
Trees
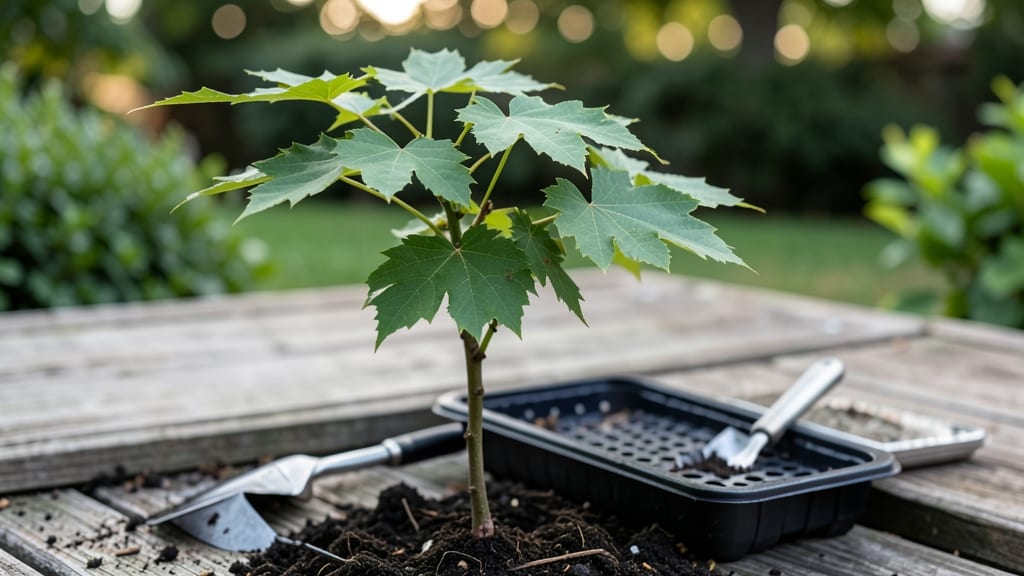
Growing sugar maple seedlings from seed means you could be planting the future of your backyard forest. 🌱 The trick to reliable sprouts isn't just patience—it's mimicking nature's cold stratification process that breaks seed dormancy.
I've struggled with maple seeds sprouting erratically until I learned this simple trick that doubles germination rates in my own experiments.
You'll need fresh seeds (green when ripe, not dried brown ones), a plastic bag, and a freezer. The process takes about 60 days of cold treatment before planting, but it's worth it for those first green shoots pushing through the soil.
Sugar maples thrive in well-draining soil with full sun to partial shade, and they're surprisingly adaptable once established—even in urban settings with proper care.
What you end up with is a sturdy young tree that grows 2-3 feet per year when happy. The leaves develop that classic lobed shape by their second season, and with proper spacing (20-30 feet apart), you'll have shade for generations.
The key early stages are keeping the soil moist but not soggy and protecting young seedlings from deer and rabbits.
This method works best in USDA Zones 3-8, though you can extend it slightly cooler with extra cold treatment time. The payoff comes in 10-15 years when you harvest sap for syrup—or just enjoy the golden fall foliage. Here's exactly how to do it right from the start.
📚 In This Guide
- What you need
- Instructions
- Tips and common mistakes
- Wrapping up and next steps
What you need
- ● Sugar maple seeds – 10-20 fresh, viable seeds (harvested in fall or purchased from a trusted supplier). Look for plump, brown seeds with a papery wing.
- ● Cold stratification setup: Small paper towels or dampened vermiculite – enough to wrap each seed (about 2-3 sheets per batch).
- ● Sealed ziplock bag or airtight container – one per batch of seeds.
- ● Refrigerator (set to 33–41°F (1–5°C)) for 90–120 days of stratification.
- ● Planting containers: 4–6 inch pots (biodegradable or plastic, with drainage holes) – 1 per seedling after stratification.
- ● Seed-starting mix – 2–3 quarts (lightweight, well-draining blend with perlite or sand).
- ● Grow lights or sunny windowsill – 12–16 hours of light daily for seedlings.
- ● Spray bottle – for gently misting seeds/mix (avoid oversaturating!).
- ● Small hand trowel – for planting and transplanting.
- ○ Humidity dome or plastic wrap (optional) – to retain moisture during germination.
- ○ pH testing kit (optional) – ideal soil pH for sugar maples: 5.0–7.0.
- ○ Fertilizer (optional) – balanced 10-10-10 or slow-release granular fertilizer for seedlings.
Step-by-Step instructions for growing sugar maple seedlings
Cold stratification transforms sugar maple seeds from stubborn to reliable—here’s how I break the dormancy barrier.
🌱 Step 1: Collect and Prepare the Seeds
Harvest sugar maple seeds in late fall when the samaras (winged fruits) begin to fall naturally. Collect them in a paper bag and let them dry in a cool, shaded spot for 2-3 weeks. This mimics the natural drying process and prevents mold. Once dry, separate the seeds from the wings by gently pulling them apart—discard the wings as they serve no purpose in germination.
Store the cleaned seeds in a paper envelope (not plastic) in a cool, dry place at 35-40°F for 3 months. This cold stratification period mimics winter conditions and tricks the seed into thinking it’s time to sprout. If you’re impatient, you can speed this up slightly by placing the seeds in the refrigerator’s crisper drawer, but natural cold works best.
❄️ Step 2: Stratify the Seeds in Moist Sand
Fill a quart-sized container with clean, coarse sand (not potting mix—this prevents compaction). Moisten the sand until it feels like a damp sponge, then mix the seeds into the top 2 inches of the sand. Cover the container loosely with plastic wrap to retain moisture but allow airflow. Place the container in a refrigerator or outdoor cold frame where temperatures stay between 35-45°F for 90-120 days.
Check the sand every 2-3 weeks—it should never feel soggy, just consistently damp. If you see mold or an unpleasant smell, discard the batch and start fresh. The stratification process is complete when the seeds begin to swell slightly or show a tiny root emerging. This is your cue to move them to the next stage.
🌿 Step 3: Sow Stratified Seeds in a Controlled Environment
Fill 4-inch pots with a sterile seed-starting mix (never garden soil—it’s too dense and may harbor pathogens). Plant the stratified seeds ½ inch deep, spacing them 1 inch apart in each pot. Gently press the soil around the seeds to ensure good contact but don’t compact it. Label each pot with the date and variety if applicable—sugar maples take patience, and you’ll want to track progress.
Place the pots in a humidity dome or cover them with clear plastic wrap to retain moisture. Keep them in a warm, bright location (around 65-70°F) but not in direct sunlight—young seedlings are sensitive to heat stress. Expect germination in 14-30 days, though some seeds may take longer. Be patient; consistency is key.
☀️ Step 4: Provide Gradual Light and Airflow
Once the first true leaves (not the initial seed leaves) appear, remove the humidity dome and move the seedlings to a south-facing window or under a grow light providing 12-14 hours of light daily. Sugar maples need bright, indirect light to grow strong but avoid harsh midday sun, which can scorch tender leaves. If you notice the seedlings stretching toward the light (a sign of legginess), adjust the light source to within 6 inches of the plants.
Water the seedlings gently from the bottom by placing the pots in a tray of 1 inch of water for 10-15 minutes. This encourages deep root growth and prevents fungal diseases. Let the top ½ inch of soil dry out between waterings—overwatering is the fastest way to kill young maples. You’ll know you’re doing it right when the soil feels like a wrung-out sponge.
🪴 Step 5: Transplant and Harden Off Seedlings
After 6-8 weeks of growth, when the seedlings have 4-6 true leaves and a sturdy root system, it’s time to transplant them into individual 1-gallon containers. Fill the pots with a well-draining potting mix (a blend of 50% potting soil, 30% perlite, and 20% compost works well). Dig a hole slightly larger than the root ball, place the seedling in, and firm the soil gently around the base. Water thoroughly to settle the roots.
Begin hardening off the seedlings by placing them outdoors in a sheltered, shaded spot for 1-2 hours the first day. Gradually increase their time outside over 2 weeks, eventually moving them to full sun for 4-6 hours daily. Watch for signs of stress like wilting or yellowing leaves—these are signals to slow down the process. Once the seedlings tolerate outdoor conditions without issue, they’re ready for their permanent home in the garden.
Tips & tricks for perfect sugar maple seedling growth
These cold stratification secrets will help you transform stubborn sugar maple seeds into thriving seedlings with minimal stress.
Temperature Matters: Maintaining the 35-45°F range during stratification is absolutely critical—this mimics natural winter conditions that break seed dormancy. If your refrigerator runs warmer, place the container on the bottom shelf where temperatures are most stable. I've had batches fail when stored near the crisper drawer's warmer vents, so always check with a thermometer if you're impatient and speeding up the process in the fridge.
Breakthrough Moment: In Step 2, when you're checking the seeds every 2-3 weeks, look for that tiny white root emerging from the seed—this is your signal that stratification is complete. I've learned to monitor closely during weeks 10-12 of the 90-120 day period, as this is when most seeds begin their transformation. If you see mold instead, discard the batch immediately—mold means the moisture balance is off, and salvage attempts rarely work.
Make-Ahead Strategy: You can actually start the 3-month cold stratification up to 6 months in advance if you plan ahead. Store the seeds in a sealed paper envelope in your refrigerator's coldest section (around 35-40°F) until you're ready to begin Step 2. This gives you flexibility to time your planting with ideal outdoor conditions, though I recommend starting the final stratification period no earlier than 2 months before your last frost date.
Equipment Recommendation: While a quart-sized container works perfectly, I've found that using a seedling flat with drainage holes for Step 2 creates better airflow and prevents compaction issues. If you don't have one, a clean plastic takeout container with holes poked in the bottom works in a pinch. Just be sure to elevate it on a tray to catch any excess moisture—sugar maple seeds are particularly sensitive to soggy conditions during this critical phase.
Pro Tips for Sugar Maple Seedling
- These cold stratification secrets will help you transform stubborn sugar maple seeds into thriving seedlings with minimal stress.
- Temperature Matters: Maintaining the 35-45°F range during stratification is absolutely critical—this mimics natural winter conditions that break seed dormancy.
- Breakthrough Moment: In Step 2, when you're checking the seeds every 2-3 weeks, look for that tiny white root emerging from the seed—this is your signal that stratification is complete.
Frequently asked questions
Got questions about growing sugar maple seedlings? You’re not alone! Here are answers to the most common queries to help you nurture strong, healthy saplings from the start.
How long does cold stratification take for sugar maple seeds?
Cold stratification typically requires 60–90 days in moist, chilled conditions (33–41°F) to break dormancy. Place seeds in a sealed bag with damp peat moss or sand, then refrigerate. Patience pays off—this mimics winter’s natural cycle and boosts germination rates!
When is the best time to plant sugar maple seedlings outdoors?
Plant seedlings in early spring (after last frost) or fall (4–6 weeks before first frost). Avoid extreme heat or cold, which can stress young roots. Choose a partially shaded spot with well-draining soil for optimal growth.
Can I grow sugar maple from seeds without cold stratification?
While possible, germination rates plummet without stratification—expect <5% success. If you skip it, soak seeds in warm water for 24 hours first, then plant in a warm, humid environment. For best results, though, always stratify!
What pests or diseases should I watch for in sugar maple seedlings?
Keep an eye out for aphids, spider mites, and scale insects (use neem oil if spotted). Fungal issues like Verticillium wilt can occur in poorly drained soil. Ensure good airflow, water at the base, and avoid overhead irrigation to prevent problems.
How fast do sugar maple seedlings grow?
Seedlings grow 6–12 inches per year under ideal conditions (moisture, sunlight, and soil quality). Mature trees take 20–30 years to produce syrup, but proper care in early years ensures faster, healthier growth. Patience is key!
Wrapping up and next steps
Growing a sugar maple seedling is a rewarding journey that combines patience, care, and a touch of nature’s magic! 🌱 By mastering cold stratification and providing the right conditions, you’re setting the stage for a thriving young tree that could one day grace your landscape—or even produce syrup.
Whether you’re a beginner or a seasoned gardener, every small step brings you closer to success.
Ready to take the next step? Start with just one seedling—experiment, observe, and refine your technique. Share your progress with fellow tree enthusiasts or local forestry groups for tips and inspiration. The future of your sugar maple’s growth begins with the seeds you plant today!