
Pruning
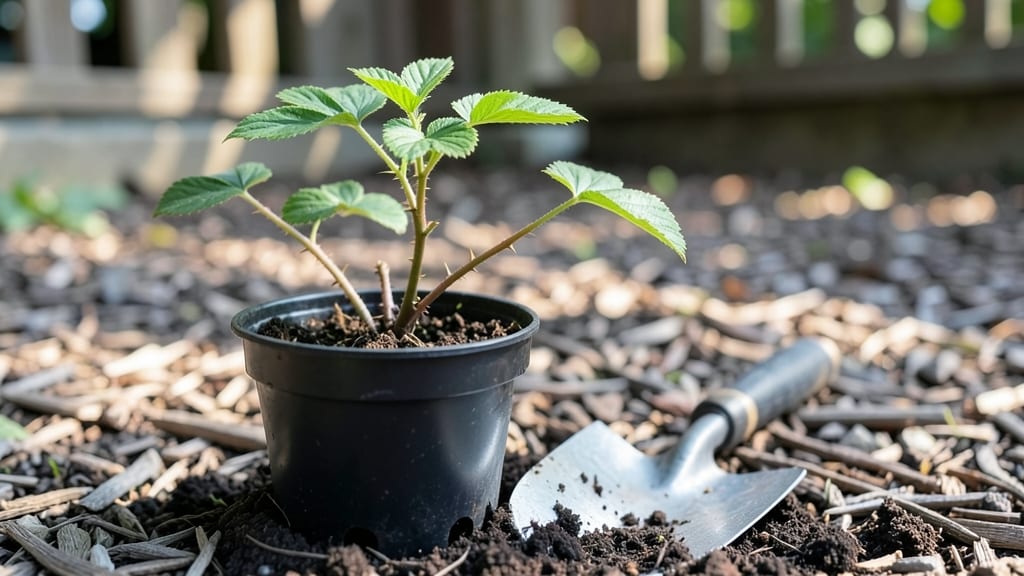
Your raspberry bush seedling could become the most productive plant in your garden—if you prune it right from the start. ✨ I learned the hard way that skipping early pruning leads to leggy, sparse canes that produce half the berries.
The secret isn’t complicated: focus on removing weak growth and encouraging strong stems now, and you’ll end up with a bush that’s thicker, healthier, and packed with fruit by next summer.
The first step is simple: wait until your seedling has at least 5-6 inches of new growth before touching it. Use clean pruners to snip any spindly stems at the base—these are the ones that’ll never support heavy berries.
Keep the strongest 3-4 canes and trim side branches back by half. This might seem drastic, but it’s what turns floppy seedlings into sturdy bushes. Water deeply right after pruning to help the plant recover.
Within a month, you’ll see the difference: new shoots will emerge thicker and more upright, and the plant will start putting energy into roots instead of weak stems. By late summer, you’ll have a bush that looks like it’s been growing for years, not months.
The best part? These early pruning habits make future harvests easier—no more tangled canes or berries hidden in the foliage.
This works for both summer-bearing and fall-bearing varieties, though timing shifts slightly between types. For summer-bearing bushes, do your first pruning in early spring; for fall-bearing, wait until late winter. The key is consistency—once you’ve got the rhythm, your raspberries will thank you with bigger, sweeter berries every season.
📚 In This Guide
- What you need
- Instructions
- Tips and common mistakes
- Wrapping up and next steps
What you need
- ● Raspberry seedlings: 1-3 healthy, disease-free Rubus idaeus seedlings (summer-bearing or everbearing varieties).
- ● Pruning shears: 1 pair of bypass pruners (sharp, clean, and sterilized with rubbing alcohol or bleach).
- ● Gloves: 1 pair of gardening gloves (nitrile-coated for durability).
- ● Disinfectant: 1 bottle of 70% isopropyl alcohol or bleach solution (1 part bleach to 9 parts water).
- ● Twine or plant ties: 50 ft of jute twine or soft plant ties (for support if needed).
- ● Mulch: 2-3 inches of organic mulch (straw, wood chips, or shredded leaves).
- ● Watering can or hose: 1 with a gentle spray nozzle (for post-pruning hydration).
- ● Loppers: 1 pair for thicker branches (if your bush is mature).
- ● Pruning saw: 1 small-handled saw (for stubborn, woody stems).
- ● Fertilizer: 1 bag of balanced organic fertilizer (10-10-10 or compost).
- ● Plant food: 1 bottle of seaweed extract or fish emulsion (for a post-pruning boost).
- ● Label markers: 1 set to tag pruning dates or varieties.
- ● Knee pad or stool: 1 for comfort during long pruning sessions!
Step-by-Step guide to pruning raspberry seedlings for strong growth
Here's how to shape your young raspberry bushes for maximum fruit production next season.
✂️ Step 1: Identify and Remove Weak Growth
Start by examining your raspberry seedling for any thin, spindly canes that don't look structurally sound. These weak stems won't support fruit well and compete with stronger growth. Use clean, sharp pruning shears to cut these back to the ground—this redirects energy to healthier canes.
Look for canes that are less than ¼ inch thick at the base. These rarely produce quality fruit and often break under berry weight. I always prune on a dry day when the plants aren't stressed—this reduces disease risk at the cut sites.
✂️ Step 2: Thin Crowded Canes for Better Airflow
Raspberry seedlings often produce multiple canes close together. Select the 3-4 strongest, thickest canes and remove the rest completely. This spacing prevents fungal diseases by improving airflow and sunlight penetration to the center of the bush.
Make your cuts at the base where the cane meets the crown. Avoid leaving stubs—these can rot and attract pests. If you're unsure which canes to keep, choose those growing outward from the center rather than inward.
☀️ Step 3: Prune for Light Penetration and Shape
Step back and look at your seedling's overall shape. You want an open, vase-like structure that lets sunlight reach all canes. Trim any crossing branches or canes growing straight upward—these block light from reaching inner growth.
Cut back any canes that are growing toward the center of the bush. Aim for a shape where canes spread outward at about 45-degree angles. This open structure ensures all canes get adequate sunlight, which is crucial for fruit development.
⏰ Step 4: Time Your Pruning for Optimal Growth
Do this initial pruning in late winter or early spring, just as new growth begins but before buds swell. This timing gives your seedling time to establish strong roots before summer heat arrives. Avoid pruning in fall—you want the plant to store energy for next year's fruit production.
After pruning, give your seedling a light application of balanced fertilizer (10-10-10) to support new growth. Water deeply at the base to help the plant recover from the pruning stress. You'll see fresh, vibrant growth within 2-3 weeks.
🌱 Step 5: Monitor and Maintain Through the Season
Throughout the growing season, watch for any suckers (new shoots) growing from the base. Remove these immediately—they divert energy from your main canes. Also, trim any canes that develop disease spots or pests to prevent spread.
In late summer, after your raspberries have fruited, cut back any canes that produced fruit this year. These won-year canes won't produce again, so removing them keeps your plant focused on next year's harvest. This two-year cycle is key to raspberry production.
Tips & tricks for perfect raspberry seedling pruning
Transforming your raspberry seedling into a productive bush starts with these key pruning strategies that make all the difference.
Tool Preparation: Before you begin, sterilize your pruning shears with rubbing alcohol or a 10% bleach solution to prevent spreading disease between cuts. I learned this the hard way after seeing my carefully pruned bushes develop fungal spots later in the season. Sharp tools make cleaner cuts that heal faster too—test your shears by cutting a piece of paper cleanly before starting.
Visual Selection Guide: In Step 1, when identifying weak canes, look for stems that bend easily or have a hollow sound when tapped. Healthy canes should feel firm and have a slight spring when bent. The ¼-inch thickness rule at the base is your best guide—use a ruler or caliper if you're unsure. Remember, thicker canes support more fruit weight and resist breaking during harvest.
Pruning Shape Strategy: For Step 3's 45-degree angle goal, visualize an open vase shape when pruning. The wider the spread, the better the sunlight distribution. I always sketch a rough outline on paper first to plan my cuts—this prevents over-trimming and ensures balanced growth. Think of it like training a dog: you want outward growth, not inward.
Seasonal Timing: The late winter/early spring window in Step 4 is crucial because it coincides with the plant's natural dormancy period. Pruning too early risks exposing fresh cuts to winter cold, while pruning too late delays root establishment before summer's heat. Mark your calendar for when buds begin to swell—this is your perfect pruning cue.
Pro Tips for Raspberry Bush Seedling
- Transforming your raspberry seedling into a productive bush starts with these key pruning strategies that make all the difference.
- Tool Preparation: Before you begin, sterilize your pruning shears with rubbing alcohol or a 10% bleach solution to prevent spreading disease between cuts.
- Visual Selection Guide: In Step 1, when identifying weak canes, look for stems that bend easily or have a hollow sound when tapped.
Frequently asked questions
Got questions about growing raspberry bush seedlings? You’re not alone! Here are some of the most common concerns—plus quick, actionable answers to help you cultivate a thriving, productive raspberry patch.
How long does it take for a raspberry bush seedling to bear fruit?
Patience is key! Most raspberry seedlings take 1–2 years to produce fruit after planting, depending on the variety and growing conditions. Everbearing types may yield berries in the first year, while fall-bearing varieties can take slightly longer. Focus on proper care—water, sunlight, and soil health—to speed up the process.
When is the best time to prune raspberry seedlings?
For seedlings, late winter or early spring (before new growth starts) is ideal. Remove dead, diseased, or weak canes first, then thin out crowded stems to improve airflow. Avoid heavy pruning in fall—it can stress young plants. Pro tip: Use clean, sharp shears to prevent damage.
Can I grow raspberries from seed instead of buying seedlings?
While possible, growing from seed is tricky—most raspberries are hybrid varieties that won’t reproduce true to type. Seedlings may take 3–5 years to fruit and could produce berries with inconsistent flavor or size. For reliable results, opt for nursery-bought seedlings or bare-root plants.
Why are my raspberry seedlings’ leaves turning yellow or curling?
Yellow leaves often signal overwatering, nutrient deficiency, or pests (like spider mites or aphids). Check soil moisture—raspberries prefer well-draining soil. Yellowing edges may indicate iron deficiency; amend soil with compost or iron supplements. Inspect undersides of leaves for pests and treat with neem oil if needed.
Do raspberry bushes need winter protection?
Young seedlings benefit from mulch or row covers in cold climates (below 10°F). Use straw or pine needles to insulate roots and protect canes from freezing. In mild winters, hardy varieties (like ‘Heritage’ or ‘Boyne’) may not need extra care. Always remove mulch in early spring to prevent rot.
Wrapping up and next steps
Growing a thriving raspberry bush starts with the right pruning techniques—now you’re armed with the knowledge to shape healthier plants and boost those harvests! 🌱 Whether you’re trimming canes for the first time or refining your skills, consistency is key. Start small, observe your plants, and adjust as you go—your patience will pay off in luscious berries.
Ready to take the next step? Grab your pruners and schedule a quick check-in with your raspberry patch every few weeks. Before you know it, you’ll be enjoying a bountiful, bushier harvest that rivals the pros! 🍓✨