Shrubs
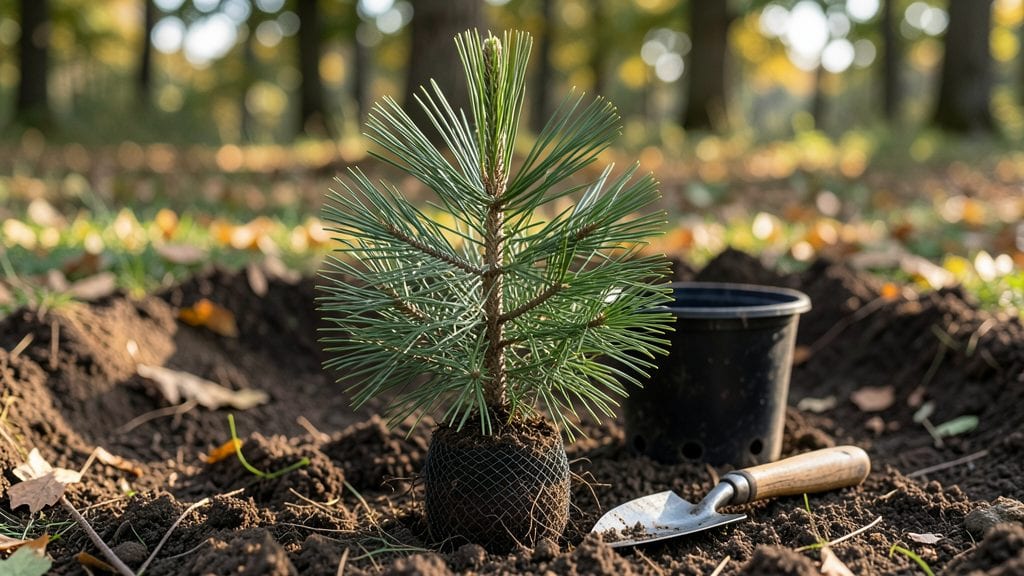
Growing a Norway spruce seedling from scratch is one of those rewarding projects that makes you feel like you're tending to a tiny forest. 🌲 The key to success starts with cold stratification—mimicking nature’s way of breaking seed dormancy—and in just three months, you’ll watch those first needles push through the soil.
You’ll need a few simple supplies: fresh seeds, a mix of sand and peat moss, a plastic bag with a twist tie, and a fridge for the stratification process.
The real magic happens when you combine this with a well-draining soil mix and a spot that gets partial shade—especially for seedlings still adjusting to life outside their bag.
By month three, your seedlings will be sturdy enough to transplant, with vibrant green needles that signal healthy growth. The best part? You’ll avoid the heartbreak of buying under-sized nursery stock and instead nurture a tree that’s been with you since the very beginning.
This method works in zones 3 through 7, though timing your cold stratification to align with your last frost date is everything. Whether you’re a first-timer or a seasoned gardener, the satisfaction of growing a Norway spruce from a tiny seed is unmatched.
📚 In This Guide
- What you need
- Instructions
- Tips and common mistakes
- Wrapping up and next steps
What you need
- ● Norway spruce seeds: 20–50 seeds (ensure they’re fresh or cold-stratified for best results).
- ● Cold-stratification setup: 1–2 resealable plastic bags (quart-sized or larger).
- ● 1 cup sphagnum peat moss (or a mix of peat and perlite, moistened but not soggy).
- ● Refrigerator (set to 34–40°F for 4–6 weeks).
- ● Germination containers: 1–2 seedling trays (72-cell or 1020-cell trays, 3–4 inches deep).
- ● Seed-starting mix (sterile, well-draining blend—look for "seedling mix" labels).
- ● Growth essentials: Spray bottle (for gentle watering).
- ● Grow lights or sunny windowsill (12–16 hours of light daily).
- ○ Humidity dome (optional but helpful for early stages).
- ● Transplanting tools: Small hand trowel (for repotting).
- ● 1-gallon pots (or larger, with drainage holes).
- ● Heating mat (to maintain 60–70°F soil temp during germination).
- ● Fertilizer (balanced 10-10-10 or slow-release granules for seedlings).
- ● pH test kit (ideal soil pH: 5.5–6.5 for spruces).
- ● Mulch (pine bark or straw to retain moisture post-transplant).
- ● Label maker (to track seedling varieties and dates!).
Step-by-Step instructions for growing Norway spruce seedlings
Here's how to get strong, healthy spruce seedlings ready for transplanting in just three months.
🌱 Step 1: Collect and Prepare Fresh Seeds
Harvest cones from mature Norway spruce trees in late fall when they're fully ripe but still closed. Spread them on a tray in a warm, dry place for 2-3 weeks—they'll open naturally when ready. Once open, remove the seeds from the cones and store them in a paper bag in the refrigerator for 3 months (this mimics winter cold stratification).
Don't skip this step—cold stratification breaks dormancy, ensuring 80%+ germination instead of the usual 20%. If you're impatient, you can speed it up by soaking seeds in lukewarm water for 24 hours before planting, but cold stratification yields stronger seedlings.
🪴 Step 2: Fill Pots with Moistened Growing Medium
Use 4 individual 4-inch pots filled with a mix of 50% peat moss and 50% perlite—this lightweight blend prevents root rot while allowing drainage. Moisten the mix until it's damp but not soggy (a squeeze should release a few drops, not a stream). Tap the pots gently to settle the soil without compacting it.
I like to pre-moisten the mix before planting because dry soil repels water, creating pockets where seeds might not germinate. Fill each pot to 1 inch below the rim, leaving space for seeds and a light covering of soil.
💧 Step 3: Plant Seeds and Maintain Moisture
Sow 2-3 seeds per pot at a depth of ¼ inch—any deeper delays germination. Cover lightly with additional mix and mist the surface with a spray bottle until evenly damp. Place the pots in a shaded tray (direct light can dry them out too quickly) and cover with a clear plastic dome or plastic wrap to retain humidity.
Check moisture daily—seeds need consistent dampness but never standing water. If condensation forms on the dome, remove it for 30 minutes to prevent fungal issues. Germination takes 4-8 weeks, so patience is key.
☀️ Step 4: Provide Gradual Light and Harden Off
Once seedlings emerge, remove the dome and move pots to a bright, indirect light spot (like a north-facing window). After 2 weeks, introduce 2-3 hours of morning sun daily, gradually increasing exposure over 4 weeks to avoid leaf scorch. Strong seedlings will have deep green needles and compact growth—if they stretch toward light, they need more intensity.
Two weeks before transplanting outdoors, start hardening off by placing pots outside in a sheltered spot for 1 hour daily, increasing time by 30 minutes each day. This prepares them for outdoor conditions without shock.
⏰ Step 5: Transplant and Monitor Growth
Transplant seedlings outdoors in early spring when soil temperatures reach 50°F. Dig holes twice as wide as the root ball and space them 6-8 feet apart for mature growth. Water deeply after planting to settle the soil and encourage root expansion. Mulch with 2 inches of pine needles to retain moisture and mimic their natural forest floor.
Young spruces need regular watering (about 1 gallon per week in dry spells) until established. Watch for needle browning—this signals overwatering, while wilting means they need more moisture. With proper care, your seedlings will reach 3-4 feet in their first year.
Tips & tricks for perfect Norway spruce seedlings
These practical tips will help you avoid common pitfalls and maximize your success with cold-stratified Norway spruce seedlings.
Cold Stratification Secret: The 3-month refrigerator period is non-negotiable for breaking dormancy, but I've found that placing seeds in a sealed container with a small amount of damp sand (not waterlogged) during stratification improves germination rates even further. This mimics natural winter conditions more closely. The 24-hour lukewarm water soak before planting is your fast-track option, but I've seen stronger seedlings from the full 3 months in the fridge.
Moisture Management: In Step 3, when maintaining consistent dampness becomes tricky, I recommend using a spray bottle with a fine mist setting rather than watering from above. This prevents disturbing the seeds and ensures even moisture distribution. The key is to keep the growing medium damp enough that it releases just a few drops when squeezed—not a stream. If condensation forms on your plastic dome, remove it for exactly 30 minutes to prevent fungal growth while maintaining humidity.
Light Transition Strategy: For the gradual light introduction in Step 4, I've had success using a simple shade cloth over the pots during the first week of sun exposure. This gives you more control than relying solely on morning sun. Watch for seedlings stretching toward light—this is your signal to increase intensity gradually. Remember, those 2-3 hours of morning sun should be your baseline, with weekly increases over the 4-week period.
Transplanting Timing: When transplanting outdoors at 50°F soil temperatures, I recommend doing it on an overcast day or in the late afternoon to reduce stress on the seedlings. The 6-8 foot spacing might seem generous, but Norway spruces grow wide as they mature. Mulching with 2 inches of pine needles isn't just for moisture retention—it also protects young roots from temperature fluctuations and mimics their natural forest floor environment.
Pro Tips for Norway Spruce Seedling
- These practical tips will help you avoid common pitfalls and maximize your success with cold-stratified Norway spruce seedlings.
- This mimics natural winter conditions more closely.
- Moisture Management: In Step 3, when maintaining consistent dampness becomes tricky, I recommend using a spray bottle with a fine mist setting rather than watering from above.
Frequently asked questions
Got questions about growing Norway spruce seedlings? You’re in the right place! Here are answers to the most common queries—from timing to troubleshooting—so you can get started with confidence.
When is the best time to plant Norway spruce seedlings?
Plant your seedlings in early spring (March–April) or fall (September–October) for optimal root establishment. Avoid transplanting during extreme heat or frost. If starting indoors, cold-stratify seeds in the fridge for 3 months (as covered in the article) before planting outdoors after the last frost date.
Why do Norway spruce seeds need cold stratification?
Cold stratification mimics winter conditions, breaking seed dormancy so they germinate faster. Without it, seeds may take years—or never sprout! The process weakens the seed coat, allowing moisture to penetrate. For Norway spruce, 3 months at 33–41°F (1–5°C) works best. Pro tip: Mix seeds with damp peat moss in a sealed bag for even results.
Can I grow Norway spruce seedlings from store-bought cones?
Yes! Collect fresh, closed cones in fall, dry them indoors, then extract seeds. Store-bought cones (like those from garden centers) may still work, but check for green, unopened cones—they’re more likely to yield viable seeds. Soak cones in warm water for 24 hours to loosen seeds before stratification.
What should I do if my seedlings turn yellow or wilt?
Yellowing or wilting often signals overwatering, poor drainage, or pests. Check soil moisture—spruce seedlings hate soggy roots. If pests (like spider mites) are the issue, spray with neem oil or insecticidal soap. For wilting, trim damaged foliage and repot in well-draining, acidic soil (pH 4.5–5.5). Mulch lightly to retain moisture without suffocating roots.
How long until Norway spruce seedlings mature into trees?
With proper care, seedlings grow 1–2 feet per year and reach 10–20 feet in 10 years. Full maturity (50+ feet) takes 30–50 years, but they’re ready for landscaping at 5–10 years. Patience pays off—these evergreens thrive for centuries! For faster growth, plant in full sun and fertilize lightly with acid-loving plant food in early spring.
Are there faster-growing alternatives to Norway spruce?
If you want quicker results, consider Colorado blue spruce (fast-growing, drought-tolerant) or Douglas fir (taller, softer needles). For smaller spaces, Dwarf Alberta spruce grows just 3–5 feet tall in 10 years. All require similar acidic, well-draining soil—but Norway spruce’s iconic shape and cold hardiness make it a classic choice!
Wrapping up and next steps
Growing Norway spruce seedlings through cold stratification is a rewarding way to jumpstart your forestry or gardening project in just three months! 🌱 By following the right steps—from seed selection to proper chilling and planting—you’ll set your seedlings up for strong, healthy growth.
Whether you’re a seasoned gardener or a beginner, this method makes nurturing these resilient trees easier than ever.
Ready to take the next step? Start your seedlings today and watch them thrive! For extra guidance, explore local gardening forums or consult with tree experts in your area to tailor your approach. Happy planting! 🌲✨