How To
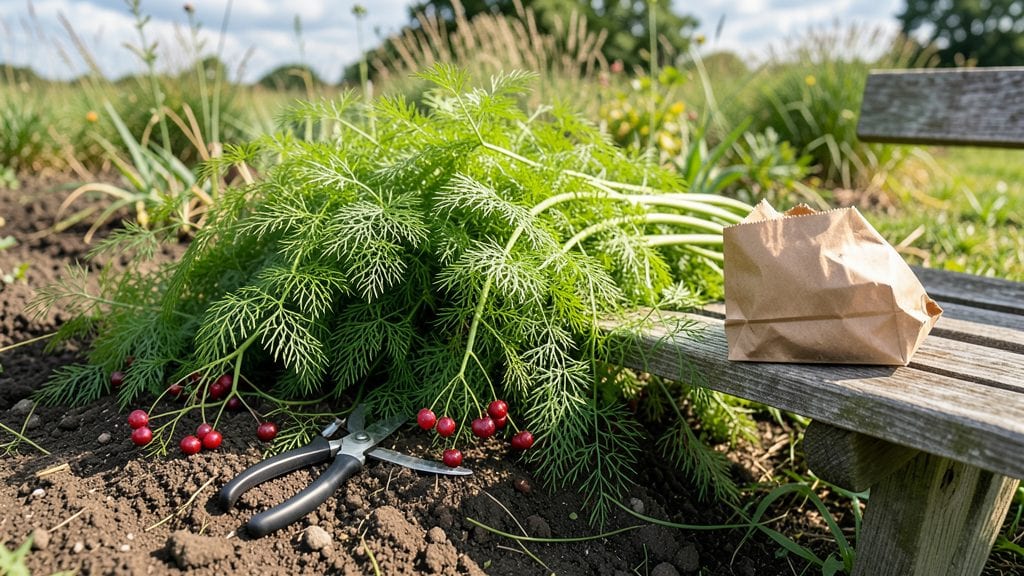
Harvesting asparagus seeds from your 🌱 mature plants is the secret to growing heirloom varieties year after year—but most gardeners miss the window.
Picture this: You’ve spent years waiting for those first sweet spears, only to realize your plants are already producing seeds. If you skip this step, you’re letting future harvests slip away. The key? Knowing when those spears transform into seed pods—and how to save them without sacrificing next year’s crop.
This guide breaks down the exact moment to harvest, how to extract seeds without damaging your plants, and the best storage tricks to keep them viable for planting. No more guessing—just a foolproof method for turning your asparagus patch into a seed-saving goldmine.
Ready to unlock the next level of homegrown abundance? Let’s get started with the timing and techniques that make all the difference.

When to harvest asparagus seeds: identifying the right spears for seed collection
Harvesting asparagus seeds at the wrong time can mean the difference between a bountiful seed collection and a failed attempt. Unlike harvesting spears, seed collection requires patience and attention to plant maturity.
The key is watching for fern development and seed pod formation—two critical stages that signal it's time to act.
Asparagus plants produce spears in their first two years, but it’s the third year when they shift focus to seed production. This transition is your cue to start monitoring for seed pods.
If you harvest seeds too early, they won’t have fully developed; too late, and they’ll shatter or lose viability.
Timing is everything. The ideal window is when the ferns mature and seed pods turn from green to brownish-red. This usually happens late summer to early fall, depending on your USDA zone. Missing this window means waiting another year for another chance.
Here’s how to spot the perfect moment: Look for ferns that have fully unfurled and seed pods that are plump but not yet splitting open. The pods should feel firm to the touch, not dry or brittle.
If you see small black seeds inside when you gently squeeze a pod, you’re on the right track.
One common mistake is confusing spear harvest with seed harvest. Never harvest spears from plants you intend to use for seeds—this weakens the plant and reduces seed viability. Instead, let the spears mature into ferns and focus on the seed pods that form afterward.
Another critical cue is the color change in the seed pods. When they shift from green to brownish-red, it’s your signal to act. At this stage, the pods are at their peak seed maturity.
If you wait too long, the pods will crack open, scattering seeds across your garden bed.
Temperature also plays a role. In warmer climates, seed pods may ripen earlier, while cooler zones might delay the process until late fall. Always check your local frost dates—if a hard frost is coming, harvest the pods before they freeze, even if they’re not fully brown.
Pro tip: Mark your asparagus plants early in the season if you’re saving seeds. Use flags or stakes to identify which plants to monitor. This prevents accidental harvesting of spears from seed-bearing plants, which can compromise your entire seed collection effort.
Once you’ve identified the right seed pods, act quickly. The pods won’t stay at peak maturity for long—sometimes just a few days. Harvest them before they split open, or you’ll risk losing seeds to scattering or wildlife.
Now that you know what to look for, let’s break down the exact stages and visual cues in this summary-table to ensure you never miss the perfect harvest window.
summary-table
| Stage | Visual Cues | Action |
|---|---|---|
| Early Summer | Ferns fully unfurl, no pods visible | Monitor plants weekly |
| Mid-Summer | Small green seed pods appear | Continue monitoring for color change |
| Late Summer | Pods turn brownish-red, feel firm | Harvest pods immediately |
| Early Fall | Pods begin to crack open | Collect any remaining seeds |
| Post-Frost | Pods dry out or freeze | No viable seeds left |
Understanding these stages ensures you never miss the optimal harvest window. For example, if you’re in Zone 6a, aim to harvest pods in late August to early September. In warmer zones, like Zone 8, you might harvest as early as July.
Harvesting at the right time also maximizes seed viability. Seeds collected from fully mature pods have a higher germination rate—often 70-80%—compared to 30-50% if harvested early or late. This makes the difference between a successful asparagus patch in years to come and a disappointing one.
Remember, asparagus is a perennial, meaning it takes 3-5 years to produce viable seeds. Don’t rush the process—patience pays off with heirloom-quality seeds tailored to your climate. Once you master the timing, you’ll have a self-sustaining asparagus supply for decades.
Step-by-step guide to extracting and storing asparagus seeds for future planting
Once you’ve identified your mature asparagus ferns with dried seed pods, the next step is extracting and storing seeds properly. Skipping this process can lead to low germination rates or even seed loss.
I’ve learned that proper drying and clean separation of seeds from chaff are critical—here’s how to do it right.
Start by harvesting the dried seed pods from healthy ferns in late summer or early fall. Avoid pods that are still green or have signs of mold or pests.
Place them in a paper bag or brown envelope to allow airflow while preventing moisture buildup. This simple step prevents seed rot and ensures viability.
How to Extract and Store Asparagus Seeds
-
Step 1: Dry the Seed Pods
Spread harvested pods on a paper towel or mesh screen in a dry, shaded area for 1-2 weeks. Avoid direct sunlight to prevent overheating. -
Step 2: Crack Open Pods
Once fully dried, gently crush pods with a rolling pin or mortar and pestle to release seeds. Sift through debris to separate viable seeds from chaff. -
Step 3: Clean the Seeds
Use a fine mesh sieve or screener to remove dust and small particles. Discard any seeds that look shriveled or discolored. -
Step 4: Store Properly
Place cleaned seeds in a paper envelope or airtight container with a silica gel packet to absorb moisture. Label with the harvest year and store in a cool, dark place (e.g., fridge). -
Step 5: Test Viability (Optional)
For best results, germination test a few seeds before long-term storage. Place 10 seeds on a damp paper towel in a warm location for 7-10 days. If 50%+ sprout, your batch is viable.
Many gardeners make the mistake of storing seeds in plastic bags or humid environments, which accelerates mold growth. I’ve found that paper envelopes or glass jars with desiccants work best for long-term storage.
Keep seeds in the fridge for up to 3 years, though viability drops after 2 years.
Avoid storing seeds near heat sources or fluctuating temperatures, as this can reduce germination rates. If you notice musty smells or white fuzz during storage, discard the batch immediately—this is a sign of fungal contamination. Always prioritize dryness and darkness for optimal seed health.
With these steps, you’ll have a reliable supply of asparagus seeds ready for planting next season. Remember, patience is key: asparagus grown from seed takes 3-5 years to produce spears, but the reward of homegrown, heirloom varieties is worth the wait! 🌱