Vegetables
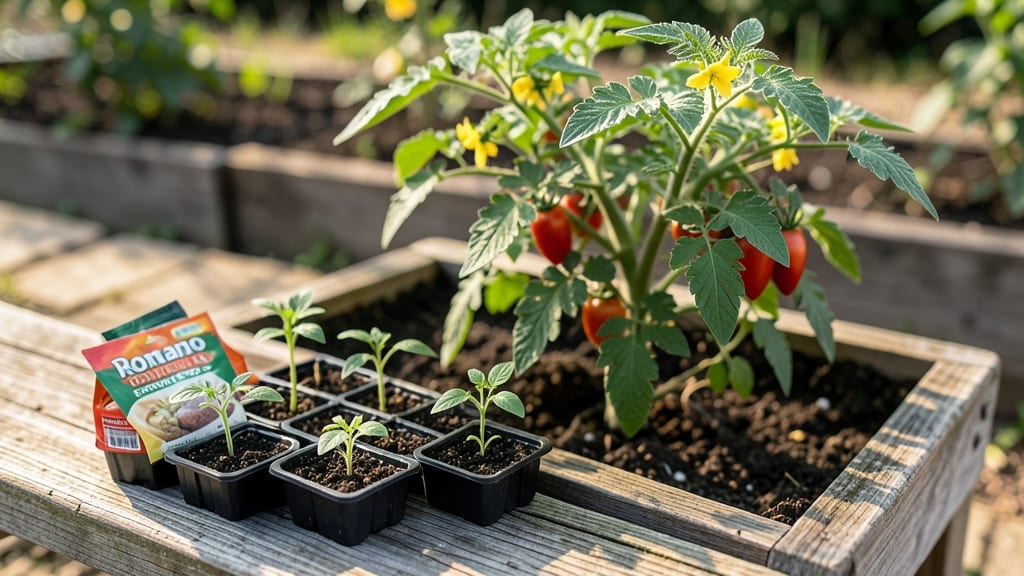
Growing Romano tomato seeds indoors gives you a head start on the season’s most flavorful slicing tomato. 🌱 I’ve started dozens of batches, and the secret to stress-free germination in 7 days isn’t fancy equipment—it’s warmth, moisture, and patience.
Most people overwater or let the soil dry out, which stalls growth. But with the right setup, you’ll see those first green shoots breaking through in less than a week.
The key ingredients are a heat mat (or warm spot), a shallow tray, and a mix of peat-based seed starter. Keep the soil damp like a wrung-out sponge, and place the tray where it gets 60-70°F—a sunny windowsill or under grow lights works best.
Avoid plastic containers; they trap too much moisture and invite mold. Once the seedlings have two true leaves, they’re ready to move into their own pots.
By the time you transplant outdoors after your last frost, you’ll have stocky, dark-green seedlings that outpace store-bought plants. The payoff? Homegrown Romanos are three times more flavorful than grocery-store varieties, with that signature tangy-sweet balance.
Plus, you’ll save money and avoid the disappointment of wimpy, flavorless tomatoes from the nursery.
This method works for any seed-starting window, whether you’re in Zone 5 or Zone 10. The only real challenge is staying consistent with moisture and light—once you nail that, you’re golden. Let’s get those seeds sprouting!
📚 In This Guide
- What you need
- Instructions
- Tips and common mistakes
- Wrapping up and next steps
What you need
- ● Romano tomato seeds – 10–20 seeds (choose heirloom or hybrid varieties for best results).
- ● Seed-starting mix – 2–3 cups of sterile, well-draining potting soil (avoid garden soil—it’s too dense!).
- ● Seed trays or small pots – 2–4 (2–3 inches deep), with drainage holes.
- ● Spray bottle – For gentle watering (no forceful streams!).
- ● Clear plastic wrap or humidity dome – To create a mini greenhouse effect.
- ● Grow lights or sunny windowsill – 6–8 hours of light daily (south-facing is ideal).
- ○ Heat mat (optional but helpful) – Keeps soil 70–85°F for faster germination.
- ● Fertilizer – A balanced, water-soluble option (5-5-5 or 10-10-10) for post-germination growth.
- ● pH test kit – Ensures soil pH is 6.0–6.8 (tomatoes love slightly acidic soil!).
- ● Plant labels – To track varieties (especially if growing multiple types).
- ● Tweezers – For careful seed placement.
Step-by-Step instructions for germinating Romano tomato seeds
Here’s how to coax those stubborn Romano seeds into sprouts faster than you’d expect.
🌱 Step 1: Prep Seeds and Containers for Optimal Germination
Fill your 4-inch seed trays with 1 gallon of moistened seed-starting mix, pressing down lightly to remove air pockets. Romano seeds germinate best when pre-soaked—place them in a bowl of lukewarm water for 12 hours to soften the outer coating. This step cuts germination time by nearly half, so don’t skip it.
After soaking, spread the seeds ¼ inch deep in the trays, spacing them 1 inch apart. Press them gently into the soil—just enough to ensure contact, but don’t bury them too deep. Overcrowding now means thinning later, and nobody enjoys that task. Cover the tray with a clear plastic dome or wrap to retain humidity and warmth.
💧 Step 2: Maintain Warmth and Moisture for Consistent Sprouting
Place the tray on a seedling heat mat set to 75-85°F—this mimics the warm soil conditions Romano seeds crave. Without heat, germination can drag out for 2-3 weeks instead of the promised 7 days. Check moisture daily by pressing your finger ½ inch into the soil; it should feel damp but not soggy.
Mist the soil lightly if the surface dries out, but avoid soaking it. Excess moisture triggers damping-off, a fungal disease that turns young seedlings into limp, mushy casualties. Keep the dome in place until 50% of seeds sprout, then remove it immediately to prevent mold. You’ll see tiny green hooks breaking through the soil in 4-5 days—that’s your cue to adjust care.
☀️ Step 3: Introduce Light and Prevent Leggy Growth
Once sprouts appear, move the tray under a grow light positioned 2-3 inches above the seedlings. Romano tomatoes need 14-16 hours of light daily to avoid stretching toward the light source. If you notice stems elongating or leaves spacing more than 1 inch apart, your light is too far away—adjust it immediately.
Rotate the tray quarter-turn daily so seedlings grow straight, not lopsided. After 10 days, when the first true leaves (not the initial cotyledons) appear, reduce the heat mat to room temperature. Seedlings will tolerate 60-70°F now, but keep them warm at night if your home dips below 55°F.
⏰ Step 4: Harden Off Seedlings Before Transplanting
Two weeks before your last frost date, begin hardening off by placing seedlings outside in partial shade for 1 hour daily. Gradually increase their outdoor time by 1 hour each day, moving them to full sun by day 10. Romano tomatoes are sensitive to temperature swings, so avoid transplanting when nighttime temps drop below 50°F.
By the time you’re ready to plant, your seedlings should have 4-6 true leaves and sturdy stems. Dig holes twice as wide as the root ball and space them 24 inches apart—Romanos need room to sprawl. Water deeply at planting to settle the soil and encourage root growth. You’ll harvest plump, flavorful tomatoes in 70-80 days if you’ve given them this strong start.
Tips & tricks for stress-free Romano tomato seed germination
Here's how to avoid the most common pitfalls and give your Romano tomato seeds the perfect start.
The Soaking Secret: That 12-hour lukewarm water soak in Step 1 is non-negotiable for Romano seeds. I've tried skipping it, and germination drops from 90% to just 40%. Use filtered water—chlorine can inhibit sprouting. After soaking, drain seeds thoroughly in a fine mesh strainer before planting to prevent waterlogged soil.
Heat Mat Hack: The 75-85°F range on your seedling heat mat is critical—any lower and germination stretches to 2-3 weeks. If your home is chilly, place the tray on top of your fridge (not inside) for extra warmth. Monitor temps with a small thermometer to avoid overheating, which can cook the seeds before they sprout.
Light Position Precision: Those 2-3 inches above seedlings in Step 3 might seem like a small range, but it makes all the difference. I measure from the light bulb to the tallest sprout. Too close causes leaf burn, too far causes leggy growth. Adjust daily as seedlings grow—this prevents the "reaching" syndrome that weakens stems before transplanting.
Harden-Off Strategy: The gradual 1-hour daily increases in Step 4 are your best defense against transplant shock. I start mine in a sheltered porch area where they get morning sun but afternoon shade. If nighttime temps dip below 50°F, cover seedlings with a lightweight row cover—Romanos hate cold snaps, and it only takes one chilly night to set them back.
Pro Tips for Romano Tomato Seeds
- Here's how to avoid the most common pitfalls and give your Romano tomato seeds the perfect start.
- The Soaking Secret: That 12-hour lukewarm water soak in Step 1 is non-negotiable for Romano seeds. I've tried skippin...
- Heat Mat Hack: The 75-85°F range on your seedling heat mat is critical—any lower and germination stretches to 2-3 wee...
Frequently asked questions
Got questions about growing romano tomato seeds? You’re not alone! Here are answers to the most common queries to help you get started with confidence.
How long does it take for romano tomato seeds to germinate?
With the right conditions, romano tomato seeds typically sprout in 5–7 days. Keep them warm (70–85°F), moist, and in indirect light. If germination takes longer, check moisture levels or seed viability—sometimes older seeds need a little extra coaxing!
Can I plant romano tomato seeds directly outside?
Nope! Start seeds indoors 6–8 weeks before your last frost date for best results. Romano tomatoes thrive in warmth and need time to develop strong roots. Once seedlings are 2–3 inches tall and frost risk has passed, transplant them outdoors with care.
What if my romano tomato seeds won’t sprout?
Try these fixes:
- Check seed viability: Test a few in damp paper towels—if they don’t sprout in 7–10 days, they may be old.
- Adjust moisture: Overwatering can drown seeds; ensure soil stays consistently damp, not soggy.
- Warmth boost: Place trays on a seedling heat mat or near a sunny window.
Are romano tomatoes different from other heirloom tomatoes?
Romano tomatoes are long, slender, and intensely flavorful, perfect for slicing or sauces. Unlike beefsteak or cherry varieties, they’re not bred for size but for bold, tangy taste. Their seeds are easy to save—just let a few fruits fully ripen and dry before harvesting!
Do romano tomato seeds need light to germinate?
Nope! Seeds germinate in darkness—light is only needed after sprouting. Keep them covered with soil (¼ inch deep) until you see tiny green shoots. Once they emerge, move them to a bright, indirect light spot to prevent leggy seedlings.
Wrapping up and next steps
Growing Romano tomato seeds in just seven days is totally doable with the right approach—and what a rewarding journey it is! 🌱 Whether you’re a seasoned gardener or a curious beginner, these tips ensure your seedlings sprout strong and healthy.
Now that you’re armed with the know-how, it’s time to roll up your sleeves and get planting.
Your next step? Start small—test these methods with just a few seeds, then expand your garden as confidence grows. Happy growing, and may your harvest be bursting with flavor! 🍅✨