Propagation
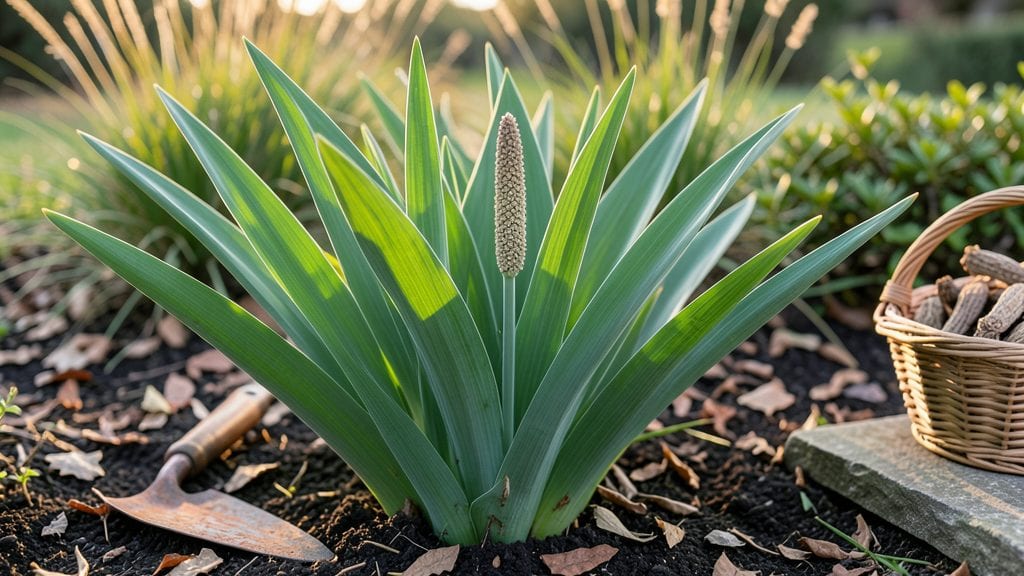
Growing iris domestica seeds feels like unlocking a secret garden—those first delicate sprouts after months of patience are worth every step. 🌱 I’ve started dozens of batches, and the key to success lies in cold stratification, which mimics nature’s way of breaking seed dormancy.
Most gardeners give up here, but with the right timing and conditions, you’ll see those first green shoots emerge within 3 months—not years.
The process starts with fresh seeds and a simple mix of potting soil and perlite to prevent rot. Plant them just below the surface—no deeper than ¼ inch—and keep them moist but never soggy.
The real magic happens in the fridge, where they’ll spend 8-12 weeks in a cold, dark environment. This isn’t just waiting; it’s setting the stage for strong, healthy growth once they finally sprout.
When those first leaves appear, you’ll know you’re on the right track. The seedlings are slow to start but gain momentum quickly, developing into sturdy plants ready for transplanting.
By late spring, you’ll have a batch of iris domestica that’s more resilient than store-bought rhizomes—and the satisfaction of growing them from seed is unmatched. Patience pays off in bold, vibrant blooms.
This method works best in zones 4-9, but the principles apply anywhere with a cold stratification setup. If you’ve ever struggled with slow germination or weak seedlings, this approach changes the game. Let’s get those seeds started—your future garden’s showstoppers are waiting.
📚 In This Guide
- What you need
- Instructions
- Tips and common mistakes
- Wrapping up and next steps
What you need
- ● Iris domestica seeds: 10–20 seeds (ensure they’re fresh or cold-stratified for best results).
- ● Seed-starting mix: 1–2 gallons of sterile, well-draining potting soil (avoid garden soil—it can harbor fungi!).
- ● Seed trays or small pots: 2–4 shallow containers (2–3 inches deep) with drainage holes.
- ● Plastic wrap or humidity dome: To maintain moisture during germination.
- ● Spray bottle: For gentle watering (avoid over-saturating the soil!).
- ● Grow lights or sunny windowsill: A south-facing window or LED grow lights (12–16 hours/day).
- ● Refrigerator (for cold stratification): A zip-top bag and a cold fridge (34–40°F) for 4–6 weeks.
- ● Labels & markers: To track seed varieties and planting dates.
- ● Heating mat: Speeds up germination (70–75°F is ideal).
- ● Fungicide: A light dose to prevent damping-off in humid conditions.
- ● Garden journal: To log growth milestones and adjustments.
- ● Transplanting tweezers: For delicate seedling handling when moving to larger pots.
Step-by-step instructions for growing Iris domestica from seeds
Here's my foolproof method for breaking dormancy and coaxing these prized blooms from tiny seeds.
🌱 Step 1: Prepare Seeds for Cold Stratification
First, verify your seeds are fresh—older than a year and germination drops dramatically. Place them in a small paper towel folded into a square, then dampen it with room-temperature water until evenly moist but not dripping. Tuck the towel into a sealed plastic bag with a tiny air pocket (about ¼ inch gap).
Real talk: The stratification process mimics winter's natural chilling period. Place the bag in your refrigerator's crisper drawer where temperatures hover around 35-40°F. Check weekly—if the towel dries out, mist it again. After 8-12 weeks, you'll see the first signs of life: tiny white roots emerging from the seed coat. This is your signal to move forward.
💧 Step 2: Sow Stratified Seeds in Moistened Mix
Fill a shallow tray with the sterilized seed-starting mix you've prepared (never garden soil—it's too dense). Moisten it thoroughly until water runs from the bottom, then drain excess. Press the mix down lightly to remove air pockets, creating a firm but crumbly surface.
Sow seeds ¼ inch deep—any deeper and they'll struggle to reach light. Space them 1 inch apart in rows 2 inches apart for easy thinning later. I use a toothpick to create tiny holes, then place one seed per hole and cover lightly with additional mix. Mist the surface gently with a spray bottle until evenly damp—no heavy watering here.
☀️ Step 3: Provide Controlled Light and Warmth
Place the tray in a location with bright, indirect light (no direct sun yet). I use a south-facing windowsill shielded by a sheer curtain. Iris seeds need warmth to germinate—keep the soil at 65-70°F using a seedling heat mat if needed. Germination can take 4-8 weeks, so patience is key.
Watch for the first true leaves—these will look like miniature grass blades. Until then, keep the soil consistently moist by misting daily. Overwatering now causes rot, so only add moisture when the top ½ inch feels dry to touch. Once seedlings emerge, remove the heat mat and increase light gradually to prevent shock.
🌿 Step 4: Thin and Harden Off Seedlings
When seedlings reach 2 inches tall and show 3-4 leaves, it's time to thin. Use scissors to snip unwanted plants at soil level—never pull, or you'll disturb roots. Keep the strongest, most vigorous seedlings spaced 3 inches apart. This ensures each plant gets proper airflow and nutrients.
Two weeks before transplanting outdoors, begin hardening off. Move seedlings to a sheltered spot outside for 1 hour daily, gradually increasing time over 10 days. Choose an overcast day for the final transplant to reduce stress. Plant in well-draining soil with the top of the root ball just below soil level—Iris domes prefer to sit slightly exposed.
Tips & tricks for perfect Iris domestica seed germination
Here's what nobody tells you about getting these finicky seeds to sprout reliably—these tricks have saved my batches from failure more times than I can count.
Cold Stratification Precision: The 35-40°F refrigerator temperature is non-negotiable for breaking dormancy. I've found that placing the bag on the middle shelf of the crisper drawer (not the door) maintains the most consistent temperature. If your fridge runs cooler, you can extend the 8-12 week period by 2-3 weeks—just monitor weekly for moisture and root development. The key is patience; these seeds won't rush like annuals.
Seed Starting Mix Secrets: Never use garden soil—it's too dense and compacted. I mix equal parts of coco coir, perlite, and vermiculite for perfect drainage while retaining moisture. Sterilizing your mix by baking it at 200°F for 30 minutes eliminates pathogens that could rot your delicate seedlings before they even emerge.
Lighting Strategy: That "bright indirect light" in Step 3 is crucial—direct sun will scorch your seedlings before they develop proper chlorophyll. I use a combination of my south-facing window with sheer curtains and a 12-hour grow light on a timer. The light should be just strong enough to cast a faint shadow when held above the tray. Once true leaves appear, you can gradually introduce more direct light.
Harden Off Gradually: The 1-hour daily outdoor exposure in Step 4 should increase by 30 minutes each day. I've seen seedlings shocked and stunted when moved too quickly. On cloudy days, you can extend the outdoor time slightly since the sun's intensity is lower. Always return seedlings to their protected spot before sunset to prevent temperature shock overnight.
Pro Tips for Iris Domestica Seeds
- Here's what nobody tells you about getting these finicky seeds to sprout reliably—these tricks have saved my batches from failure more times than I can count.
- Cold Stratification Precision: The 35-40°F refrigerator temperature is non-negotiable for breaking dormancy.
- Seed Starting Mix Secrets: Never use garden soil—it's too dense and compacted.
Frequently asked questions
How long does cold stratification take for Iris domestica seeds?
Cold stratification typically requires 8–12 weeks in the fridge (34–40°F). Place seeds in a moist paper towel or peat moss, then store them in a sealed container. Patience pays off—this mimics winter conditions and breaks dormancy for faster germination!
When should I plant the seeds after stratification?
Plant your seeds immediately after stratification, ideally in early spring (March–April) or fall (September–October). Use well-draining soil and keep them shallow (¼ inch deep). If delayed, store them in the fridge again briefly—just avoid drying them out!
Can I grow Iris domestica indoors from seeds?
Yes, but it’s tricky! Use a sunny windowsill or grow lights for 12+ hours/day. A heating mat (70–75°F) can speed germination. Expect slower growth indoors—transplant outdoors after the last frost for stronger blooms. Potting mix should mimic their native, well-draining habitat.
What if my seeds don’t germinate after stratification?
Don’t panic! Try these fixes:
- Check moisture: Keep the medium damp but not soggy.
- Test viability: Soak seeds in warm water—floating seeds are likely non-viable.
- Re-stratify: Return them to the fridge for another 4–6 weeks.
- Adjust light: Some seeds need bright, indirect light post-stratification.
How long until I see flowers from Iris domestica seeds?
Patience is key! Seed-grown irises usually take 2–3 years to bloom. First-year plants focus on roots, year two builds foliage, and year three (or later) rewards you with vibrant flowers. For faster blooms, consider layering or dividing mature plants—it’s a shortcut!
Wrapping up and next steps
Growing Iris domestica from seeds is a rewarding journey that unlocks vibrant blooms in just three months with cold stratification!
By following the right steps—from seed preparation to transplanting—you’ll enjoy stunning, fragrant flowers that thrive in your garden. Don’t let hesitation hold you back—start your seeds today and watch your garden transform!
🌱 Ready to Grow?
Your next step? Order high-quality seeds and mark your calendar for stratification in fall or winter. With patience and care, you’ll soon be surrounded by the beauty of Iris domestica—proving that great things grow from small beginnings! 🌸