How To
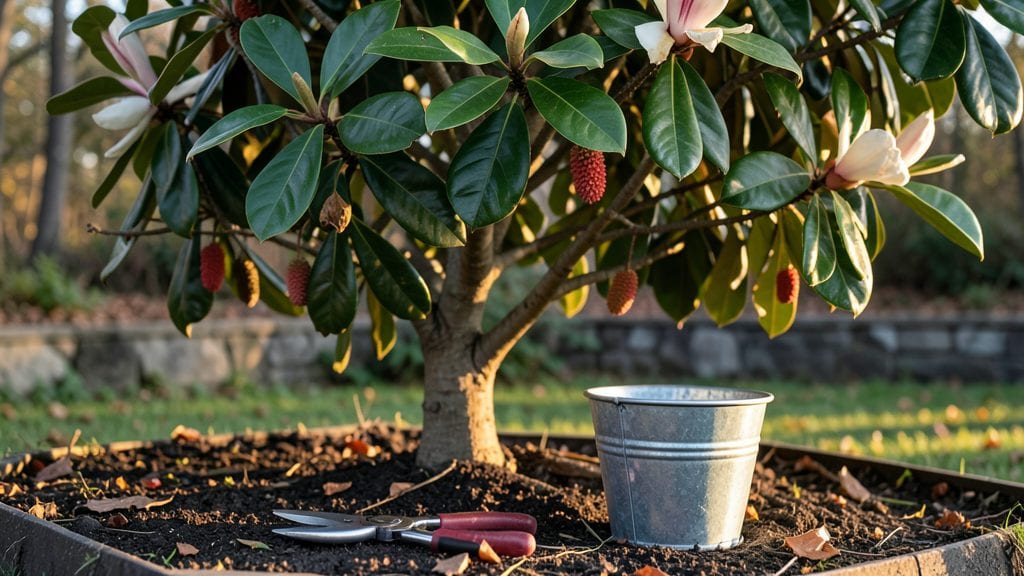
Harvesting magnolia seeds at the right moment 🌸 ensures high germination rates—but timing is everything, and missing it means wasted effort.
Picture this: You’ve waited all spring for those iconic magnolia blooms to fade, only to find the seed pods still green and unripe. Or worse, you collect too late and the seeds have already sprouted or dried out completely.
The difference between success and failure often comes down to knowing when those pods turn from green to brown and split open naturally.
In this guide, I’ll walk you through the exact signs to watch for—like dry, brown pods and firm, dark seeds—and the best methods for collecting them without damaging the tree. You’ll also learn how to store them properly so they stay viable until planting season.
Whether you’re a seasoned gardener or just starting with magnolias, these steps will help you avoid common mistakes and give your seeds the best shot at growing into stunning trees of their own.

When to harvest magnolia seeds for maximum germination success
Harvesting magnolia seeds at the wrong time can leave you with seeds that won’t germinate—or worse, rot before you even plant them. The key to success lies in understanding seasonal timing and seed maturity indicators.
Unlike many plants, magnolias require a specific window for optimal seed collection, typically between late summer and early fall. Missing this window can drastically reduce your chances of growing new magnolia trees from seed.
Timing matters because magnolia seeds need to reach full maturity before they’re viable. If you harvest too early, the seeds may still be soft and moist, leading to poor germination rates. Conversely, waiting too long risks exposure to pests, mold, or weather damage.
The ideal moment is when the seed pods turn fully brown and dry and begin to split open naturally. This usually happens around September or October, depending on your climate zone.
Climate plays a huge role in determining the best harvest time. In warmer southern regions (USDA Zones 8-10), seeds may mature earlier, sometimes as early as late August. Meanwhile, in cooler northern zones (USDA Zones 4-7), you might need to wait until October or even November.
Always monitor your tree closely, as local weather patterns can shift these timelines significantly.
Here’s a quick reference to help you identify when your magnolia seeds are ready for harvest:
| Stage | Visual Cues | Action | Best Time |
|---|---|---|---|
| Early Maturity | Pods turn light brown, slightly dry | Wait 2-3 weeks | August (South) / September (North) |
| Optimal Maturity | Pods fully brown, split open, seeds dark and firm | Harvest immediately | September-October |
| Overripe | Pods cracked open, seeds exposed to elements | Collect remaining seeds, discard damaged ones | Late October-November |
One of the most reliable ways to determine seed readiness is by touch and sight. Gently press a seed pod—if it feels dry and papery and opens easily with minimal pressure, it’s time to harvest. The seeds inside should be dark brown and firm, not sticky or green.
If you’re unsure, split open a few pods and inspect the seeds. Healthy seeds will feel dense and look glossy, while underripe seeds will be soft and pale.
Don’t overlook the importance of weather conditions during harvest. Collect seeds on a dry, sunny day to minimize moisture exposure, which can accelerate mold growth. If rain is forecasted, prioritize harvesting immediately, even if the pods aren’t fully mature.
Wet seeds are far more likely to spoil during storage, so err on the side of caution when the forecast looks uncertain.
Another pro tip: Harvest seeds in the morning when humidity is lowest. This reduces the risk of seeds absorbing excess moisture from the air, which can compromise their viability. Use a clean, dry container to collect the pods, and avoid crushing them during the process.
Once you’ve gathered your seeds, the next step is proper drying and storage, which we’ll cover in the next section.
If you’re in a cooler climate, you might notice that magnolia seeds take longer to mature. In these regions, it’s not uncommon for the harvest window to extend into November. Pay close attention to your local frost dates, as a sudden freeze can damage unharvested pods.
If frost is imminent, collect seeds even if they’re not fully mature—though germination rates may be lower.
Finally, remember that patience is key when harvesting magnolia seeds. Rushing the process can lead to disappointment, but taking the time to monitor your tree’s seed pods will reward you with high-quality, viable seeds ready for planting.
Once you’ve mastered the timing, you’ll be well on your way to propagating your own magnolia trees—adding a touch of nature’s elegance to your garden for generations to come.
Step-by-step process for collecting and processing magnolia seeds
Harvesting magnolia seeds at the right moment ensures high germination rates and healthy seedlings. These seeds require careful handling from collection to storage, so timing and technique matter. Whether you're a beginner or seasoned gardener, following the correct steps will maximize your success in propagating these fragrant, ornamental trees.
The process involves identifying mature seed pods, extracting the seeds, and preparing them for long-term storage.
Before you begin, gather your tools: gloves, scissors or pruners, a paper bag or breathable container, and a drying surface. Work on a dry, shaded day to prevent moisture buildup, which can lead to mold or premature germination.
Understanding the stages of seed maturity will help you avoid common mistakes like harvesting too early or too late. Let’s break down the process into clear, actionable steps.
-
Step 1: Identify Mature Seed Pods
Look for brown, dry seed pods that have naturally split open. Avoid green or closed pods, as they aren’t ready for harvest. -
Step 2: Collect Seed Pods
Use pruners or scissors to carefully cut open pods from the tree. Place them in a breathable paper bag to allow airflow. -
Step 3: Extract the Seeds
Gently open the pods and remove the dark brown, firm seeds. Discard any soft, shriveled, or discolored seeds—they won’t germinate. -
Step 4: Clean the Seeds
Rinse seeds under lukewarm water to remove debris, then pat dry with a paper towel. Avoid soaking, as excess moisture can damage them. -
Step 5: Dry the Seeds
Spread seeds on a mesh screen or paper towel in a well-ventilated, dry area for 1-2 weeks. Stir occasionally to ensure even drying. -
Step 6: Store for Viability
Place dried seeds in a sealed, airtight container with a desiccant packet. Store in a cool, dark place (like a fridge) for up to 1 year.
Once your magnolia seeds are properly dried and stored, they’re ready for planting. The key to success lies in patience—rushing the drying process or storing them in humid conditions can drastically reduce germination rates.
For best results, plant seeds in well-draining, acidic soil during the early spring or fall, mimicking their natural growing cycle.
If you’re unsure whether your seeds are viable, conduct a simple float test: Place seeds in water. Viable seeds will sink, while non-viable ones will float. This quick check saves time and effort when preparing for planting.
With the right care, your harvested magnolia seeds can grow into stunning, fragrant trees that enhance your garden for decades.
Remember, every magnolia tree starts as a single seed. By following these steps, you’re not just collecting seeds—you’re nurturing the future of your garden’s beauty and biodiversity. Happy harvesting! 🌱