
Pruning
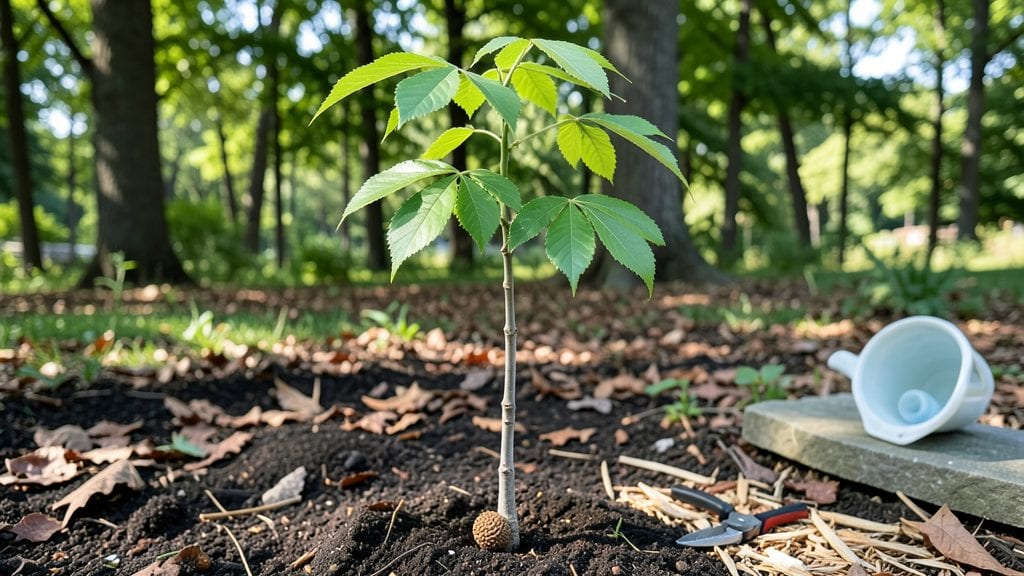
Nurturing a hickory tree seedling from seed is one of those rewarding projects that takes patience but pays off with a towering shade provider for generations. 🌱 The real secret to success starts with cold-stratification—mimicking winter's chill to break the seed's dormancy so it'll finally sprout.
Without this step, most hickory seeds just sit there, stubborn as a summer drought, while properly treated seeds shoot up within weeks.
You'll need just a few simple supplies: raw hickory nuts (collected fresh in fall), a damp paper towel or peat moss, a sealed plastic bag, and a fridge for the stratification process.
The whole operation takes about 90 days, with the first 60 spent in cold storage and the final 30 in warm, bright conditions. It's not complicated, but it does require remembering to check on your seeds every few weeks—no skipping this step if you want reliable germination.
Once those first green leaves appear, you'll know you've done it right. The seedlings grow slowly at first, but with proper sunlight (at least 6 hours daily) and well-draining soil, they'll develop into sturdy young trees within a year.
The real payoff comes when you transplant them outdoors after their second growing season—watch them shoot up 2-3 feet annually once established.
This method works best in zones 4-9, where hickories thrive naturally, but even in warmer climates, the cold treatment kickstarts growth. The key is consistency: don't let the soil dry out completely, and avoid over-fertilizing those delicate young roots.
With this approach, you're not just growing a tree—you're planting a future backyard landmark.
📚 In This Guide
- What you need
- Instructions
- Tips and common mistakes
- Wrapping up and next steps
What you need
- ● Hickory seeds (fresh or stored, preferably from a mature tree—aim for at least 10 seeds for better success rates).
- ● Cold-stratification medium: Moist peat moss or perlite (2–3 cups per batch of seeds).
- ○ Paper towels (optional, for individual seed stratification).
- ● Sealed plastic bag or airtight container (to hold the stratification mix).
- ● Refrigerator (set to 34–40°F (1–4°C) for stratification).
- ● Small pots or seed trays (3–4 inch diameter, with drainage holes).
- ● Well-draining potting mix (a blend of 50% peat moss, 30% perlite, and 20% compost).
- ● Gloves (to protect hands from seed shells).
- ● Spray bottle (for keeping the stratification mix moist).
- ○ Heat mat (optional, for germinating seeds post-stratification).
- ● Grow lights or sunny windowsill (for seedlings after sprouting).
- ● Plant labels (to track seedling progress).
Step-by-step instructions for cold-stratifying hickory tree seeds
Here's how to break dormancy and boost germination rates for your hickory seedlings.
🌱 Step 1: Harvest and Prepare the Seeds
Collect hickory nuts in late fall when they've fallen naturally. Remove any nuts with visible cracks or insect damage—only use whole, firm seeds. I like to soak them in lukewarm water for 24 hours first to soften the hard outer shell. This step mimics natural weathering and helps water penetrate during stratification.
After soaking, spread the seeds on a paper towel to dry slightly. The goal is damp but not wet—you should see moisture beads but no dripping. Store them in a paper bag (not plastic) in the fridge for the next steps. This prevents mold while allowing airflow.
❄️ Step 2: Cold-Stratify for 60-90 Days
Place the damp seeds in a sealed plastic bag with a bit of moist peat moss or sand. I use a quart-sized bag and add enough moisture to keep the mix damp like a wrung-out sponge. Seal it tightly and store in your refrigerator's crispier drawer (around 35-40°F) for 60-90 days.
Check the bag every 2-3 weeks—if the moss feels dry, mist it lightly. Over-saturation causes rot, but too little moisture prevents germination. You'll know stratification is working when tiny white roots appear through the bag's plastic. This is your cue to move to the next phase.
🌿 Step 3: Plant After Stratification
After cold treatment, plant seeds 1 inch deep in a well-draining mix of 50% potting soil and 50% perlite. Use individual pots (3-4 inches deep) to avoid overcrowding. Water gently until moisture reaches the bottom—you'll see it drain from the holes. Hickory seedlings hate soggy roots, so ensure pots have drainage.
Place the pots in a bright, indirect light location (like an east window). Keep the soil consistently moist but never soggy. Germination can take 3-6 weeks, so patience is key. You'll know it's working when the first true leaves appear—these look different from the initial seed leaves and are deeper green.
☀️ Step 4: Transition to Outdoor Conditions
Once seedlings have 3-4 true leaves and are 4-6 inches tall, harden them off by moving them outside for 2 hours daily. Start with a shaded spot and gradually increase sun exposure over 10-14 days. Watch for wilting—if leaves droop, they're not ready for full sun yet.
After hardening, transplant outdoors in late spring when soil temperatures reach 60°F. Choose a location with full sun and well-draining soil. Mulch around the base with 2-3 inches of wood chips to retain moisture and regulate temperature. Water deeply once a week unless rainfall provides 1 inch of moisture.
Tips & tricks for perfect hickory seedling stratification
These proven strategies will help you maximize germination success with your hickory tree seeds.
The Soaking Secret: That 24-hour lukewarm water soak in Step 1 isn't just about softening the shell—it's mimicking nature's way of preparing seeds for winter. Use water that feels warm to your wrist (around 90°F) to avoid shocking the seeds. I've found that adding a pinch of horticultural fungicide to the soaking water prevents mold without harming the seeds. This is especially helpful if you're working with older seeds that might carry more contaminants.
Temperature Matters: The 35-40°F range in your refrigerator's crispier drawer is perfect for stratification, but not all fridges are created equal. If your fridge runs cooler, consider using a seed stratification box or even a garage refrigerator that maintains more consistent temperatures. The goal is to keep seeds cold but not frozen—tiny ice crystals can damage the embryos. I've had success using a small cooler with a thermometer to monitor temps if my fridge fluctuates.
Moisture Management: The "wrung-out sponge" moisture level in Step 2 is critical—too wet and you risk rot, too dry and germination suffers. I like to use a spray bottle to mist the peat moss or sand instead of soaking it. This gives me better control over moisture levels. You'll know you've got it right when condensation forms on the inside of the bag but doesn't pool at the bottom. This balance prevents both mold and dehydration during those 60-90 days.
Root Check Strategy: When you see those tiny white roots pushing through the plastic bag, that's your signal to move to planting—but don't rush! Wait until you can see roots on at least 30% of your seeds before planting. I've learned this the hard way: planting too early often results in weak seedlings that struggle to establish. Those visible roots indicate the seed has broken dormancy and is ready to focus energy on growth rather than just survival.
Pro Tips for Hickory Tree Seedling
- These proven strategies will help you maximize germination success with your hickory tree seeds.
- The Soaking Secret: That 24-hour lukewarm water soak in Step 1 isn't just about softening the shell—it's mimicking nature's way of preparing seeds for winter.
- Temperature Matters: The 35-40°F range in your refrigerator's crispier drawer is perfect for stratification, but not all fridges are created equal.
Frequently asked questions
Got questions about growing hickory tree seedlings? You’re not alone—success with these hardy trees often hinges on timing, technique, and a few key tricks. Here’s what you need to know before diving in:
What is cold-stratification, and why is it essential for hickory seedlings?
Cold-stratification mimics winter conditions by exposing seeds to cold, moist soil (or a fridge) for 60–90 days. Hickory seeds have thick, hard coats that block water absorption—stratification softens them, breaking dormancy and boosting germination rates. Skip this step, and you’ll likely wait months (or never see sprouts!).
How long should I cold-stratify hickory seeds before planting?
For best results, stratify hickory seeds for 90 days in a mix of moist sand/peat (or a damp paper towel in a sealed bag). Store them in your fridge (34–40°F) or bury them outdoors in fall if your climate freezes. Pro tip: Test a few seeds after 60 days—if they’re still hard, extend stratification by 30 days.
Can I plant hickory seedlings outdoors without cold-stratifying first?
Outdoor planting can work if you sow seeds in late fall or winter (before soil freezes solid). Nature handles the cold-stratification for you! However, germination may be slower or inconsistent. For faster, more reliable growth, always stratify indoors first—especially in warmer climates where winter isn’t severe enough.
My hickory seedlings aren’t sprouting after stratification—what’s wrong?
Don’t panic! Try these fixes:
- Check moisture: Seeds must stay consistently damp (not soggy). Adjust your container’s drainage if needed.
- Test viability: Cut open a few seeds—if the inside is mealy or moldy, they’re likely dead. Fresh seeds (1–2 years old) germinate best.
- Warmth shock: After stratification, soak seeds in warm water (100°F) for 24 hours to kickstart germination.
What’s the best soil mix for hickory seedlings after germination?
Hickory seedlings thrive in well-draining, slightly acidic soil (pH 6.0–7.0). Mix equal parts:
- Peat moss or coco coir
- Perlite or coarse sand
- Compost or aged manure
Wrapping up and next steps
Growing hickory tree seedlings from cold-stratified seeds is a rewarding journey that connects you to nature’s resilience! By following the right steps—from gathering seeds to proper chilling and planting—you’ll set the stage for strong, thriving trees.
Whether you’re a seasoned gardener or a curious beginner, every seed holds potential, and your patience will soon bloom into lush, towering hickories.
Ready to take the next step? Start small—plant a few seedlings this season and monitor their progress. Share your successes (or lessons!) with fellow green thumbs, and soon, you’ll be nurturing a legacy of shade, wildlife support, and rustic beauty. Happy planting! 🌱🌳