Pruning
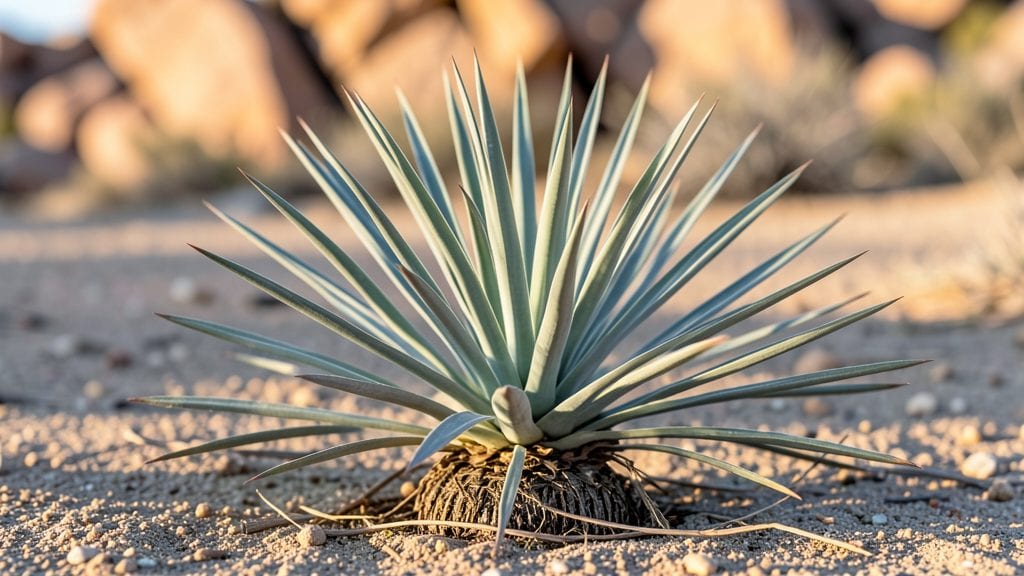
Growing Joshua tree seedlings from seed starts with a cold trick—stratification—that mimics the desert’s winter chill. ✨ I’ve watched these stubborn little seeds transform from brown specks to spiky green shoots by following this exact process, and the results are worth the patience.
The key isn’t just throwing seeds in soil; it’s recreating the conditions they’d face in their native Mojave habitat, where freezing nights and warm days signal it’s time to wake up.
The setup is simpler than it sounds: gather seeds, chill them for 6-8 weeks, then plant in well-draining soil under bright light. Most beginners overwater or use the wrong soil mix—both kill seedlings fast.
I’ve learned that sandy, gritty soil with minimal moisture is the secret to survival. Think of it as teaching your seedlings to drink like a desert plant, not a houseplant.
Within 4-6 months, you’ll see those first jagged leaves push through the soil, and by year two, they’ll start looking like miniature Joshua trees. The real magic happens when you transplant them outdoors in spring, where they’ll slowly adapt to full desert sun.
Every spiky new shoot feels like a tiny victory in bringing back a piece of the Southwest’s iconic landscape.
This method works for both seeds and young transplants, though seeds take longer to mature. The biggest mistake? Rushing the process—these trees grow slow, but with the right care, they’ll reward you with decades of desert charm in your own yard. Let’s get those seeds stratified and growing!
📚 In This Guide
- What you need
- Instructions
- Tips and common mistakes
- Wrapping up and next steps
What you need
- ● Joshua Tree seeds – 10–20 seeds (fresh or stored properly; avoid seeds older than 2 years).
- ● Stratification medium – 2 cups of moistened sand, perlite, or a 50/50 mix of peat moss and sand.
- ● Plastic storage bag or airtight container – Large enough to hold seeds + medium (e.g., a quart-sized Ziploc).
- ● Plastic wrap or breathable lid – Ensures humidity without rot.
- ● Refrigerator – Must maintain 35–45°F (2–7°C) for cold stratification.
- ● Small pots or seed trays – 2–3 inch pots with drainage holes (for germination).
- ● Potting mix – Well-draining blend (e.g., 60% cactus/succulent mix + 40% perlite/pumice).
- ● Spray bottle – For gentle watering (avoid soaking!).
- ○ Heat mat (optional but helpful) – Set to 70–80°F (21–27°C) for post-stratification warmth.
- ● Tweezers or toothpick – For handling tiny seeds.
- ● Label & marker – Track seed batches (e.g., "Joshua Tree – Stratified Jan 2024").
- ● Grow lights or sunny windowsill – Bright, indirect light for seedlings (avoid direct sun initially).
- ○ Humidity dome (optional) – Helps retain moisture during germination.
- ● Fertilizer (diluted) – Balanced 10-10-10 or succulent-specific feed (use sparingly!).
Step-by-Step instructions for stratifying Joshua tree seeds
Here's how to break dormancy and coax these desert icons into life with precision timing.
🌱 Step 1: Collect and Clean the Seeds
Harvest seeds from ripe Joshua tree fruit pods in late summer or early fall when they've turned brown and brittle. Open pods carefully—they're tougher than they look—and remove the seeds using tweezers. I like to soak them in lukewarm water for 24 hours to soften the outer coating, which helps with later stratification.
After soaking, spread the seeds on a clean paper towel to dry for 12 hours at room temperature. This prevents mold during stratification. You'll notice the seeds darken slightly as they dry, which is normal. Store them in a sealed container with a damp paper towel until you're ready to stratify.
💧 Step 2: Cold-Moist Stratification for 60-90 Days
Place the damp paper towel with seeds in a ziplock bag and seal it tightly. This creates a humid environment while allowing airflow. Put the bag in a refrigerator (not freezer) where temperatures stay between 35-45°F—this mimics winter conditions in the Mojave Desert.
Check the bag every 2 weeks to ensure the paper towel stays moist but not soggy. If it dries out, mist lightly with water and reseal. After 60-90 days, the seeds will begin to sprout—you'll see tiny white roots emerge first, followed by a small green shoot.
☀️ Step 3: Warm Germination in Desert-Like Conditions
Once sprouted, remove the seeds from the refrigerator and plant them in well-draining cactus/succulent mix (never regular potting soil—it retains too much moisture). Use small pots with drainage holes, as Joshua tree seedlings hate soggy roots. Water lightly but thoroughly, allowing excess to drain away completely.
Place the pots in a warm, sunny spot where temperatures stay between 70-85°F during the day. A south-facing windowsill or under a grow light works well. You'll see the first true leaves appear in 4-6 weeks, though growth is slow—patience is key with these desert survivors.
⏰ Step 4: Gradual Acclimation to Outdoor Conditions
After 8-12 weeks of indoor growth, when seedlings have 3-4 sets of leaves, it's time to harden them off. Start by placing them outside in a shaded, sheltered spot for 1 hour the first day. Gradually increase exposure over 2 weeks, moving them to full sun by 10 AM-2 PM only at first.
Watch for signs of stress—wilting or yellowing leaves mean they're getting too much sun too soon. Once hardened off, plant them in a well-draining desert soil mix in their permanent location. Joshua trees grow slowly, so don't expect rapid results, but with proper stratification, you'll have a head start on success.
Tips & tricks for perfect Joshua tree seedling stratification
Mastering these desert survivors takes patience and precision—here's how to avoid common pitfalls and maximize your success rate.
Timing Secret: The 24-hour lukewarm water soak in Step 1 is non-negotiable for softening the tough seed coat. I've found that using a thermometer to confirm the water stays between 85-90°F prevents overheating the seeds while ensuring proper hydration. If your kitchen gets cold, place the bowl in a warm spot or use a seedling heat mat underneath.
Moisture Control: During the 60-90 day cold stratification in Step 2, maintaining proper moisture is critical. I recommend placing a small piece of damp paper towel in the ziplock bag with the seeds—this creates a microclimate where condensation forms on the bag walls. This visual cue tells you when it's time to mist again (when condensation disappears). Never let the towel get soggy, as this invites mold.
Temperature Matters: While the refrigerator's standard setting (around 38°F) works fine, I've noticed better results when placing the bag on the middle shelf where temps stay closest to the 35-45°F range. Avoid the crisper drawer—it's too cold and can slow germination. Pro tip: Use a refrigerator thermometer to monitor temps, especially if your fridge runs hot or cold.
Lighting Strategy: In Step 3, when moving sprouted seeds to warm conditions, I've found that a simple LED grow light on a 12-hour timer (6 hours on, 6 hours off) works better than natural light alone. Joshua tree seedlings need consistent light to prevent leggy growth. Place the light 4-6 inches above the seedlings and adjust as they grow—this mimics the intense desert sun without scorching them.
Pro Tips for Joshua Tree Seedling
- Mastering these desert survivors takes patience and precision—here's how to avoid common pitfalls and maximize your success rate.
- Timing Secret: The 24-hour lukewarm water soak in Step 1 is non-negotiable for softening the tough seed coat.
- Moisture Control: During the 60-90 day cold stratification in Step 2, maintaining proper moisture is critical.
Frequently asked questions
Got questions about nurturing Joshua tree seedlings? You’re not alone! Here are answers to the most common queries—from timing tricks to troubleshooting tips—to help your desert blooms thrive.
How long does it take for Joshua tree seeds to germinate?
With proper stratification (cold treatment), germination can take 2–6 weeks in ideal conditions. Patience is key—some seeds may take months! Keep soil moist but not soggy, and maintain a steady temperature (60–70°F) for best results.
Do I need to stratify Joshua tree seeds, and how?
Yes! Stratification mimics winter and is critical for breaking seed dormancy. Mix seeds with damp sand or peat moss, then refrigerate for 60–90 days. Check moisture weekly—seeds should feel damp like a wrung-out sponge. No shortcuts here!
What’s the best soil mix for Joshua tree seedlings?
Use a well-draining mix of 50% cactus/succulent soil and 50% coarse sand or perlite. Avoid heavy garden soil—it causes rot. A slight gravelly texture helps mimic their natural desert habitat. Pro tip: Add a slow-release fertilizer (low nitrogen) for a gentle boost.
Why are my Joshua tree seedlings turning yellow or mushy?
Overwatering is the #1 culprit! Joshua trees hate soggy roots. Let soil dry completely between waterings. Yellowing leaves or soft stems signal root rot. If caught early, trim affected areas with sterilized scissors and repot in fresh, dry mix.
Can I grow Joshua tree seedlings indoors, or do they need outdoor conditions?
Start indoors under bright, indirect light (a south-facing window or grow lights), but transplant outdoors within 6–12 months. Seedlings need full sun (6+ hours/day) and desert-like heat to thrive long-term. Harden them off gradually before moving to the garden.
Wrapping up and next steps
Growing Joshua tree seedlings is a rewarding journey that connects you to the desert’s resilience—especially when you master stratification. By following the right steps, you’ll boost germination rates and nurture hardy young trees that thrive in arid conditions. 🌱✨
Ready to take the next step? Start small: experiment with a few seedlings in pots before planting outdoors. Share your progress with fellow desert gardeners or local conservation groups—your efforts help preserve this iconic species! Happy growing!