
Planting
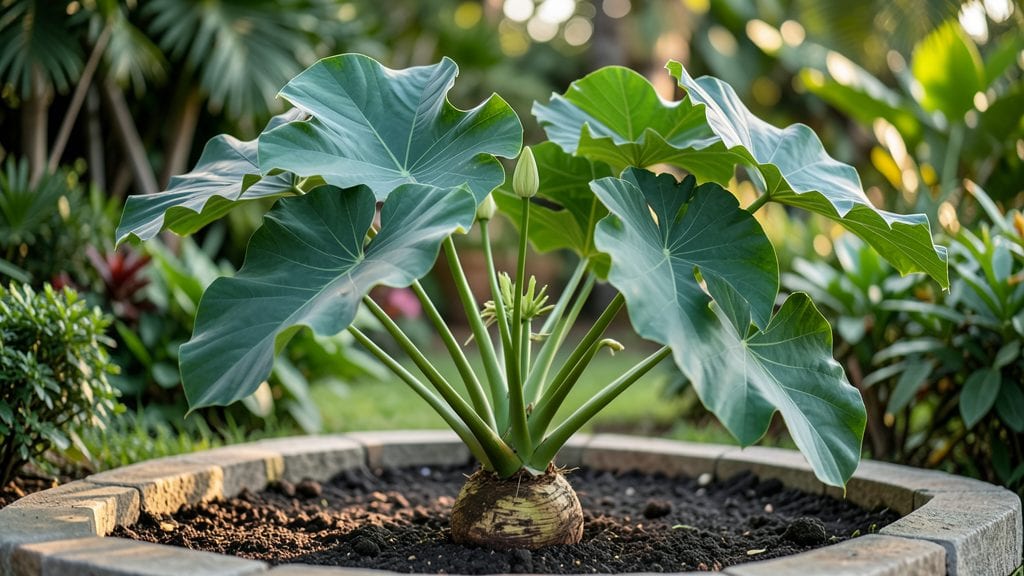
Planting taro from seeds is faster than you’d expect—those bushy, arrowhead-shaped leaves arrive in just 4-6 weeks if you start right. 🌱 I’ve grown taro in containers and garden beds, and the secret to speedy growth lies in mimicking its tropical roots: warmth, moisture, and shade at first.
Most gardeners skip seeds entirely and use corms (the edible root), but seeds let you experiment with heirloom varieties without waiting years for mature plants.
The trick to fast growth is rich, well-draining soil mixed with compost—think 50% potting mix, 30% coconut coir, 20% compost—and keeping the soil damp (not soggy). Taro thrives in 60-80°F temperatures, so if you’re outside zone 10, start seeds indoors under grow lights.
Space them 12 inches apart once they’re a few inches tall, and watch those broad leaves unfurl in record time.
By week 6, you’ll have a taro plant with leaves big enough to harvest for stir-fries or tempura—though the corms take longer to mature. The real payoff? These plants multiply underground, giving you free propagation material for next season.
Just avoid overwatering (root rot is the enemy) and keep them sheltered from harsh afternoon sun until established.
Works in pots or garden beds, and even thrives in partial shade—perfect for balconies or shaded yards. Whether you’re growing for food or foliage, this method cuts the wait time dramatically. Let’s get those seeds sprouting!
📚 In This Guide
- What you need
- Instructions
- Tips and common mistakes
- Wrapping up and next steps
What you need
- ● Taro seeds (corms or seedling tubers): 3–5 healthy, disease-free corms (or 5–10 small tubers for propagation). Choose certified organic or heirloom varieties for best results.
- ● Containers: 5–7-inch pots (with drainage holes) or a shallow tray (12+ inches deep) for seedling propagation. Use biodegradable pots if transplanting directly.
- ● Well-draining potting mix: 1–2 bags of a blend designed for tropical plants (e.g., 60% peat moss, 30% perlite, 10% coconut coir). Avoid heavy clay soils.
- ● Watering can or spray bottle: With a fine rose attachment for gentle watering (1–2 gallons capacity).
- ● Grow lights or sunny window: A full-spectrum LED grow light (12–16 hours/day) or a south-facing window (6+ hours of sunlight daily).
- ○ Humidity dome or plastic wrap: To retain moisture during germination (optional but highly recommended for tropical plants).
- ● Fertilizer: Balanced liquid fertilizer (10-10-10 or 20-20-20, diluted to half-strength) or organic options like fish emulsion or compost tea.
- ● Pruning shears or knife: For trimming excess foliage or dividing tubers (sterilized with rubbing alcohol).
- ● Heat mat: To maintain soil temps between 70–85°F (21–29°C) for faster germination.
- ● Soil moisture meter: To monitor hydration levels (taro loves consistently damp soil!).
- ● Mulch (e.g., straw or pine needles): To retain soil moisture and regulate temperature.
- ● Support stakes or trellis: If growing variegated or climbing varieties (though most taro stay compact).
- ● Epsom salt: 1 tbsp per gallon of water (monthly) for magnesium boosts (especially for yellowing leaves).
Step-by-Step guide to propagating taro plant seeds for fast growth
Here's how to jumpstart your taro plants with a method that delivers bushy, healthy growth in just a few weeks.
🌱 Step 1: Prepare Your Growing Medium
Taro thrives in rich, well-draining soil that mimics its tropical roots. Fill your 6-inch deep containers with a mix of 50% peat moss and 50% perlite—this keeps moisture consistent while preventing root rot. I like to add a handful of worm castings to each container for extra nutrients, as taro is a heavy feeder.
Moisten the mix until it feels like a damp sponge—squeeze it gently and it should hold together but not drip. Avoid compacting the soil; instead, fluff it with your fingers to create air pockets. This ensures roots can spread easily without suffocating.
🌱 Step 2: Plant the Corms or Seed Corns
Taro doesn’t grow from true seeds like most plants—it starts from corms (thick, starchy underground stems). Cut a healthy corm into 1-inch thick sections, ensuring each piece has at least one eye (the small bump where shoots emerge). Let the cut pieces dry for 24 hours to prevent rot.
Place each corm section 1 inch deep in the soil, with the eye facing upward. Space them 4 inches apart in the container. Press lightly around the edges to secure them, but don’t bury them too deeply—taro roots need room to breathe and expand.
💧 Step 3: Provide Warmth and Humidity for Germination
Taro loves warmth, so place your container in a spot where temperatures stay between 75-85°F. A seedling heat mat works wonders if your home runs cooler. Cover the container with a clear plastic dome or wrap it in plastic wrap to trap humidity—taro corms need moist conditions to sprout.
Check the soil daily and mist lightly if it feels dry at the surface. You’ll see sprouts in 2-3 weeks, but don’t rush to remove the cover until you see 2-3 inches of new growth. This ensures the young plants establish strong roots before facing drier air.
☀️ Step 4: Move to Bright, Indirect Light
Once sprouts appear, move the container to a spot with bright, indirect light. A south-facing window with sheer curtains works perfectly—direct sun can scorch tender new leaves. If you’re using artificial light, keep it 12 inches away and provide 14 hours of light daily.
You’ll notice leaves unfurling in 3-4 weeks. At this stage, taro plants grow fast, so fertilize lightly with a balanced liquid fertilizer (10-10-10) diluted to half strength. This boosts growth without overwhelming the young roots.
✂️ Step 5: Thin and Transplant for Bushier Growth
When your taro plants reach 6-8 inches tall, thin them if they’re crowded. Remove the weakest shoots, leaving the strongest 2-3 per container. This gives remaining plants more space to develop thick, bushy foliage.
After 8-10 weeks, when leaves are large and healthy, transplant them into larger containers or directly into the ground. Taro loves space—give each plant 18-24 inches of room to spread. Water deeply after transplanting to help roots adjust.
Tips & tricks for perfect taro plant propagation
Fast growth starts with these key strategies that'll help you avoid common pitfalls while maximizing your taro's potential.
Soil Preparation Secret: The 50% peat moss and 50% perlite mix is perfect, but here's the thing—don't skip the worm castings. I've found that adding just a handful to each container gives your taro plants a nutrient boost that makes all the difference in those critical first 3-4 weeks. The castings break down slowly, providing steady nourishment as roots establish themselves.
Corm Cutting Technique: When you're cutting those 1-inch thick corm sections in Step 2, look for the eyes—they're the small bumps where shoots emerge. Here's what nobody tells you: those eyes should be facing upward when planted, but don't worry if you accidentally plant one upside down. Taro is surprisingly resilient—it'll still grow, though it might take 1-2 extra days to sprout.
Germination Timing: The 24-hour drying period for cut corms is non-negotiable—it prevents rot by letting the cut surfaces callus over. Real talk: I've rushed this step before and ended up with moldy corms. After drying, place them in your prepared soil immediately. The warmth between 75-85°F is crucial—if your home runs cooler, that's where a seedling heat mat becomes your best friend for consistent germination.
Light Transition Strategy: Moving your taro from humidity dome to bright, indirect light at the 2-3 week mark is where things get interesting. I've found that gradually increasing light exposure over 3-4 days prevents shock. Start with morning sun only, then gradually add afternoon light. This mimics natural conditions and helps prevent those delicate new leaves from burning when you finally move to full bright, indirect light.
Pro Tips for Taro Plant Seeds
- Fast growth starts with these key strategies that'll help you avoid common pitfalls while maximizing your taro's potential.
- Soil Preparation Secret: The 50% peat moss and 50% perlite mix is perfect, but here's the thing—don't skip the worm castings.
- Corm Cutting Technique: When you're cutting those 1-inch thick corm sections in Step 2, look for the eyes—they're the small bumps where shoots emerge.
Frequently asked questions
Got questions about growing taro from seeds? You’re not alone! Here are some of the most common queries—plus straightforward answers to help you succeed.
Can I grow taro from seeds, or do I need a corm?
While taro is technically grown from seeds, they’re rare and slow to mature (taking 1–2 years to produce edible corms). Most gardeners start with cormels (small corms) or slips (shoots) for faster, bushier growth in weeks. Seeds are more common in specialty nurseries or online stores—just confirm the variety!
How long does it take for taro seeds to sprout?
Taro seeds can take 2–4 weeks to sprout, depending on warmth (70–85°F) and moisture. Keep soil consistently damp (not soggy) and use a humidity dome or plastic wrap to speed things up. Patience is key—seedlings grow slowly at first but reward you with hearty foliage!
What’s the best soil mix for taro seeds?
Taro seeds thrive in light, well-draining soil with a pH of 5.5–7.0. Mix equal parts peat moss, perlite, and coco coir for airy roots. Avoid heavy clay—it can suffocate seedlings. Add a handful of compost for nutrients, but avoid fresh manure (it can burn tender sprouts).
Why aren’t my taro seeds germinating?
Common culprits: cold soil (use a heat mat if temps dip below 65°F), dry conditions (mist seeds daily), or old seeds (taro seeds lose viability after 6–12 months). Try scarifying seeds (lightly nicking the outer shell) or soaking them in warm water for 24 hours to encourage germination.
Can I grow taro seeds indoors?
Start seeds in 4–6 inch pots under grow lights (12–14 hours/day) to prevent leggy growth. Use a humidity tray (pebble + water) to mimic tropical conditions. Once seedlings have 2–3 leaves, transplant outdoors after the last frost—taro loves warmth but hates cold snaps!
Wrapping up and next steps
Growing taro from seeds is a rewarding journey that yields fast, lush, and productive plants—especially when you follow the right steps! With the right soil, warmth, and patience, you’ll soon enjoy vibrant foliage and a thriving harvest.
Whether you’re a beginner or a seasoned gardener, this guide gives you the confidence to start small and grow big.
Ready to dive in? Order your taro seeds today and begin your propagation adventure! Once your plants are thriving, explore companion planting or experiment with different growing conditions to maximize your yield. Happy gardening! 🌱✨