Vegetables
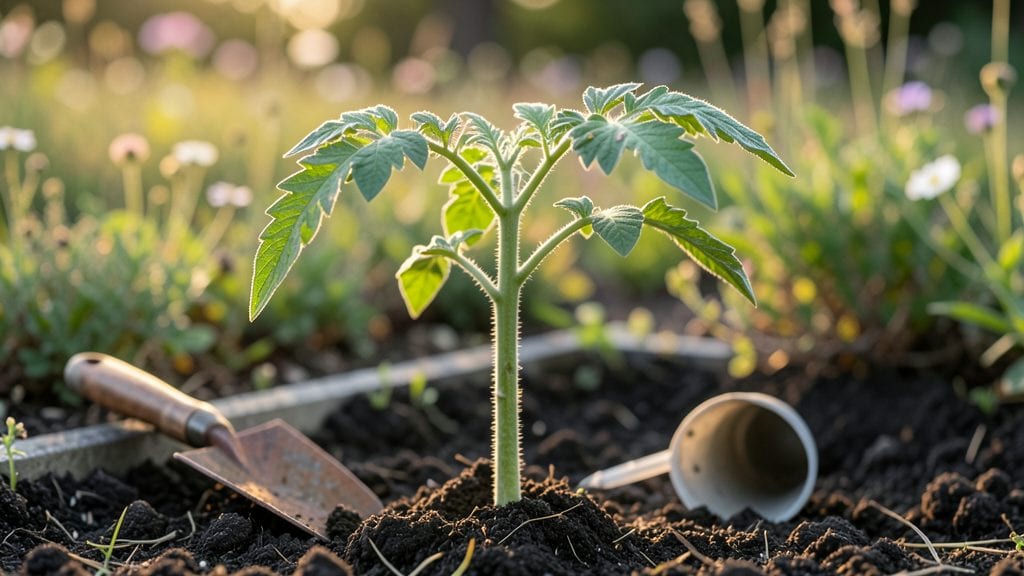
There’s nothing quite like capturing the magic of tomato seedling images as they transform from delicate sprouts into thriving plants ready for your garden—here’s how I do it. 🌱 I’ve watched my own seedlings go from fragile sprouts to robust plants ready for the garden, and I’ll show you exactly what each stage should look like so you can spot problems before they start.
The first leaves are tiny and round, but by week three, you’ll see the true leaves—serrated and vibrant green—that signal healthy growth. Comparing these stages to stressed seedlings (yellowing, stunted, or leggy) helps you catch issues like overwatering or weak light before they derail your plants.
With the right images, you’ll recognize strong stems, proper leaf shape, and well-developed roots—key signs your seedlings are ready for transplanting. These visual cues make it easy to troubleshoot common problems like damping off or nutrient deficiencies early.
This collection works as a quick reference whether you’re starting seeds indoors or troubleshooting under grow lights. Bookmark it for when you’re checking seedlings during those critical first few weeks—it’s the difference between thriving plants and disappointment.
📚 In This Guide
- What you need
- Instructions
- Tips and common mistakes
- Wrapping up and next steps
What you need
- ● Seed-starting trays or pots: 2–4 inch cells (10–20 cells per tray) or biodegradable peat pots. Pro tip: 💡 Opt for clear trays to monitor root growth—perfect for tomato seedling images!
- ● High-quality tomato seeds: Choose heirloom or hybrid varieties (e.g., 'Cherry Tomato,' 'Beefsteak'). Start with 5–10 seeds per tray for experimentation.
- ● Seed-starting mix: Lightweight, sterile potting mix (avoid garden soil—it’s too dense!). A 10–12 quart bag covers ~10 trays.
- ● Grow lights or sunny windowsill: 12–16 hours of light daily. LED grow lights (e.g., 24W full-spectrum) work well for indoor setups.
- ● Spray bottle (16 oz) or watering can with a fine rose: For gentle watering to avoid disturbing seeds.
- ● Humidity dome or plastic wrap: To retain moisture while seeds germinate (remove once sprouts appear).
- ○ Heat mat (optional but helpful): 70–80°F range speeds up germination. A 10"x20" mat fits most seed trays.
- ● Macro lens or smartphone with 10x zoom: Captures fine details like cotyledons and early leaves.
- ● Natural or softbox lighting: Avoid harsh shadows—use a ring light or shoot near a window.
- ● Tripod or stable surface: Ensures sharp, steady shots, especially for time-lapse sequences.
- ● Background options: White foam board (for clean backgrounds) or a textured surface (e.g., moss) for depth.
- ● Labeling supplies: Toothpicks + masking tape to mark seed varieties (great for tracking growth stages!).
- ● Patience: Germination takes 5–14 days, depending on variety and conditions.
- ● Space: Seedlings need 2–3 inches of vertical space to grow before transplanting.
- ● Temperature control: Ideal germination temp: 70–85°F. Use a thermometer to monitor.
- ● Transplant timeline: Harden off seedlings 1–2 weeks before moving outdoors (aim for after last frost).
How to document tomato seedling growth stages for reference
Capture each phase of your seedlings' development with these clear visual checkpoints.
📸 Step 1: Prepare Your Photography Setup
Use natural light near a window or a softbox to avoid harsh shadows. I position my camera on a tripod at the same height for every shot—consistency makes comparisons easier later. A white background or plain surface keeps focus on the plants without distractions.
Set your camera to macro mode if possible, or use the closest zoom setting. You'll want to capture fine details like cotyledon texture and root structure. Take notes on lighting conditions (morning vs. afternoon) in your file names to track how light affects growth.
🌱 Step 2: Photograph Key Developmental Milestones
Start with the germination stage when the first seedling breaks through soil—this is your 0-day reference. Capture the cotyledon stage (the first two leaves) which appears 7-14 days after planting. These leaves are round and smooth, signaling the seedling has tapped into its food reserves.
Next, document the first true leaves (the second set) which emerge 10-21 days after sowing—these look different from cotyledons and indicate the plant is now photosynthesizing properly. Include a side view to show stem thickness and root development if using clear containers.
☀️ Step 3: Track Light and Growth Responses
Photograph seedlings at the same time each day (I use 10 AM) to capture consistent lighting. Note any leggy growth (thin stems reaching toward light) or compact growth (short, sturdy stems) in your notes. These visual cues help diagnose light deficiencies or excesses.
At the 4-6 week mark, focus on the root ball size and leaf count—healthy seedlings should have 4-6 true leaves and roots filling the container. Compare these images to your initial shots to track progress visually.
✂️ Step 4: Document Transplant Readiness
Capture the hardening-off stage when seedlings show deep green color and no wilting after outdoor exposure. Include close-ups of stem thickness and leaf robustness—these traits indicate transplant resilience. A side view helps assess root development in the container.
Take a final "transplant day" shot showing the full seedling height and leaf spread. This baseline helps you compare next year's seedlings. I always include a ruler or coin for scale in these final images.
📂 Step 5: Organize and Label Your Collection
Create a digital folder with dates in the filename (e.g., "TomatoSeedlingDay14_Cotyledon.jpg"). Include brief notes about growing conditions (temperature, light hours) in the file metadata. I use a spreadsheet to track growth metrics alongside each image.
For physical reference, print and laminate key images (germination, first true leaves, transplant stage) to create a visual growth chart. This becomes your go-to reference for future seed-starting seasons.
Tips & tricks for perfect tomato seedling Documentation
A few strategic approaches will transform your seedling photos from casual snapshots into a valuable reference library.
Lighting Consistency is Key: Natural light near a window is ideal, but position your setup at the same time each day—I shoot at 10 AM—to maintain consistent lighting conditions. Use a white background to eliminate color distortion and ensure your seedlings appear true to their actual growth stages. If you must use artificial light, a softbox with 5500K color temperature mimics natural daylight most accurately.
Capture Growth Patterns, Not Just Appearance: In Step 2, when documenting the cotyledon and first true leaves stages, include both top and side views. The side view reveals crucial information about stem thickness and root development (especially visible in clear containers) that top-down shots miss. I've learned this the hard way—skipping side views means missing early signs of leggy growth or root-bound seedlings.
Scale Matters for Documentation: Always include a reference object like a ruler or coin in your transplant-day photos (Step 4). This provides essential scale information for future reference. Without scale, it's impossible to accurately compare seedling sizes from year to year. I keep a small plastic ruler with my photography kit specifically for this purpose.
Digital Organization Strategy: Create a standardized naming convention for your files that includes both the growth stage and date. For example, "TomatoSeedlingCotyledonDay10_70F_12hrLight.jpg" tells you everything you need to know about the growing conditions at that moment. This level of detail becomes invaluable when comparing different growing seasons or troubleshooting issues.
Pro Tips for Tomato Seedling Images
- A few strategic approaches will transform your seedling photos from casual snapshots into a valuable reference library.
- Lighting Consistency is Key: Natural light near a window is ideal, but position your setup at the same time each day—I shoot at 10 AM—to maintain consistent lighting conditions.
- Capture Growth Patterns, Not Just Appearance: In Step 2, when documenting the cotyledon and first true leaves stages, include both top and side views.
Frequently asked questions
Got questions about nurturing your tomato seedlings? You’re not alone! Here are some of the most common queries—plus quick answers to keep your little green sprouts thriving from seed to transplant.
How do I know if my tomato seedling images match healthy growth stages?
Compare your seedlings to trusted tomato seedling images online (like those from seed packet guides or gardening blogs). Look for sturdy stems, dark green leaves, and no yellowing. First true leaves (not the initial seed leaves) should appear 1–3 weeks after germination. If your seedlings look leggy or weak, they may need more light or shorter spacing.
When is the best time to transplant tomato seedlings based on their size?
Transplant when seedlings are 6–8 inches tall and have 4–6 true leaves (not counting the first seed leaves). This usually happens 6–8 weeks after sowing, depending on your climate. Hardening off (acclimating them to outdoor conditions) for 7–10 days before transplanting is key to survival.
What should I do if my tomato seedlings look weak or leggy?
Leggy seedlings (long stems, sparse leaves) often mean too little light. Move them to a sunnier spot (like a south-facing window or grow lights). Bury 2/3 of the stem when transplanting to encourage new root growth. Avoid overwatering—bottom-watering (placing trays in water) helps prevent weak stems.
Can I use tomato seedling images to identify pests or diseases early?
Yes! Compare your seedlings to tomato seedling images showing common issues like aphids, fungal spots (early blight), or damping-off. Look for yellow leaves, mold, or tiny bugs. Act fast: Isolate affected plants, use neem oil for pests, and improve airflow to prevent disease. Early detection saves your crop!
What’s the best alternative if I can’t find tomato seedling images for my variety?
Check your seed packet for variety-specific growth charts or use general tomato seedling images as a reference. Most heirloom and hybrid tomatoes follow similar early stages. For rare varieties, join gardening forums (like Reddit’s r/gardening) or ask local nurseries—they often have grower tips!
Wrapping up and next steps
Watching your tomato seedlings grow from tiny sprouts to sturdy transplants is a rewarding journey! 🌱 Whether you’re a beginner or a seasoned gardener, capturing each stage with tomato seedling images helps track progress and celebrate small victories.
Now that you’re armed with the right knowledge, it’s time to roll up your sleeves—plant those seedlings, nurture them with care, and soon you’ll be harvesting juicy, homegrown tomatoes!
Ready to dive deeper? Check out our guide on transplanting tips or explore variety-specific care to give your plants the best start. Happy gardening! 🌿