Vegetables
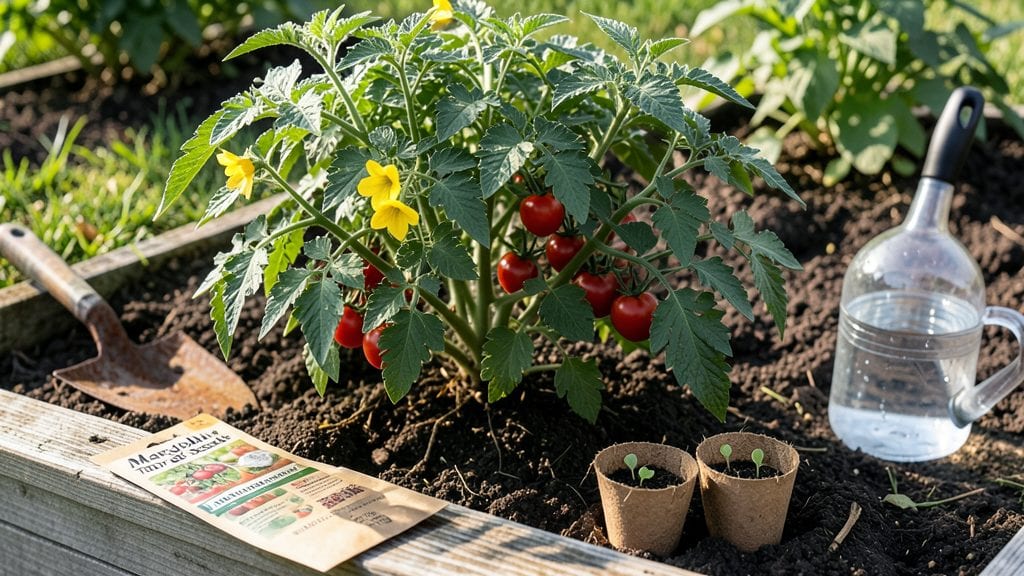
Marglobe tomato seeds burst into action faster than most varieties, with sturdy vines that fill out your garden in record time. 🌱 I’ve grown them for three summers now, and they’ve never disappointed—thick stems, glossy leaves, and clusters of sweet, meaty tomatoes that neighbors beg for slices of.
The secret isn’t just speed, though; it’s how they handle heat and humidity better than many heirlooms, making them the workhorse of my summer garden.
To get started, you’ll need a sunny spot with at least 6-8 hours of direct light daily, a 5-gallon container or raised bed for each plant, and a well-draining soil mix rich in compost.
Marglobes thrive when planted 4-6 weeks before your last frost date, so mark those calendars now—these seeds sprout in just 5-7 days when kept warm and moist. The bushy growth habit means less pruning than indeterminate varieties, but you’ll still want to stake them early to prevent sprawl.
By midsummer, you’ll be harvesting 2-inch beefsteak tomatoes with a flavor that’s rich, slightly tangy, and perfect for slicing or sauces. The plants stay productive for weeks, and their disease resistance means fewer chemical interventions.
I’ve had mine yield pounds of fruit per plant with minimal fuss—just consistent watering and a little extra mulch during dry spells.
They’re equally at home in containers or in-ground beds, making them ideal for small spaces or urban gardens. Whether you’re chasing fast results or just want a reliable, flavorful tomato, Marglobes deliver. Let’s get those seeds in the ground and watch them grow!
📚 In This Guide
- What you need
- Instructions
- Tips and common mistakes
- Wrapping up and next steps
What you need
- ● Marglobe tomato seeds: 1–2 packets (50–100 seeds per packet). Choose organic or heirloom seeds for best results!
- ● Seed-starting mix: 1–2 cups of high-quality, sterile potting soil (avoid garden soil—it’s too dense for germination!).
- ● Seed trays or small pots: 2–4 biodegradable or plastic cell trays (2–3 inches deep) or small pots (3–4 inches in diameter).
- ○ Grow lights or sunny windowsill: A seedling heat mat (optional but helpful) or a south-facing window with consistent sunlight.
- ● Spray bottle: For gentle watering without disturbing seeds.
- ● Plastic wrap or humidity dome: To retain moisture while seeds germinate.
- ● Small hand trowel or spoon: For planting seeds without over-deepening.
- ● Labels & marker: To track planting dates and varieties.
- ○ Fertilizer (optional): A balanced, water-soluble fertilizer (5-5-5 or 10-10-10) for post-germination care.
- ● Transplanting supplies (later stage): Larger pots (5–6 inches) or garden bed prepared with compost.
Step-by-Step instructions for growing Marglobe tomato seeds
Here's how to get your Marglobe tomato seeds sprouting in days and thriving into sturdy, productive vines.
🌱 Step 1: Prepare Containers and Seed Starting Mix
Fill clean 2-3 inch deep biodegradable pots with a sterile seed-starting mix. I like to use peat pots because they eliminate transplant shock when moving Marglobes outside. Moisten the mix until it holds together when squeezed but doesn't drip water—think of it like a damp sponge, not a wet rag.
Press the soil down lightly so the surface is firm but not packed. You want air pockets gone but the mix loose enough for tender roots to push through. Tap the container gently on the table once or twice to settle everything evenly. This ensures even moisture distribution and prevents dry pockets where seeds might fail to germinate.
🌱 Step 2: Sow Seeds at Correct Depth and Cover
Plant 1-2 seeds per pot at a depth of about ¼ inch—roughly the diameter of the seed itself. Marglobe seeds germinate fastest when planted shallow. Cover lightly with a sprinkle of additional mix, just enough to obscure the seeds but not bury them too deep.
Mist the surface gently with a spray bottle until evenly moist. A heavy watering can will dislodge the seeds and bury them too deep. I label each pot with the variety and date—after a week of watching identical green sprouts, you'll forget which is which. Place the pots in a warm, dark spot for germination.
💧 Step 3: Provide Warmth and Moisture for Fast Germination
Cover the pots with a clear humidity dome or plastic wrap to retain warmth and moisture. Marglobe seeds germinate fastest at 75-85°F. A seedling heat mat keeps the soil 10°F warmer than ambient and dramatically improves germination speed. Expect sprouts in 5-7 days—that's the "fast" I promised.
Check daily but resist the urge to water. The dome traps enough moisture that the soil stays evenly damp without intervention. Once 50% of seeds have sprouted, remove the dome immediately—trapped humidity around new seedlings invites damping-off disease that will collapse stems overnight.
☀️ Step 4: Move to Bright Light and Encourage Bushy Growth
The instant seedlings break through the soil, they need 14-16 hours of light daily. A south-facing window rarely provides enough intensity, so I use a full-spectrum LED grow light positioned 2-4 inches above the plants. Raise it as they grow to maintain that gap.
Marglobes grow best with strong light from the start—this prevents leggy growth. You'll see leggy growth as thin, pale stems with leaves spaced far apart. Strong seedlings have thick stems, deep green color, and compact spacing between leaves. Pinch off the top set of leaves when the plant reaches 12 inches tall to encourage bushier growth.
⏰ Step 5: Harden Off Before Transplanting Outdoors
Two weeks before your last frost date, start hardening off the seedlings by placing them outside in a sheltered, shaded spot for 1-2 hours the first day. Gradually increase outdoor time by 1 hour daily over 10-14 days, slowly introducing more sun and wind.
Skipping this step burns leaves, breaks stems, and shocks plants severely. Once seedlings tolerate a full day outside without wilting, they're ready for the garden. Transplant on an overcast afternoon to reduce transplant shock and water deeply at the base. Marglobes thrive in full sun and well-draining soil, so choose a spot with at least 6-8 hours of sunlight daily.
Tips & tricks for fast Marglobe tomato germination
Here's what I've learned over years of growing Marglobe tomatoes—the little details that turn mediocre sprouts into vigorous, productive vines.
Soil Temperature Secret: The 75-85°F range in Step 3 is non-negotiable for fast germination. I've found that placing pots on a seedling heat mat (which keeps soil 10°F warmer than ambient) cuts germination time from 7-10 days to just 5-7 days. If your home stays below 70°F, consider a small greenhouse or sunny windowsill with a heat source—cold soil is the #1 reason for slow germination.
Light Timing Strategy: Marglobe seedlings need their 14-16 hours of light daily from day one (Step 4). I set up my grow lights on a timer to automatically turn on at 6am and off at 8pm, ensuring consistent light exposure. If you're using natural light, rotate pots daily so all sides get equal exposure—this prevents lopsided growth that weakens stems.
Pinching Technique: When your Marglobe reaches 12 inches tall (Step 4), pinch off the top set of leaves just above a leaf junction. This might seem counterintuitive, but it triggers bushier growth by encouraging lateral shoots. I've seen plants go from leggy and weak to compact and productive within just 2 weeks after pinching. Use clean scissors to make precise cuts—never tear leaves, as this invites disease.
Harden Off Gradually: The 10-14 day hardening process in Step 5 is where most gardeners fail. Start with just 1-2 hours on day one in a sheltered spot, then increase by 1 hour daily. I've watched seedlings wilt dramatically when moved too quickly—always check for wilting after each session. On the final day, if they look crispy or droopy, they're not ready for full sun yet.
Pro Tips for Marglobe Tomato Seeds
- Here's what I've learned over years of growing Marglobe tomatoes—the little details that turn mediocre sprouts into vigorous, productive vines.
- Soil Temperature Secret: The 75-85°F range in Step 3 is non-negotiable for fast germination.
- Light Timing Strategy: Marglobe seedlings need their 14-16 hours of light daily from day one (Step 4).
Frequently asked questions
Got questions about growing Marglobe tomato seeds? You’re not alone! Here are answers to the most common queries to help you cultivate a thriving harvest.
How long do Marglobe tomato seeds take to germinate?
Marglobe seeds typically sprout within 5–10 days when planted in warm (70–85°F), moist soil. For faster results, pre-soak seeds for 4–6 hours or use a seedling heat mat. Patience pays off—consistent moisture and warmth are key!
When is the best time to plant Marglobe tomato seeds indoors vs. outdoors?
Start seeds 6–8 weeks before your last frost date indoors under grow lights. Transplant seedlings outdoors after soil warms to 60°F+ and nighttime temps stay above 50°F. Marglobes thrive in full sun (6–8 hours/day), so avoid early spring planting.
Can I grow Marglobe tomatoes in containers, or do they need a garden bed?
Marglobes adapt well to 5-gallon containers or larger with proper drainage. Use a lightweight potting mix and support vines with cages or stakes. Just ensure containers get plenty of sunlight and regular watering—container-grown tomatoes dry out faster.
What are common pests for Marglobe tomatoes, and how do I prevent them?
Watch for aphids, hornworms, and whiteflies. Prevent issues with neem oil sprays, row covers, or companion planting (basil/marigolds). Remove damaged leaves promptly and rotate crops yearly to disrupt pest cycles.
Why are my Marglobe tomato plants flowering but not fruiting?
Common culprits: lack of pollinators (hand-pollinate with a brush), temperature stress (keep daytime temps above 70°F), or over-fertilizing with nitrogen (switch to phosphate-rich fertilizer). Also, ensure consistent watering—stress can halt fruit set!
Wrapping up and next steps
Growing Marglobe tomato seeds is a rewarding journey that delivers fast germination and bushy vines in just weeks—perfect for gardeners eager to see quick results! With the right conditions, patience, and a little care, you’ll soon be harvesting juicy, flavorful tomatoes that’ll make your kitchen (and taste buds) sing. 🌱
Ready to take the next step? Start small—whether it’s a single pot or a dedicated garden bed—and watch your Marglobe tomatoes thrive. Happy growing, and may your harvest be plentiful! 🍅✨