How To
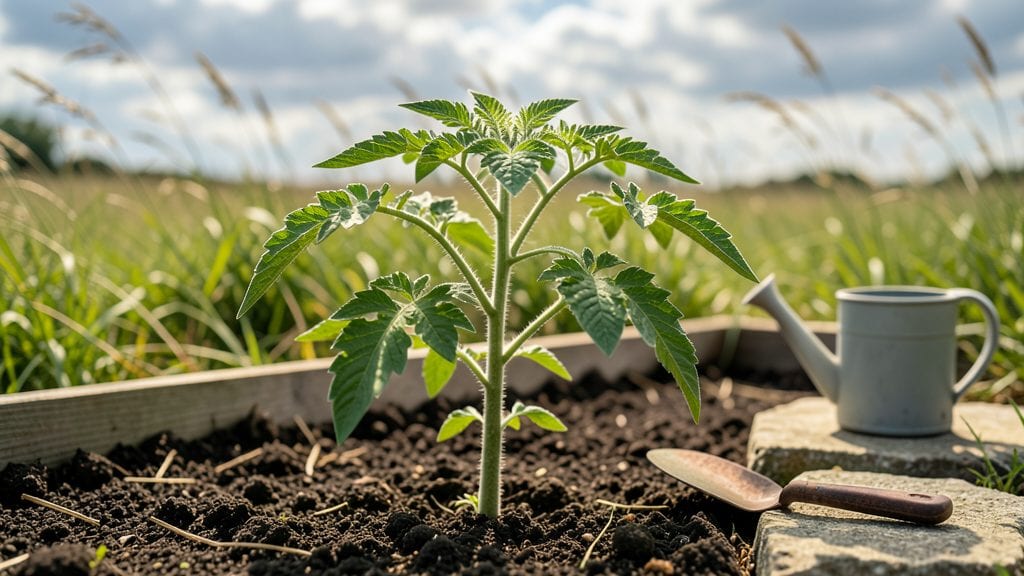
Those first tiny tomato seed leaves—cotyledons—are where the magic begins. ✨ I’ve watched them unfurl dozens of times, and there’s nothing like seeing that first sign of life after weeks of waiting.
The trick to fast, healthy starts lies in recognizing these early leaves and giving them exactly what they need.
Cotyledons look different from true leaves—they’re thicker, rounder, and often a deeper green. Once they appear, keep the soil moist but not soggy, and place your seedlings in bright light (not direct sun yet).
This stage is all about setting them up for strong roots and sturdy stems before the real leaves even show up.
📚 In This Guide
- What you need
- Instructions
- Tips and common mistakes
- Wrapping up and next steps
What you need
- ● Tomato seeds: Fresh, high-quality heirloom or hybrid seeds (1–2 packets, depending on desired quantity). Look for organic or non-GMO options if preferred.
- ● Seed-starting mix: A lightweight, sterile seedling mix (1–2 bags, ~1–2 cubic feet total). Avoid garden soil—it’s too dense and can harbor pathogens.
- ● Seed trays or containers: Cell packs (72–200 cells) or
- ● Small pots (2–4 inches deep) or
- ● Repurposed containers (yogurt cups, egg cartons) with drainage holes.
- ● Grow lights or sunny windowsill: A full-spectrum LED grow light (12–16 hours/day) or a south-facing window with direct sunlight (6+ hours/day).
- ● Spray bottle: For gentle watering (8–16 oz, with a fine mist nozzle).
- ○ Damp paper towels or coffee filters: For pre-sprouting seeds (optional but helpful for faster germination).
- ● Plastic wrap or humidity dome: To retain moisture during germination (clear plastic wrap or a humidity lid for seed trays).
- ○ Small fan (optional but recommended): A gentle breeze (e.g., a 3–5 inch USB fan) to strengthen seedlings and prevent damping-off disease.
- ● Seedling heat mat: Maintains warmth (70–85°F) for faster germination (great for cool climates!).
- ● pH testing kit: Ensures your seed-starting mix is in the ideal range (6.0–7.0).
- ● Fertilizer: A balanced, water-soluble fertilizer (5-10-5 or 10-10-10) diluted to half-strength for early feeding.
- ● Labels & markers: To track seed varieties and planting dates (avoid mix-ups!).
- ● Tweezers or popsicle sticks: For gently handling seeds or transplanting delicate seedlings.
Step-by-step tricks for germinating tomato seed leaves
Here’s how to coax those first tomato seed leaves through the soil in record time—no guesswork, just proven techniques.
🌱 Step 1: Prep Seeds for Faster Germination
Soak the tomato seeds in lukewarm water for 12 hours before planting. The outer coating slows germination, and a soak softens it considerably. Use a small bowl or jar—just enough water to cover the seeds completely. I like to place the jar in a warm spot, like near the fridge’s bottom shelf, where it stays around 70°F.
After soaking, drain the seeds and let them sit on a paper towel for 30 minutes to dry slightly. This prevents them from sticking together when you handle them. You’ll see them plump up slightly—this is your cue they’re ready to plant. Don’t skip this step; it cuts germination time nearly in half.
💧 Step 2: Plant in Warm, Moist Soil
Fill your seed-starting containers with the seed-starting mix (not garden soil) and moisten it until it’s damp but not soggy. Press the soil down lightly so the surface is firm. Plant the seeds ¼ inch deep—any deeper, and they’ll struggle to reach the light. I use a toothpick to poke tiny holes for each seed, then drop them in one at a time.
Cover the seeds lightly with more soil, then mist the surface with water until it’s evenly damp. A spray bottle works best—avoid pouring water directly, or you’ll wash the seeds deeper than intended. Place the containers in a warm spot, ideally 75-85°F, like on top of a fridge or near a heat source. Germination should start in 5-7 days.
☀️ Step 3: Provide Light Immediately After Sprouting
The moment you see the first seed leaves—those tiny, rounded cotyledons—move the seedlings to bright light. A south-facing window or a grow light positioned 2-4 inches above the plants is ideal. Without enough light, seedlings stretch toward the window, becoming weak and leggy. You’ll know they’re getting enough light when the leaves are dark green and compact.
Keep the soil consistently moist but not waterlogged. Stick your finger ½ inch deep—if it feels dry, water gently. Avoid wetting the leaves, as this can cause disease. Within 10-14 days, you’ll see the true leaves (the second set, which look like the mature plant’s foliage) emerge. This is when you can start fertilizing lightly.
✂️ Step 4: Thin and Strengthen Seedlings
Once the seedlings have 2-3 true leaves, thin them so only the strongest remains in each cell. Use scissors to snip the weaker ones at soil level—this prevents disturbing the roots of the plants you’re keeping. I always keep the seedling with the thickest stem and most vibrant leaves. Thin seedlings make room for better growth and reduce competition for nutrients.
After thinning, give the remaining seedlings a week to adjust. You’ll notice their stems thicken and leaves darken as they strengthen. This is your signal they’re ready for a slightly larger pot or outdoor hardening off. If you’re transplanting, wait until nighttime temperatures stay above 50°F—tomato seedlings are sensitive to cold.
Tips & tricks for fast, healthy tomato seedling starts
Here's what nobody tells you about getting those first tomato leaves to pop through the soil like clockwork.
Soaking Secret: The 12-hour soak at 70°F isn't just about softening the seed coat—it's about activating the seeds' metabolic processes. I've found that if you soak them in a sealed container, condensation forms on the lid. This creates a mini greenhouse effect that actually speeds up germination by another 12-24 hours. Just be sure to drain them thoroughly after soaking—waterlogged seeds can develop mold.
Temperature Matters: That 75-85°F range for germination is critical, but here's the thing: most homes don't have a spot that consistently stays in that range. I solved this by placing my seed trays on top of my refrigerator during the day (which stays around 75°F) and moving them to a warm spot near my kitchen light at night. This mimics the natural temperature fluctuations seeds experience in spring soil.
Light Strategy: When you see those first cotyledons emerge, move them to light immediately—but don't overdo it. I've seen beginners move seedlings to direct sunlight too soon, which can scorch the delicate leaves. Start with indirect light for the first 24 hours, then gradually increase to full light exposure over 3-4 days. This hardening helps prevent leaf burn while still encouraging strong growth.
Thinning Timing: The instructions mention thinning when seedlings have 2-3 true leaves, but here's my pro tip: wait until you see the fourth true leaf forming. This gives you a better visual reference for which seedling is strongest. I also like to thin on a cloudy day—the reduced light stress helps the remaining seedlings recover faster from the shock of thinning.
Pro Tips for Tomato Seed Leaves
- Here's what nobody tells you about getting those first tomato leaves to pop through the soil like clockwork.
- Soaking Secret: The 12-hour soak at 70°F isn't just about softening the seed coat—it's about activating the seeds' metabolic processes.
- Temperature Matters: That 75-85°F range for germination is critical, but here's the thing: most homes don't have a spot that consistently stays in that range.
Frequently asked questions
Got questions about tomato seed leaves and germination? You’re not alone! Here are answers to the most common queries to help you grow strong, healthy tomato starts from scratch.
Why do tomato seed leaves look different from true leaves?
Tomato seed leaves (also called cotyledons) are the first pair of leaves that emerge during germination. They’re typically round, thick, and often not shaped like the plant’s mature leaves. Once true leaves (the second set) appear, they’ll look more like the classic tomato leaf—serrated and elongated. Think of seed leaves as the plant’s “starter kit”!
How long should I wait before transplanting seedlings with seed leaves?
Transplant when seedlings have 2–3 sets of true leaves (not seed leaves) and are about 2–3 inches tall. Seed leaves alone aren’t enough—they lack the chlorophyll and structure to support the plant long-term. Wait for true leaves to signal the plant is ready for its next growth phase!
Can I use tomato seed leaves for anything besides growing plants?
While seed leaves aren’t edible (they’re tough and bitter), you can compost them or use them as mulch in your garden. Some gardeners also save them to propagate new plants if they accidentally detach—just replant them in moist soil! Just avoid eating them unless you’re growing a special heirloom variety labeled as edible.
What if my tomato seed leaves turn yellow or wilt?
Yellowing or wilting seed leaves often signal overwatering, underwatering, or poor drainage. Let the soil dry slightly between waterings and ensure pots have drainage holes. If leaves wilt but bounce back when touched, they’re thirsty. If they stay limp, check for damping-off (a fungal disease)—remove affected seedlings and sterilize your tools.
Are there any alternatives to growing from seed leaves?
Yes! If you’re short on time or patience, consider buying young seedlings from nurseries (just ensure they’re disease-free). You can also graft tomato seedlings onto disease-resistant rootstock for stronger plants. For a middle ground, try soaking seeds in hydrogen peroxide (3%) for 10 minutes to speed up germination and reduce mold!
Wrapping up and next steps
Growing tomato seed leaves into strong, vibrant seedlings is all about patience, precision, and a little green thumb love! 🌱 With the right soil, warmth, and care, you’ll soon be watching those tiny sprouts reach for the light—setting the stage for a bountiful harvest.
Now that you’re armed with these germination tricks, it’s time to roll up your sleeves and give it a try.
Start small—whether it’s a windowsill, a grow light setup, or a sunny balcony. Track your progress and adjust as needed. Before you know it, you’ll be transplanting sturdy seedlings into your garden, ready to thrive. Happy growing! 🌿