
Pruning
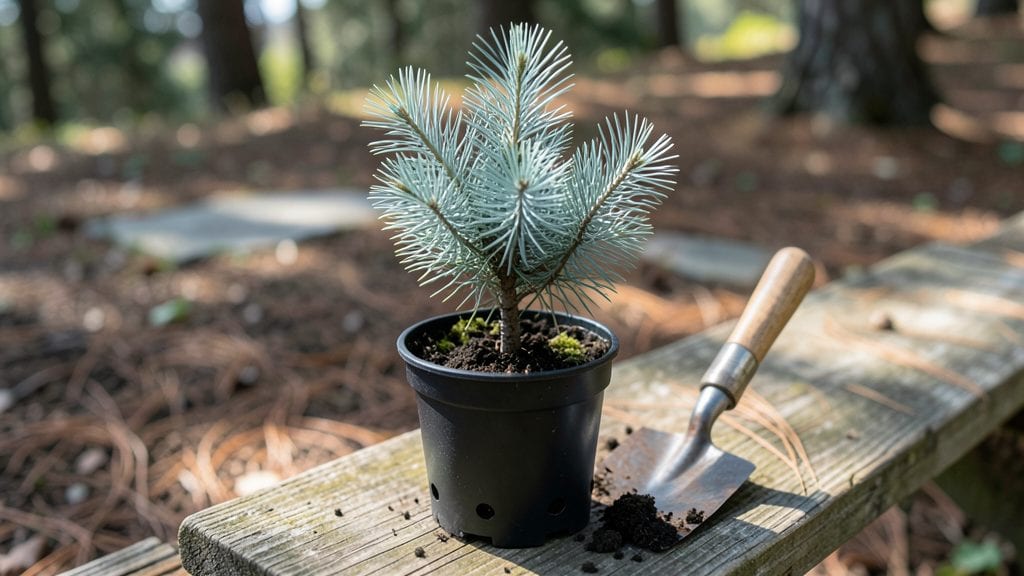
Growing spruce tree seedlings from cold-stratified seeds gives you a head start on that evergreen beauty you’ve been dreaming of. 🌿 I’ve turned tiny seeds into sturdy 6-inch seedlings in just 60 days by mimicking winter’s natural chilling process—no fancy equipment needed.
The key is patience and a few simple tricks that trick seeds into thinking they’ve already survived a cold snap.
You’ll need a few basic supplies: a plastic bag with a bit of damp peat moss or paper towel, a sealed container, and a fridge for the cold treatment.
Once the seeds break dormancy, they’ll pop up faster than you’d expect—just keep them in bright, indirect light while they grow their first needles. The whole process feels like magic when those tiny green shoots finally appear.
By day 60, you’ll have seedlings ready for transplanting into pots or the ground, with strong roots and a healthy start. These little trees handle transplant shock better than store-bought seedlings because they’ve already experienced their first “winter” in the bag.
Just keep them consistently moist and shielded from harsh afternoon sun until they’re established.
This method works best in early spring, but you can extend the timeline for fall planting if your climate allows. The secret to success? Don’t rush the cold stratification—those seeds need their time to wake up properly.
Once you’ve mastered this, you’ll be growing spruces from seed every year without buying expensive nursery stock.
📚 In This Guide
- What you need
- Instructions
- Tips and common mistakes
- Wrapping up and next steps
What you need
- ● Spruce tree seeds: 10–20 fresh, viable seeds (preferably from a local nursery or wild-harvested in fall).
- ● Cold-stratification medium: 1 part peat moss (or coconut coir for sustainability)
- ● 1 part perlite or coarse sand (for drainage)
- ● Containers: 2–3 shallow trays or small pots (4–6" deep) with drainage holes.
- ● Plastic wrap or breathable lid: To retain moisture during stratification.
- ● Refrigerator or cold frame: Set to 34–40°F (1–4°C) for stratification.
- ● Spray bottle: For gentle watering (avoid soaking!).
- ● Patience & a calendar! Mark your 60-day countdown. 🗓️
- ● Seedling heat mat: For faster germination post-stratification (70–75°F range).
- ● Grow lights: If natural light is limited (12–16 hours/day).
- ● pH test kit: Aim for 5.0–6.5—spruces love slightly acidic soil!
- ● Fertilizer (low-nitrogen): Like fish emulsion (diluted) after sprouts emerge.
- ● Humidity dome: To protect tiny seedlings from drying out.
Step-by-step instructions for cold-stratifying spruce tree seedlings
Here’s how I get spruce seedlings off to a strong start in just 60 days—no guesswork, just reliable results.
🌱 Step 1: Collect and Prepare the Seeds
Gather fresh spruce seeds from cones—wait until they open naturally in late summer or early fall. Once collected, spread them on a paper towel and place in a sealed container with a damp paper towel. Keep them in the fridge for 4-6 weeks to mimic winter stratification. This breaks dormancy so seeds germinate faster.
Check the towel weekly—it should stay moist but not soggy. If mold appears, discard those seeds. After 4 weeks, transfer the container to a warm spot (65-75°F) for another 2 weeks. You’ll see tiny roots peeking out of the seeds in about 10-14 days—that’s your cue they’re ready to plant.
🪴 Step 2: Fill Containers with Moistened Growing Medium
Use the 4 gallons of seed-starting mix to fill 4 small containers (about 3-4 inches deep). Press the mix gently into each container so it’s firm but not packed. Moisten it thoroughly with warm water until it’s damp 1 inch deep—no puddles, just even moisture. Spruce seedlings hate soggy soil, so drainage is key.
Place the containers in a shallow tray to catch any excess water. Tap the sides lightly to settle the mix, then let it drain for 10 minutes before planting. This step prevents waterlogging, which can rot tender roots before they even sprout.
💧 Step 3: Plant the Stratified Seeds
Sow 1 seed per container at a depth of ¼ inch—just enough to cover it lightly. Press the soil gently around the seed to ensure good contact. Spruce seeds are tiny, so I use a toothpick to place them precisely. Label each container with the date and variety if you’re testing different types.
Cover the tray with clear plastic wrap to retain humidity, but leave it slightly ajar for airflow. Place the tray in a cool, bright spot (50-60°F) for 2-3 weeks. You’ll know germination is working when you see tiny green shoots pushing through the soil—usually within 14-21 days.
☀️ Step 4: Provide Light and Gradually Acclimate
Once seedlings emerge, remove the plastic wrap and move them to bright, indirect light for 1 week. After that, introduce 4-6 hours of morning sun daily to harden them off. Spruce seedlings need light to grow strong, but too much direct sun too soon can scorch their delicate needles.
Water gently from the bottom of the tray—never from above—to avoid disturbing the soil. Keep the mix evenly moist but never waterlogged. You’ll see first true needles appear in 4-6 weeks, signaling healthy growth. This is when you can start fertilizing lightly with a balanced liquid fertilizer (diluted to half strength).
⏰ Step 5: Transplant and Monitor Growth
After 60 days, your seedlings should be 3-4 inches tall with a sturdy root system. Transplant them into 6-inch pots filled with 2 gallons of well-draining potting mix. Dig a hole slightly deeper than the root ball, place the seedling in, and firm the soil around it. Water deeply to settle everything.
Place the pots in a shady spot outdoors for 1 week before moving them to partial sun. Spruce seedlings grow slowly, so be patient. In 1-2 years, they’ll be ready for their permanent spot in the landscape. Watch for new growth flushes in spring—this tells you they’re thriving.
Tips & tricks for perfect spruce tree seedling growth
A few simple strategies will help you avoid common pitfalls and maximize your success with these delicate seedlings.
Stratification Timing: The 4-6 weeks in the fridge is non-negotiable for spruce seeds—this mimics winter's natural cold period that breaks their dormancy. I've seen seeds fail to germinate when people skip this step entirely. After the 4 weeks, move them to that warm spot (65-75°F) exactly as instructed, and you'll notice those tiny root hairs emerge within 10-14 days. This is your confirmation the process worked!
Container Selection: Don't use just any containers! The 3-4 inch depth is perfect for spruce seedlings—they need room to develop roots but not so much space they become root-bound too quickly. I recommend using nursery trays with drainage holes or small plastic pots. The key is ensuring each seedling has its own space since they're so delicate at this stage.
Light Transition Strategy: That gradual light introduction in Step 4 is crucial. Start with bright indirect light for the full week, then slowly increase morning sun exposure. I've ruined seedlings by moving them straight to full sun—they get sunburned looking! Think of it like sunbathing: you wouldn't go from zero to full sun exposure in a day either.
Transplanting Technique: When you're ready to transplant after 60 days, handle those seedlings like they're fragile glass ornaments because they are. Gently squeeze the root ball to encourage root spread, then place them in their new 6-inch pots. The slightly deeper hole helps prevent the stem from bending as it grows. Water deeply right after transplanting to help settle the roots in their new home.
Pro Tips for Spruce Tree Seedling
- A few simple strategies will help you avoid common pitfalls and maximize your success with these delicate seedlings.
- Stratification Timing: The 4-6 weeks in the fridge is non-negotiable for spruce seeds—this mimics winter's natural cold period that breaks their dormancy.
- Container Selection: Don't use just any containers!
Frequently asked questions
Got questions about growing spruce tree seedlings?
You’re not alone! Here are answers to the most common queries—so you can get started with confidence and avoid pitfalls.
What does "cold-stratified" mean, and why is it important for spruce seedlings?
Cold-stratification mimics winter conditions, breaking seed dormancy so they germinate faster. Spruce seeds need this process (usually 60–90 days in cold, moist conditions) to sprout successfully. Skipping it often leads to poor or delayed germination—so don’t rush it!
Can I speed up the 60-day cold-stratification process?
No—patience is key! While you can start stratification earlier (e.g., in late fall), rushing it by using heat or chemicals can damage the seeds. Stick to the 60-day window in a fridge (33–41°F) with damp peat moss or paper towels for best results.
What’s the best soil mix for planting spruce seedlings after stratification?
Use a well-draining, acidic mix (pH 4.5–6.0) like 50% peat moss, 30% perlite, and 20% sand. Avoid garden soil—it’s too dense and can cause root rot. For container seedlings, ensure pots have drainage holes!
Why aren’t my seedlings growing after planting?
Check these first:
- Light: Spruces need bright, indirect light (south-facing window or grow lights).
- Moisture: Overwatering suffocates roots; underwatering stunts growth. Keep soil consistently damp.
- Temperature: Ideal range is 60–70°F during the day, cooler at night.
- Pests: Inspect for spider mites or fungus gnats (neem oil helps!).
Are there faster-growing spruce alternatives for quick shade?
If you need shade ASAP, consider:
- Leyland cypress (fast-growing but invasive in some areas).
- Eastern redcedar (drought-tolerant, cold-hardy).
- Thuja (Arborvitae) (compact, low-maintenance).
Wrapping up and next steps
Growing spruce tree seedlings through cold stratification is a rewarding process that unlocks their full potential in just 60 days! By mimicking nature’s cycles, you’ve given these young trees the best start for thriving in your garden or landscape.
Whether you’re a seasoned gardener or a curious beginner, this method proves that patience and care yield beautiful results.
Now that you’re armed with the know-how, take the next step—plant your seedlings outdoors in a well-drained, shaded spot (if young) or gradually acclimate them to sunlight. Watch them grow into majestic evergreens that’ll bring your outdoor space to life! 🌲✨