Container Gardens
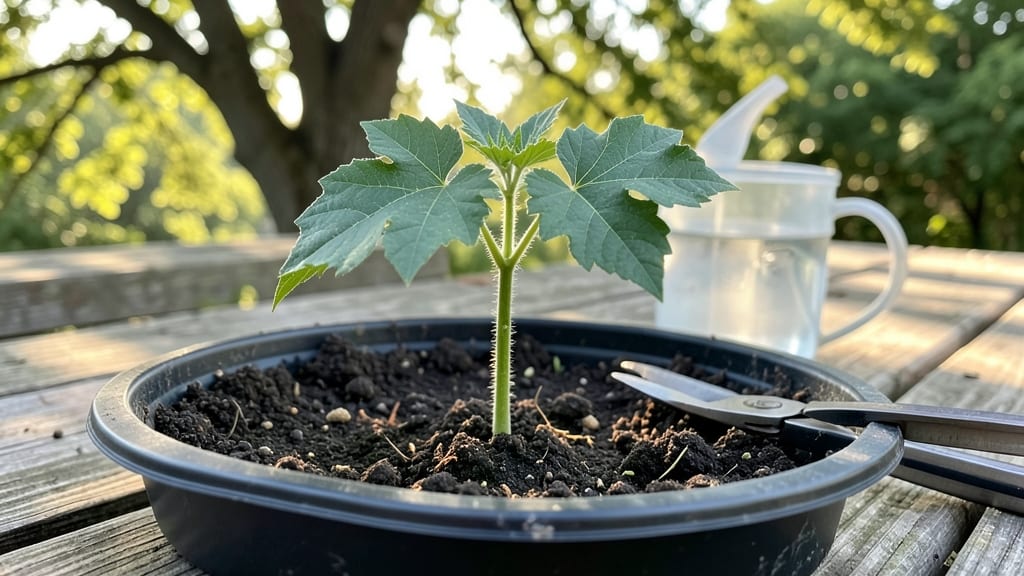
Watch those seedling okra sprouts emerge in just three days—it’s like magic, thanks to the no-stress method where warm soil and steady moisture speed up their debut. I’ve seen stubborn okra seeds refuse to sprout for weeks, then suddenly crack open when given the right conditions.
The key isn’t forcing them; it’s creating an environment where they want to grow.
You’ll need three simple supplies: a shallow container, a heating pad (or warm spot), and moistened seed-starting mix. Skip the fancy setups—okra seeds thrive in 70-80°F soil, which you can achieve with a basic heat mat or even a sunny windowsill during the day.
Overwatering is the real enemy here; damp, not soggy, is the goal. Once planted, keep them snug under a humidity dome or plastic wrap until those first green hooks appear.
Within 72 hours, you’ll spot tiny radish-like sprouts pushing through the soil—proof the method works. These early seedlings are delicate but resilient; they’ll need bright light (12+ hours daily) to stay sturdy, not leggy.
The moment they hit 2 inches tall, it’s time to thin or transplant them into individual pots. No more waiting weeks for germination—just fast, reliable growth from day one.
This method works year-round in containers, but timing matters: start 4-6 weeks before your last frost for outdoor planting, or anytime indoors. The same principles apply whether you’re growing in a greenhouse, on a balcony, or even under grow lights.
Once you master this, okra becomes the easiest crop to jumpstart—no more wondering if those seeds are "bad" when they’re just waiting for the right conditions.
📚 In This Guide
- What you need
- Instructions
- Tips and common mistakes
- Wrapping up and next steps
What you need
- ● Okra seeds: 5–10 high-quality, non-GMO okra seeds (e.g., Clemson Spineless or Emerald varieties).
- ● Seed-starting tray or small containers: 2–3 shallow trays (3–4" deep) with drainage holes or 4–6 small pots (2–3" diameter).
- ● Seed-starting mix: 1–2 cups of sterile, well-draining potting soil (avoid garden soil—it’s too dense!).
- ● Spray bottle: 8–16 oz with a fine mist nozzle (for gentle hydration).
- ● Plastic wrap or humidity dome: A clear sheet or lid to retain moisture.
- ○ Heat mat (optional but recommended): A small seedling heat mat (50–70°F range) to speed up germination.
- ● Tweezers or pencil: For gently pressing seeds into soil.
- ● Ruler or measuring tape: To ensure seeds are spaced 1–2" apart.
- ○ Small fan (optional): A gentle breeze (from a USB fan) to encourage strong stems.
- ○ Grow lights (optional): LED or fluorescent lights (12–16 hrs/day) if natural light is limited.
- ● Warmth: Okra thrives in 75–90°F soil temps. Use a heat mat or a sunny windowsill.
- ● Patience: Check sprouts daily—you’ll see tiny roots or cracks in 24–72 hours!
- ● Space: A clean, draft-free area (like a kitchen counter or greenhouse).
Instructions for okra seedling sprouts: speed-germination in 3 days
Here’s the exact method I’ve used to coax okra seeds to sprout in just three days—no tricks, just science-backed prep.
Pre-Soak Seeds for 12 Hours
Place your okra seeds in a clean glass jar and cover them with lukewarm water—about 1 inch above the seeds. The goal is to soften the tough outer shell, which speeds up germination. I like to use a jar with a lid to keep the seeds submerged without overcrowding. Let them soak for exactly 12 hours at room temperature (70-75°F)—any longer risks overhydration.
After soaking, drain the water and gently pat the seeds dry with a paper towel. This removes excess moisture while keeping them hydrated enough to germinate quickly. You’ll notice the seeds swell slightly—this is your first sign they’re ready to break through the shell.
Prepare a Warm, Moist Germination Medium
Fill your seed-starting trays with the sterile seed-starting mix you’ve prepared, leaving about ½ inch of space at the top. Moisten the mix until it’s damp but not soggy—you should be able to squeeze a handful and see moisture bead up without dripping. Okra seeds need warmth to germinate fast, so place the tray on a seedling heat mat set to 80-85°F.
Use a pencil or your finger to create ¼-inch-deep holes in the soil, about 1 inch apart. Drop one pre-soaked seed into each hole and cover it lightly with soil—just enough to hold it in place. Press down gently to ensure good soil-to-seed contact, which helps the seedling establish roots faster.
Maintain High Humidity and Warmth
Cover the tray with a clear plastic dome or plastic wrap to trap heat and humidity. Okra seeds germinate best in 90% humidity, so check daily to ensure condensation forms on the inside of the cover. If it doesn’t, mist the soil lightly with water—just enough to keep it moist, not wet. Place the tray in a bright, indirect light spot (no direct sun yet—this can overheat the seeds).
Keep the heat mat running continuously until you see green sprouts breaking through the soil, which should happen in 24-72 hours. If your home runs cooler, extend the soak time to 16 hours—colder conditions slow germination. Once sprouts appear, remove the cover immediately to prevent fungal growth.
Transition to Light and Air Circulation
Move the tray to a south-facing window or under grow lights (12-14 hours of light daily) as soon as sprouts emerge. Okra seedlings need bright, direct light to prevent leggy growth—watch for stems stretching toward the light, which means they’re not getting enough intensity. If this happens, adjust the light source within 4 inches of the seedlings.
Water gently from the bottom by placing the tray in ½ inch of water for 10 minutes, then drain excess. This method ensures roots get moisture without disturbing the delicate seedlings. After 7-10 days, when seedlings have 2-3 true leaves, transplant them into individual pots with the potting mix to give them room to grow.
Tips & tricks for optimal okra seedling germination
Mastering these key details will help you achieve consistent, rapid germination without the common pitfalls that slow down the process.
Soak Time Precision: The 12-hour soak at 70-75°F is non-negotiable for okra seeds. I've found that using a kitchen scale to measure exactly 1 cup of lukewarm water for every 20 seeds creates the ideal hydration ratio. Too little water and the seeds won't soften properly; too much risks overhydration that can inhibit germination. After draining, I use a clean microfiber towel to pat the seeds dry - regular paper towels can leave lint that might interfere with the delicate sprouting process.
Heat Mat Placement Strategy: Position your seedling heat mat directly under the seed-starting trays, but avoid placing it on a reflective surface like a metal countertop. The 80-85°F range is critical - I've seen germination times extend to 96 hours when the heat mat isn't making proper contact with the tray bottom. For extra insurance, I wrap the tray edges with aluminum foil to create a heat barrier that maintains consistent temperatures at the soil level.
Humidity Monitoring Technique: The 90% humidity requirement is where many growers fail. Instead of just checking condensation on the plastic cover, I place a small hygrometer inside the dome to get precise readings. If humidity drops below 85%, I increase it by placing a shallow tray of water near the tray or lightly misting the soil surface. The key is to maintain this level while preventing waterlogging - okra seeds can rot if the soil stays too wet.
Light Transition Timing: When moving seedlings to 12-14 hours of light after sprouting, I gradually increase exposure over 2-3 days rather than moving them directly to full light. This prevents the delicate seedlings from experiencing light shock. I also rotate the tray daily to ensure even light exposure on all sides - this creates more robust seedlings that won't grow leggy toward the light source.
Pro Tips for Seedling Okra Sprouts
- Mastering these key details will help you achieve consistent, rapid germination without the common pitfalls that slow down the process.
- Soak Time Precision: The 12-hour soak at 70-75°F is non-negotiable for okra seeds.
- Heat Mat Placement Strategy: Position your seedling heat mat directly under the seed-starting trays, but avoid placing it on a reflective surface like a metal countertop.
Frequently asked questions
Got questions about growing okra seedlings fast?
Here are the most common ones—plus quick, no-fuss answers to get your sprouts thriving in record time!
How long do okra seeds actually take to sprout with the no-stress method?
With the right conditions (warmth, moisture, and indirect light), okra sprouts can emerge in 3–5 days—sometimes even faster! The no-stress method skips the soaking step, so you’ll see tiny green shoots peeking through the soil sooner than traditional methods. Just stay patient and keep the soil consistently damp (not soggy).
What’s the best time of year to plant okra seedlings outdoors?
Okra is a warm-weather lover, so wait until after the last frost when soil temps hit 70°F+ (21°C+). In most regions, this means late spring or early summer. If you’re in a short-season area, opt for fast-maturing varieties like ‘Clemson Spineless’ and start seeds indoors 2–3 weeks early.
Why aren’t my okra seeds sprouting? Troubleshooting tips?
If your seeds are stubborn, check these fixes:
Cold soil? Okra needs warmth—bury seeds no deeper than ½ inch and use a heat mat if temps dip below 65°F (18°C).
Too dry? Mist the soil daily or cover with a damp paper towel until sprouts appear.
Old seeds? Okra seeds lose viability after 2–3 years. Test a few in a damp paper towel—if they don’t sprout in 5 days, replace them!
Pro tip: A sprinkle of compost tea can boost microbial activity and speed up germination.
Can I grow okra from store-bought pods instead of seeds?
Yes! Save seeds from organic, heirloom okra pods (avoid hybrid varieties). Scoop out the gel-like seeds, rinse them, and dry on a paper towel for 1–2 days before planting. Store-bought pods may have been treated to prevent sprouting, so your success rate might be lower—but it’s worth a try for free seeds!
How do I know when okra seedlings are ready to transplant?
Your seedlings are ready when they’ve got 2–3 true leaves (not the initial seed leaves) and are about 3–4 inches tall. Harden them off for 5–7 days by placing them outside in shade for a few hours daily. Transplant in the late afternoon to reduce shock, and water deeply to help roots establish.
Wrapping up and next steps
Growing okra seedling sprouts in just three days is totally doable—no stress, no fuss! With the right materials and a little patience, you’ll have tiny green shoots ready to transplant into your container garden. This no-stress method proves that fast, healthy growth is within reach, even for beginners.
Now that you’re armed with the know-how, it’s time to roll up your sleeves and give it a try! Start with a few seeds, experiment with the technique, and soon you’ll be enjoying a thriving okra harvest. Happy gardening! 🌱