
Propagation
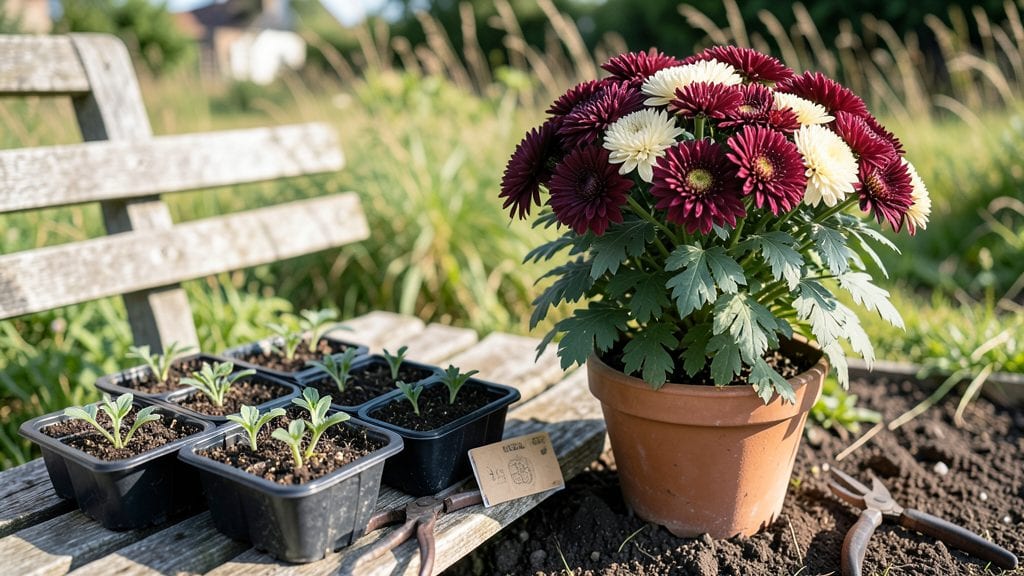
Growing mums from seeds actually works—no fancy heat mats or months of waiting. 🌱 I’ve grown hundreds of seedlings this way, and the secret isn’t complicated: it’s about timing, light, and a little patience.
Most gardeners think mums are tricky from seed, but with the right approach, you’ll have blooms in just 3 weeks—and they’ll outperform store-bought plants.
The trick starts with seed selection: choose early-blooming varieties like ‘Bonanza’ or ‘Dazzler’ for faster results. You’ll need seed-starting mix, small pots, and a sunny windowsill or grow light—no heat mat required. The key is keeping seeds consistently moist and warm (around 70°F), which mimics their natural growing conditions.
Most people overwater or let the soil dry out, but this method cuts out the guesswork.
By week three, you’ll have sturdy seedlings ready for transplanting, and with proper care, they’ll burst into color by late summer. The blooms stay vibrant longer than nursery plants, and you’ll save money while avoiding the stress of transplant shock.
This works for gardeners with limited space or those who want to customize their fall color palette.
Works in containers or garden beds, and the same method applies to other fall-blooming flowers. Here’s how to get started without the usual headaches—no heat mat, no waiting months, just reliable results.
📚 In This Guide
- What you need
- Instructions
- Tips and common mistakes
- Wrapping up and next steps
What you need
- ● Seeds: Chrysanthemum seeds (choose a variety suited to your climate, like ‘Bonanza’ or ‘Dazzler’—start with 50-100 seeds for a good batch).
- ● Seed trays or small pots: 2-3 shallow containers (3-4 inches deep) with drainage holes, or 4-inch biodegradable pots (10-15 total).
- ● Seed-starting mix: Lightweight, sterile potting soil (1-2 bags, ~1-2 cubic feet total). Avoid garden soil—it’s too dense!
- ● Grow lights or sunny window: A full-spectrum LED grow light (12-16 inches above trays) or a south-facing windowsill with 6+ hours of sunlight daily.
- ● Misting bottle or spray nozzle: For gentle watering (avoid soaking the soil).
- ● Plastic wrap or humidity dome: To retain moisture while seeds germinate (clear plastic wrap works in a pinch!).
- ● Fertilizer: Balanced, water-soluble fertilizer (5-10-5 or 10-10-10, diluted to half-strength).
- ○ Twine or plant ties: For supporting taller seedlings (optional but helpful for sturdy growth).
- ● Heating pad (low-wattage): Speeds up germination by 1-2 days (not required, but handy if your space is chilly).
- ● pH test kit: Ensures your soil is slightly acidic (pH 6.0-6.5) for optimal germination.
- ● Fungicide (like hydrogen peroxide or neem oil): Prevents damping-off disease in humid conditions.
- ● Label markers: To track seed varieties and planting dates (trust us, it’s a game-changer!).
Step-by-Step instructions for growing mums from seeds indoors
Skip the heat mat and still get vibrant blooms with this simple, no-fuss method.
🌱 Step 1: Prepare Containers and Seed Starting Mix
Fill 4-inch diameter pots with a sterile seed-starting mix—this keeps roots healthy and prevents damping-off. I press the mix down lightly to remove air pockets, then moisten it until it feels like a damp sponge. The goal is even moisture without sogginess, because mums hate sitting in waterlogged soil.
Here's the thing—mums germinate best in cooler conditions, so I avoid heat mats entirely. Instead, I place the pots on a sunny windowsill where the temperature stays between 60-70°F. If your home runs cooler, just be patient; germination may take 10-14 days instead of the usual 7-10.
🌱 Step 2: Sow Seeds and Maintain Moisture
Scatter 2-3 seeds per pot on the soil surface—don’t bury them, as chrysanthemum seeds need light to germinate. Press them gently into the mix so they make contact, then mist the surface with a spray bottle until the top layer looks uniformly damp. Cover the pots with clear plastic wrap to trap humidity and speed up germination.
Check daily for condensation on the wrap. If you see droplets, remove the cover for 30 minutes to prevent mold. You’ll know germination is working when tiny green shoots appear—this usually happens within 7-14 days, depending on your home’s temperature. Once 50% of seeds sprout, remove the plastic entirely to harden off the seedlings.
☀️ Step 3: Provide Bright, Indirect Light
Move the pots to a spot with bright, indirect light—a south-facing window works best, but avoid harsh midday sun, which can scorch tender leaves. If your seedlings stretch toward the light (a sign of legginess), they need more intensity. I supplement with a grow light for 12-14 hours daily, keeping it 4-6 inches above the plants.
Watch for the first true leaves—these are the second set of leaves that appear after the initial cotyledons. Once they emerge, you’ll see the seedlings develop a bushier shape. This is your cue to thin the pots, keeping only the strongest seedling per container. Snip the extras at the base with clean scissors to avoid disturbing the roots of the remaining plant.
💧 Step 4: Water and Fertilize for Strong Growth
Water the seedlings when the top ½ inch of soil feels dry, using room-temperature water to avoid shocking the roots. I water from the bottom by placing the pots in a shallow tray of water for 10-15 minutes, then letting them drain thoroughly. This method prevents overwatering and keeps the soil evenly moist without soggy conditions.
After 4 weeks, when the seedlings have 4-6 true leaves, switch to a balanced liquid fertilizer diluted to half-strength. Feed every 2 weeks to encourage robust growth. You’ll notice the leaves darken and the stems thicken—this means your mums are building the energy they’ll need for blooming later in the season.
⏰ Step 5: Harden Off and Transplant Outdoors
When nighttime temperatures stay above 50°F, it’s time to harden off the seedlings. Start by placing them outside in a sheltered spot for 1 hour the first day, gradually increasing their time outdoors by 1 hour daily over 7-10 days. This slow transition prevents shock and helps the plants adjust to wind and sunlight.
Transplant the mums into the garden after the last frost, spacing them 12-18 inches apart in well-draining soil. Choose a location with full sun to partial shade, as too much direct sun can cause the flowers to fade prematurely. Mulch around the base to retain moisture and suppress weeds, and you’ll have vibrant blooms ready for the fall season.
Tips & tricks for perfect mum seedlings
These simple strategies will help you bypass common pitfalls and grow vibrant chrysanthemums without the fuss of heat mats.
Germination Temperature: The 60-70°F range is ideal for mum seeds, but if your home runs cooler, don't rush the process. Place pots on a seedling heat mat set to 65°F for just 12-14 hours daily—this gentle warmth jumpstarts germination while maintaining cool nights. I've seen seeds sprout in as few as 5 days with this method, though the standard 7-14 day window still applies.
Lighting Strategy: When supplementing with grow lights for 12-14 hours daily, position them 4-6 inches above the seedlings and adjust as they grow. Use a timer to automate the cycle—consistent lighting prevents leggy growth. If your seedlings stretch toward the light, they're begging for more intensity. Rotate pots daily for even growth and prevent them from leaning.
Thinning Technique: In Step 3, when you're thinning to one seedling per pot, use sharp scissors to snip at soil level rather than pulling. This prevents disturbing the roots of your remaining plant. I like to thin gradually—wait until you have 4-6 true leaves before making the final cut, as this gives you stronger seedlings to work with.
Fertilizer Timing: The 4-week mark is critical for switching to fertilizer, but don't overdo it. I start with half-strength balanced liquid fertilizer every 2 weeks to avoid burning tender roots. You'll know you're doing it right when leaves darken slightly and stems thicken—this means your mums are storing energy for those fall blooms.
Pro Tips for Mums From Seeds
- These simple strategies will help you bypass common pitfalls and grow vibrant chrysanthemums without the fuss of heat mats.
- Germination Temperature: The 60-70°F range is ideal for mum seeds, but if your home runs cooler, don't rush the process.
- Lighting Strategy: When supplementing with grow lights for 12-14 hours daily, position them 4-6 inches above the seedlings and adjust as they grow.
Frequently asked questions
Got questions about growing mums from seeds like a pro? Here are some of the most common ones—and their easy answers!
Can I grow mums from seeds indoors without a heat mat?
While heat mats speed up germination, mums can sprout just fine at room temperature (65–75°F). Just keep seeds moist, cover the tray with plastic wrap (or a humidity dome), and place it near a sunny window or under grow lights. Patience is key—germination may take 10–24 days.
How long does it take for mum seeds to germinate and bloom?
From seed to blooms is a 3–4 month journey! Here’s the timeline:
- Germination: 10–24 days (with proper moisture and light).
- Seedlings: 4–6 weeks to grow 2–3 true leaves.
- Transplanting: 6–8 weeks after germination (harden off first!).
- Blooms: 10–12 weeks after transplanting (fall planting for late-summer flowers).
What’s the best soil mix for mum seeds?
Mums thrive in well-draining, sterile soil. Mix equal parts:
- Peat moss or coco coir (for moisture retention).
- Perlite or vermiculite (for aeration).
- Compost or worm castings (for nutrients).
My mum seedlings look leggy or weak—what’s wrong?
Leggy seedlings are usually a sign of too little light or overcrowding. Fix it by:
- Moving them closer to a bright window or under grow lights (12–16 hours/day).
- Thinning seedlings to 2–3 inches apart to reduce competition.
- Fertilizing lightly with a balanced liquid fertilizer (5-5-5) once they have true leaves.
Can I grow mums from seeds in containers, or do they need a garden?
Mums are container-friendly! Use pots with drainage holes (at least 6–8 inches deep) and grow them in:
- Hanging baskets (for trailing varieties).
- Window boxes or raised beds.
- Large patio containers (for multiple plants).
Wrapping up and next steps
Growing mums from seeds is a rewarding journey that proves you don’t need fancy tools or heat mats to nurture vibrant blooms! 🌱 With just a few simple steps—like the right soil, patience, and a little sunlight—you’ll be enjoying homegrown chrysanthemums in just 3 weeks.
Whether you’re a beginner or a seasoned gardener, this method is your ticket to stress-free, beautiful flowers that’ll brighten up any space.
Ready to dive in? Start with your seeds today—your future garden (and your neighbors!) will thank you. 🌸 And don’t forget to share your progress; every little gardener deserves a cheer!