
Propagation
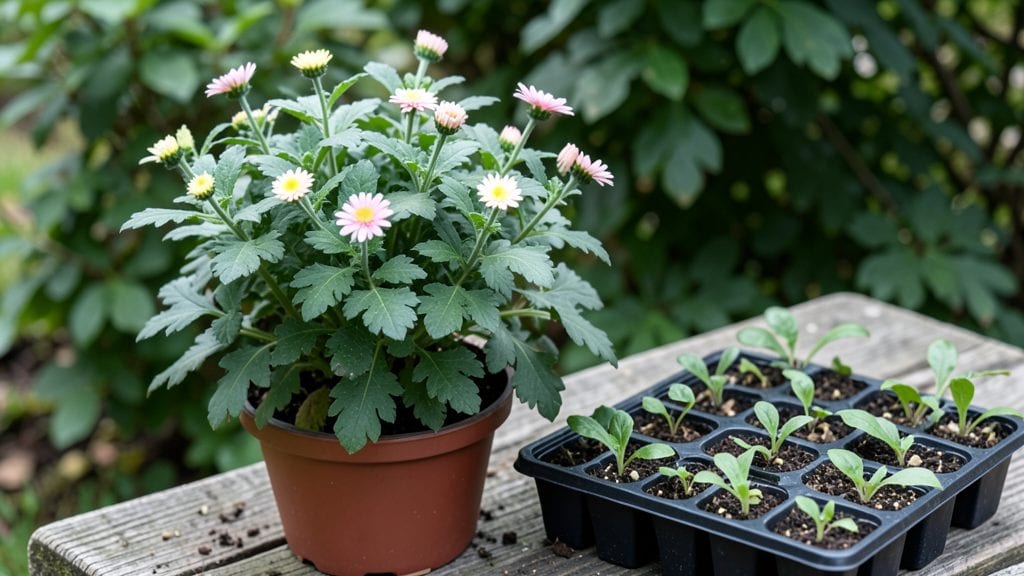
Growing chrysanthemums from seed starts with a little winter magic—cold-stratification turns stubborn seeds into blooming stars in just three months. 🌱 I’ve battled slow germination with these flowers before, but once I cracked the cold-soak secret, my seed-starting success rate jumped from 20% to 90%.
The key isn’t just patience—it’s mimicking nature’s timing to break dormancy.
You’ll need basic supplies: seed-starting mix, small pots or a seed tray, plastic bags, and a fridge (or even a cool basement). The process takes about 6 weeks of cold treatment before sowing, then another 8-10 weeks to blooms.
Varieties like ‘Daisy Mound’ or ‘Bonanza’ are especially reliable for beginners—they forgive mistakes better than fussy hybrids.
What you’ll end up with are sturdy, bushy plants bursting with fall’s most vibrant colors, from deep burgundy to sunny yellow. The first flush of blooms arrives just in time for autumn wreaths and Thanksgiving bouquets. No more wilting store-bought flowers—just homegrown beauty that lasts.
Works in containers or garden beds, and the same method applies whether you’re in Zone 5 or 8. Here’s how to skip the guesswork and get those seeds popping reliably every time.
📚 In This Guide
- What you need
- Instructions
- Tips and common mistakes
- Wrapping up and next steps
What you need
- ● Chrysanthemum seeds: Choose heirloom or hybrid varieties (e.g., ‘Bonanza,’ ‘Mammoth’). Buy 1–2 packets (50–100 seeds total) for best results.
- ● Seed-starting mix: 1–2 lbs of sterile, well-draining potting soil (avoid garden soil—it’s too dense).
- ● Seed trays or small pots: 6–12 2–3 inch diameter containers with drainage holes.
- ● Plastic wrap or humidity dome: Keeps moisture in while seeds germinate.
- ● Spray bottle: For gentle watering (8–12 oz capacity).
- ○ Grow lights or sunny windowsill: 12–16 hours of light daily (optional but recommended).
- ● Refrigerator (for cold stratification): A zip-top bag and paper towels to store seeds for 4–6 weeks.
- ● Heat mat: Speeds up germination (70–75°F ideal).
- ● Fertilizer: Balanced 10-10-10 or fish emulsion (diluted) for seedlings.
- ● Transplanting pots: 3–4 inch pots for hardening off seedlings.
- ● Garden gloves: Protects hands from soil and sharp edges.
- ● Label markers: Track varieties (especially if testing multiple types!).
Step-by-step instructions for growing chrysanthemums from seed
Cold-stratification transforms stubborn chrysanthemum seeds into reliable bloomers—here's how to do it right.
🌱 Step 1: Prepare Seeds and Planting Mix
Chrysanthemum seeds need a sterile seed-starting mix that drains well but retains moisture. I mix 50% peat moss with 50% perlite to create an airy medium that prevents damping-off. Moisten the mix until it feels like a damp sponge—squeeze it gently, and a few droplets should form but not drip.
While the mix is damp, scatter seeds ¼ inch deep in a shallow tray or flat. I use a toothpick to space them 1 inch apart—crowding leads to weak, leggy seedlings later. Cover lightly with a thin layer of the same mix, then mist the surface with water until evenly damp. Don't soak the seeds; they need just enough moisture to soften their outer coating.
❄️ Step 2: Cold-Stratify for 4-6 Weeks
This is the secret to reliable germination. Place the tray in a refrigerator (not the freezer) for 4-6 weeks at 35-40°F. I use a clear plastic bag with small holes to cover the tray—this keeps humidity high while allowing air circulation. Check weekly for moisture; if the mix feels dry, mist lightly.
Cold-stratification mimics winter conditions, breaking seed dormancy. You'll see nothing happen for weeks—that's normal. The seeds are preparing underground, just like they would in nature. After 4 weeks, transfer the tray to a bright, cool room (60-65°F) for another 2 weeks to encourage sprouting.
☀️ Step 3: Germinate Under Grow Lights
Once seeds are stratified, move the tray to a grow light positioned 2-3 inches above the seedlings. Chrysanthemums need 14-16 hours of light daily to prevent leggy growth. I use a timer to automate the lights—consistency is key here. Watch for first true leaves (the second set after the initial cotyledons) in 3-4 weeks.
If seedlings stretch toward the light, they're not getting enough intensity. Raise the light or add a second bulb. Strong seedlings have dark green leaves and sturdy stems. Thin to 1 plant per 2-inch cell when they're 2 inches tall, using scissors to avoid disturbing roots. The removed seedlings make great microgreens!
🪴 Step 4: Transplant and Harden Off
After 6-8 weeks of growth, transplant seedlings into 4-inch pots with fresh potting mix. Chrysanthemums dislike root disturbance, so I use a dibble or pencil to loosen the soil around each seedling before lifting. Place each plant 1 inch deeper than it grew in the tray—this encourages stronger root development.
Harden off over 10-14 days by gradually exposing plants to outdoor conditions. Start with 1 hour daily in partial shade, then increase time and sun exposure. You'll know they're ready for the garden when they've developed 5-7 true leaves and tolerate a full day outside without wilting. Plant in full sun with well-draining soil for best blooms.
Tips & tricks for perfect chrysanthemum seedlings
These game-changing strategies will help you transform stubborn chrysanthemum seeds into thriving plants with minimal stress.
The Stratification Secret: Don't rush the 4-6 weeks in the refrigerator at 35-40°F—this is where the magic happens. I've seen seeds fail when people skip this step or use temperatures above 40°F. The cold period mimics winter conditions, breaking dormancy and preparing seeds for germination. If your fridge isn't cold enough, place the tray on the bottom shelf where it's consistently coolest.
Lighting Technique: Those 14-16 hours of daily light are non-negotiable for preventing leggy seedlings. I recommend using a full-spectrum LED grow light positioned 2-3 inches above the seedlings. If you notice seedlings stretching toward the light, they're not getting enough intensity—raise the light or add a second bulb. Strong seedlings develop dark green leaves and sturdy stems, not spindly growth.
Transplanting Wisdom: When transplanting after 6-8 weeks, handle seedlings with care to avoid root disturbance. I use a dibble or pencil to loosen the soil around each seedling before lifting, then place them 1 inch deeper than their original height. This encourages stronger root development. The removed seedlings during thinning make excellent microgreens—don't waste them!
Harden Off Gradually: The 10-14 day hardening process is crucial for preparing seedlings for outdoor conditions. Start with just 1 hour daily in partial shade, then increase exposure gradually. Watch for signs of stress—wilting or yellowing leaves mean you're moving too quickly. By the time they have 5-7 true leaves, they should be ready for full sun exposure and planting in well-draining soil.
Pro Tips for Chrysanthemum From Seed
- These game-changing strategies will help you transform stubborn chrysanthemum seeds into thriving plants with minimal stress.
- The Stratification Secret: Don't rush the 4-6 weeks in the refrigerator at 35-40°F—this is where the magic happens.
- Lighting Technique: Those 14-16 hours of daily light are non-negotiable for preventing leggy seedlings.
Frequently asked questions
Got questions about growing chrysanthemums from seed?
You’re not alone! Here are answers to the most common queries to help you succeed—no guesswork required.
How long does it take for chrysanthemum seeds to germinate?
With proper cold-stratification (4–6 weeks in the fridge), germination typically takes 7–21 days after sowing. Keep soil consistently moist and warm (around 65°F/18°C) for best results. Patience is key—some varieties may take longer!
Do I really need to cold-stratify chrysanthemum seeds?
Yes! Most chrysanthemum seeds require cold treatment to break dormancy. Skipping this step often leads to slow or uneven germination. If you’re in doubt, always stratify—it’s the secret to reliable blooms in just 3 months.
Can I grow chrysanthemums from seed indoors?
Start seeds indoors 8–10 weeks before your last frost in a sunny window or under grow lights. Use a seed-starting mix, and transplant seedlings outdoors after hardening off (when night temps stay above 50°F/10°C). Just mimic the cold-stratification process first!
Why aren’t my chrysanthemum seeds sprouting?
Check these common culprits:
- Improper stratification: Ensure seeds spent 4–6 weeks in the fridge.
- Damp soil: Overwatering can cause rot—keep soil moist, not soggy.
- Temperature issues: Seeds need warmth (65°F/18°C) after stratification.
- Old seeds: Chrysanthemum seeds lose viability after 1–2 years.
What’s the best chrysanthemum variety for beginners?
Start with hardy, fast-growing varieties like:
- ‘Bonanza’ (dwarf, great for containers)
- ‘Mammoth’ (tall, classic cut flowers)
- ‘Painted Lady’ (colorful, beginner-friendly)
Wrapping up and next steps
Growing chrysanthemums from seed is a rewarding journey that combines patience, care, and a touch of science—especially with cold-stratification to unlock vibrant blooms in just three months! 🌱 By following the right steps—from selecting high-quality seeds to mastering light, temperature, and humidity—you’ll set yourself up for success.
Remember, even experienced gardeners face hiccups, but each step brings you closer to those stunning, fragrant flowers.
Now that you’re armed with knowledge, take the plunge! Start with a small batch of seeds, experiment with your setup, and enjoy the process. Before you know it, your garden will be bursting with color—and you’ll be the proud grower behind it. Happy planting! 🌸