
Picking
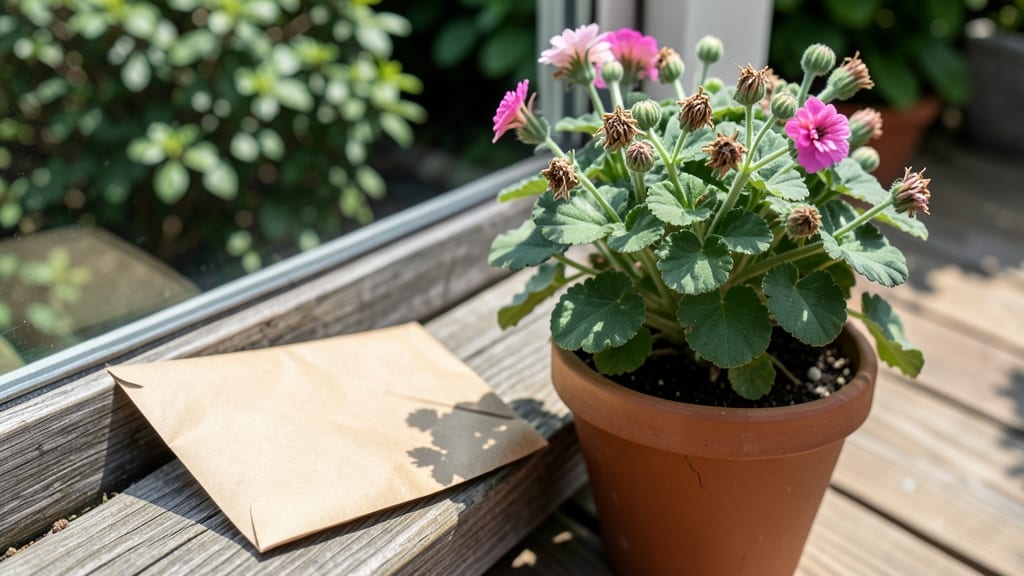
Harvesting geranium seeds at the right moment means fast blooms next season and plants that grow bushier than ever. 🌱 I’ve learned the hard way that waiting too long means seeds scatter before you can collect them, while harvesting too early gives you weak, nonviable seeds.
The key is timing those dry, papery seed pods—when they’re brown but still intact.
You’ll need just a few simple things: a small paper bag or envelope for storage, a pair of clean scissors or your fingers, and a dry spot to work. The process takes about 15 minutes once you spot the ripe pods, and it’s easier than you’d think.
Just avoid humid days—moisture turns those pods into a sticky mess that sticks to everything.
Once you’ve collected the seeds, store them in a cool, dark place for up to a year. Plant them indoors 8-10 weeks before your last frost, and you’ll see those familiar geranium blooms popping up in just 3 weeks—faster than starting from cuttings.
The payoff? A bushier plant with more flowers than the ones you bought at the nursery.
Fair warning: some geranium varieties self-seed aggressively, so keep an eye out for volunteer plants popping up where you don’t want them. But if you’re patient and precise with your harvest, you’ll have a steady supply of fast-growing, hardy geraniums for years to come.
📚 In This Guide
- What you need
- Instructions
- Tips and common mistakes
- Wrapping up and next steps
What you need
- ● Mature geranium plants: Choose healthy, well-established plants with fully developed seed pods (usually after blooming season). Pro tip: 🌡️ Wait until the seed pods turn brown and papery—this means they’re ripe!
- ● Small paper bags or envelopes: 5–10 bags (1 per plant or per seed type if cross-pollinated). Use breathable materials like brown paper or unbleached paper bags to prevent moisture buildup.
- ● Scissors or pruning shears: Sharp and clean to snip seed pods without damaging the plant.
- ● Labeling markers or tags: Permanent markers or small plant tags to label seeds by variety and harvest date.
- ○ Desiccant (optional but helpful): Silica gel packets or uncooked rice (placed in a small mesh bag) to absorb moisture during drying.
- ● Drying tray or screen: A flat, elevated surface (like a cooling rack or wire mesh) to allow airflow around seed pods.
- ● Air-tight containers: Small glass jars, plastic containers with tight lids, or resealable bags with oxygen absorbers (for long-term storage).
- ○ Fine-mesh sieve or sifter: Optional but handy for separating seeds from chaff after drying.
- ○ Humidity indicator (optional): A small moisture meter or silica gel indicator to monitor storage conditions.
- ● Patience: Geranium seed pods can take 2–4 weeks to fully mature after flowering.
- ● Dry weather: Harvest seeds on a sunny, dry day to avoid dampness.
- ● Knowledge of your geranium varieties: Some geraniums (like Pelargonium) are self-pollinating, while others may cross-pollinate. Label accordingly to maintain purity!
How to harvest geranium seeds for next season’s fastest growth
Skip the store-bought plants and grow your own geraniums—here’s how to collect seeds for bushier, blooming plants in just three weeks.
🌱 Step 1: Identify and Select Healthy Seed Heads
Wait until your geraniums produce fully dried seed pods—they’ll look like tiny, papery balls hanging from the stems. Avoid pods that are still green or have started splitting open. The best time to harvest is in late summer or early fall, when the pods are brown and crispy to the touch.
Gently twist the dried seed pods between your fingers until they release the tiny seeds inside. I like to do this over a clean sheet of paper or a small bowl to catch every last one. If you miss any, they’ll scatter on the ground and may not germinate as reliably.
🪴 Step 2: Dry and Store Seeds Properly
Spread the harvested seeds in a single layer on a dry, flat surface—like a paper towel or a piece of cardboard—for 3-5 days in a warm, dry place. This ensures any remaining moisture evaporates, preventing mold. Stir them gently once a day to avoid clumping.
Once completely dry, transfer the seeds to a small envelope or airtight container. Label it with the geranium variety and the harvest date. Store in a cool, dark place—like a pantry or seed drawer—where they’ll stay viable for 2-3 years. Humidity is the enemy here, so avoid plastic bags.
☀️ Step 3: Start Seeds Indoors for Fast Germination
Sow your geranium seeds 8-10 weeks before your last frost date in small pots filled with the seed-starting mix. Press each seed lightly into the surface—don’t bury them, as geranium seeds need light to germinate. Cover the pot with a clear plastic dome or wrap it in plastic wrap to retain moisture and warmth.
Place the pot in a warm spot, like on top of the fridge or near a sunny window, where temperatures stay between 65-75°F. Germination usually takes 10-14 days, but don’t give up if it takes longer—geraniums can be finicky. Once sprouts appear, remove the cover and move them to a bright spot with 6+ hours of indirect light daily.
✂️ Step 4: Thin and Harden Off Seedlings
When seedlings reach 2 inches tall and have their first true leaves, thin them so only the strongest plant remains in each pot. Use clean scissors to snip the weaker stems at soil level—this prevents disturbing the roots of the plants you’re keeping. Water lightly after thinning to help the remaining seedlings establish.
About 2 weeks before transplanting outdoors, start hardening off your seedlings by placing them outside in a sheltered spot for 1-2 hours the first day. Gradually increase their time outside over 7-10 days
Move your hardened-off seedlings outdoors after the last frost, spacing them 12-18 inches apart in well-draining soil. Geraniums love full sun, so choose a spot with 6+ hours of direct sunlight daily. Water deeply at the base after planting to help the roots settle in. To encourage bushier growth and more blooms, pinch back the tips of the stems when they reach 4-6 inches tall. This trick tells the plant to focus on growing wider instead of taller. With proper care, your homegrown geraniums will be blooming beautifully in just 3 weeks—far faster than store-bought plants!🌿 Step 5: Transplant and Encourage Bushy Growth
Tips & tricks for perfect geranium seed harvesting
A few simple tricks will help you maximize seed viability and grow bushier, faster-blooming geraniums next season.
Timing Secret: Harvest seed pods only after they've fully dried and turned crispy brown—this usually happens in late summer or early fall. I've learned the hard way that green pods won't release seeds properly, and split-open pods mean you've missed your window. The 3-5 day drying period in Step 2 is non-negotiable for preventing mold, so don't rush this step.
Storage Wisdom: For long-term seed storage, use small envelopes or airtight containers with silica gel packets to absorb any moisture. I label mine with both the variety and harvest date—this helps me track which seeds to use first. The cool, dark pantry environment keeps seeds viable for 2-3 years, but check them annually for any signs of moisture or pests.
Heat Control: Maintain that 65-75°F range during germination by placing pots on top of your fridge or near a sunny window. I've found that using a small heat mat under the pots can help maintain consistent warmth, especially if your home tends to be cool. This temperature range is crucial for breaking geranium seeds' dormancy and encouraging faster germination within those 10-14 days.
Make-Ahead Move: You can actually prepare your seed storage containers up to a month ahead of harvest time. Just leave them empty and labeled—this way, you're ready to transfer seeds as soon as they're dry. I also like to prep my seed-starting mix in advance and store it in a sealed container to maintain its moisture balance until planting time.
Pro Tips for Harvest Geranium Seeds
- A few simple tricks will help you maximize seed viability and grow bushier, faster-blooming geraniums next season.
- Timing Secret: Harvest seed pods only after they've fully dried and turned crispy brown—this usually happens in late summer or early fall.
- Storage Wisdom: For long-term seed storage, use small envelopes or airtight containers with silica gel packets to absorb any moisture.
Frequently asked questions
Got questions about harvesting geranium seeds? You’re not alone!
Here are some of the most common queries—and their straightforward answers—to help you grow like a pro.
When is the best time to harvest geranium seeds?
Harvest seeds when the geranium pods just start turning brown and dry but haven’t split open yet—usually late summer to early fall (August–September in most climates). If you wait too long, the seeds will scatter, and you’ll lose your harvest.
Can I harvest seeds from store-bought geraniums?
Yes, but with a caveat! Many hybrid or F1 geraniums (like those from nurseries) produce sterile seeds that won’t grow true to the parent plant. For reliable results, opt for heirloom varieties or ask local growers for seed-saving tips.
What if my geranium pods don’t open on their own?
No worries! If the pods stay closed, gently squeeze or tap them over a paper bag to release the seeds. For stubborn pods, place them in a dry, warm spot (like a sunny windowsill) for a few days to encourage drying and splitting. Patience is key!
How do I store harvested geranium seeds for next year?
Keep seeds in a cool, dry place (like a sealed envelope or jar) for up to 2–3 years. Add a damp paper towel to the container to maintain humidity—this prevents mold and keeps viability high. Label with the harvest date!
What if my geranium seeds don’t germinate?
Try these fixes:
- Freshness: Seeds lose viability over time—test with a moist paper towel for 3–5 days to check viability.
- Light: Geranium seeds need light to germinate—don’t bury them; just press them into soil.
- Warmth: Use a heat mat (70–75°F) to speed up sprouting.
Wrapping up and next steps
Harvesting geranium seeds is your ticket to fast, vibrant blooms and lush, bushy growth—all in just three weeks! By following the right steps, you’ll ensure healthy seed collection, proper drying, and successful storage for future planting.
Whether you’re a seasoned gardener or a curious beginner, this process is simple, rewarding, and full of potential.
Now that you’re armed with the know-how, roll up your sleeves and get growing! Start by selecting the healthiest geraniums in your garden, and soon, you’ll be enjoying a burst of color that’ll make your green space shine. Ready to dive in? Grab your tools and let the seed-saving adventure begin! 🌱✨