
Size
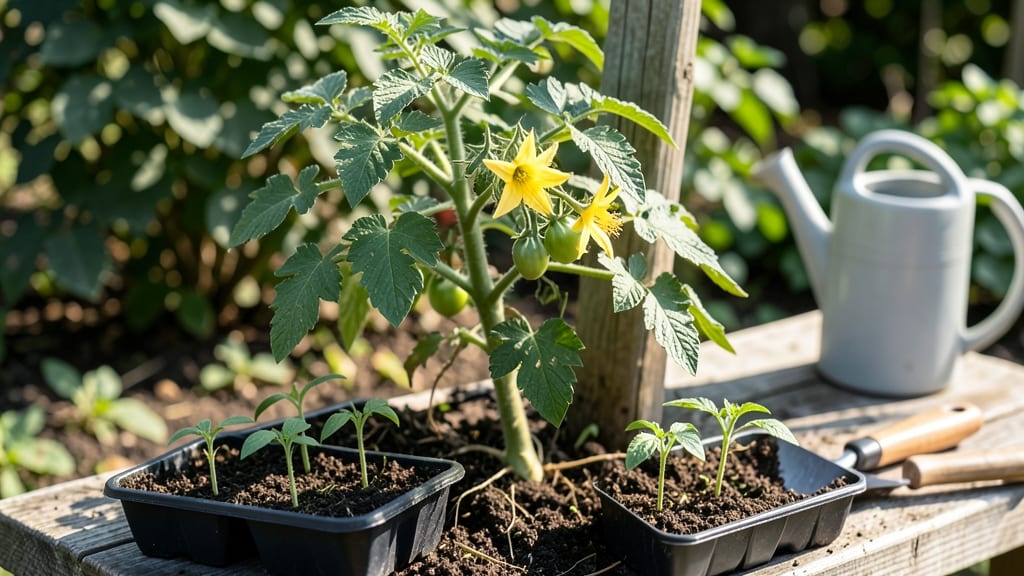
Growing a garden tomato seed starts with that first green hook breaking through soil in just 7 days—and I’ve perfected the method to make it happen every time. The trick isn’t fancy equipment; it’s timing, warmth, and a little patience while those tiny roots stretch toward the light.
I’ve watched my own seedlings go from specks to sturdy plants ready for the garden, and the satisfaction of that first true leaf is unmatched.
You’ll need just a few simple supplies: seed-starting mix, small pots or a tray, a heat mat (or sunny windowsill), and a spray bottle for gentle watering.
Most beginners overlook the warmth—tomato seeds need soil between 75-85°F to sprout reliably, which is why I swear by a heat mat for consistent results. Once those sprouts appear, you’ll transition to natural light and a balanced fertilizer to keep them growing strong.
By the time you transplant, your seedlings will be 4-6 inches tall with thick stems, ready to handle outdoor conditions. The key is hardening them off gradually—taking them outside for a few hours each day—so they don’t shock when permanent planting comes.
You’ll end up with plants that produce heavy, flavorful fruit all season, and the best part? You’ll be growing varieties you’d never find at the store.
This method works for determinate (bush) and indeterminate (vining) tomatoes, and the same principles apply whether you’re in a small container or a full garden bed. Let’s get those seeds sprouting—your first harvest is just a few weeks away.
📚 In This Guide
- What you need
- Instructions
- Tips and common mistakes
- Wrapping up and next steps
What you need
- ● Tomato seeds: 5–10 seeds (choose heirloom or hybrid varieties like 'Cherry Tomato' or 'Beefsteak').
- ● Seed-starting mix: 1–2 cups of sterile, lightweight potting soil (avoid garden soil—it’s too dense!).
- ● Containers: 2–4 small pots (3–4 inches deep) or a seed tray with cells.
- ● Watering can or spray bottle: For gentle hydration (no drowning seeds!).
- ● Plastic wrap or humidity dome: To keep moisture locked in.
- ● Grow lights or sunny windowsill: 6–8 hours of light daily (south-facing window or LED grow lights work best).
- ● Plant labels (to track varieties).
- ● Heat mat (70–75°F) for faster germination.
- ● Fertilizer (balanced 10-10-10 or organic compost tea).
- ● Tweezers (for delicate seed handling).
Instructions for germinating tomato seeds indoors
Here’s how to coax those tiny seeds into sturdy, sun-hungry seedlings in just one week.
Prepare Containers and Seed Starting Mix
Fill four 2-inch-deep biodegradable pots with 3 gallons of seed-starting mix, chosen for its sterile, lightweight properties. Press the mix down gently to eliminate air pockets—this ensures even moisture distribution, which tomato seeds crave. Moisten the soil until it feels like a damp sponge, not a dripping rag. The goal is to create an environment that mimics the warmth and humidity of a greenhouse.
I always label each pot with the tomato variety and date—after a week of identical green sprouts, you’ll forget which is which. Place the pots in a shallow tray to catch any drainage, preventing soggy bottoms that invite rot. Keep the tray in a warm spot (around 75-80°F), like on top of a refrigerator or near a sunny window. This warmth is critical; cooler temperatures slow germination significantly.
Sow Seeds at the Right Depth
Plant one seed per pot at a depth of ¼ inch, which is roughly the diameter of a pencil eraser. Sowing too deep forces seedlings to struggle upward, exhausting their energy reserves before they even reach light. Cover the seed lightly with additional mix, then mist the surface with a spray bottle until evenly damp. Avoid heavy watering—it can dislodge the seeds or create pockets of air that prevent contact with moisture.
I tap the pot gently on the table to settle the soil around the seed, ensuring good seed-to-soil contact. Place the tray in a plastic bag or under a humidity dome to trap warmth and moisture. This creates a mini greenhouse effect, accelerating germination. Check daily for condensation on the bag—if it’s foggy, you’ve got the moisture balance right. If not, mist lightly again and reseal.
Monitor for Germination and Adjust Conditions
Within 3-5 days, you’ll see the first signs of life: tiny white roots breaking through the soil surface, followed by the seedling’s first true leaves. Keep the soil consistently moist but never soggy—overwatering at this stage suffocates roots and triggers damping-off, a fungal disease that collapses seedlings overnight. Water only when the top ½ inch of soil feels dry to the touch, and use a spray bottle to avoid disturbing the delicate sprouts.
As soon as the first true leaves appear (not the initial cotyledons), remove the humidity dome immediately. This prevents fungal growth and encourages stronger stems. Place the seedlings under a grow light or in the brightest window you have, ensuring they receive 14-16 hours of light daily. Without sufficient light, seedlings stretch toward the source, becoming leggy and weak—a condition that’s nearly impossible to correct later.
Harden Off Seedlings Before Transplanting
Two weeks after germination, start hardening off the seedlings by placing them outside in a sheltered spot for 1-2 hours the first day. Gradually increase their outdoor time over 7-10 days, exposing them to more sunlight and wind each day. This slow acclimation prevents transplant shock, which can stunt growth or even kill young plants. Watch for wilting or yellowing leaves—these are signs the process is moving too fast.
By the time your last frost date arrives, your seedlings should be 4-6 inches tall with 4-5 sets of true leaves. Transplant them into the garden on an overcast day or in the late afternoon to reduce stress. Bury them slightly deeper than they were in their pots—this encourages stronger root systems. Water deeply at the base, not overhead, to settle the soil and prevent fungal spores from splashing onto the leaves.
Tips & tricks for germinating tomato seeds indoors
A few subtle techniques can transform your germination success rate from hit-or-miss to consistently robust seedlings. The devil is in the details when working with tomato seeds—what follows are the nuances that separate thriving plants from failed experiments.
Soil Temperature Control: Maintaining that 75-80°F range is non-negotiable for germination speed. I place my seed trays directly on top of my refrigerator, which maintains a consistent warm temperature without risking overheating. If your home stays cooler than 70°F, consider using a seedling heat mat ($15-$20) beneath the pots to create the ideal environment. The difference between 70°F and 80°F can mean the difference between germination in 5 days versus 10 days.
Lighting Strategy: Those critical 14-16 hours of daily light require more than just a sunny windowsill. South-facing windows provide only about 6-8 hours of direct light, which causes seedlings to stretch pitifully toward the light source. Invest in a basic LED grow light ($30-$50) placed 2-3 inches above seedlings—this prevents leggy growth and ensures sturdy stems. Rotate pots daily so all sides receive equal light exposure, preventing uneven growth patterns.
Humidity Management: The plastic bag or humidity dome creates the perfect microclimate, but it requires daily monitoring. Check for condensation every morning—if you see heavy fogging, your humidity is perfect. If the bag remains clear, mist lightly with a spray bottle and reseal. Overly humid conditions (beyond what the bag provides) can trigger damping-off disease, where seedlings suddenly collapse at the soil line. The key is balance: enough moisture to keep seeds hydrated, but not so much that they suffocate.
Transplanting Preparation: When it comes time to harden off seedlings, don't rush the process. Start with just 1-2 hours of outdoor exposure on day one, then gradually increase by 1-2 hours each subsequent day. I've seen gardeners try to harden off seedlings too quickly, resulting in shocked plants that wilt dramatically. The goal is to acclimate them to outdoor conditions—wind, temperature fluctuations, and sunlight intensity—over the full 7-10 day period specified. This gradual exposure builds resilience that will protect your seedlings when they finally meet the garden.
Pro Tips for Grow A Garden Tomato Seed
- A few subtle techniques can transform your germination success rate from hit-or-miss to consistently robust seedlings.
- Soil Temperature Control: Maintaining that 75-80°F range is non-negotiable for germination speed.
- Lighting Strategy: Those critical 14-16 hours of daily light require more than just a sunny windowsill.
Frequently asked questions
Got questions about growing tomato seeds from scratch?
You’re not alone! Here are answers to the most common queries to help you grow confidently—no green thumb required.
How long does it take for tomato seeds to sprout?
With the right conditions (warmth, moisture, and light), most tomato seeds sprout in 5–10 days. Our 7-day method speeds this up by keeping them cozy in a damp paper towel or seedling mat. Patience is key—don’t disturb them until you see tiny green sprouts!
Can I plant tomato seeds directly in the garden instead of starting indoors?
Yes, but timing matters! In warm climates (zones 8–10), direct sowing works in spring after the last frost. Cooler areas? Start seeds 6–8 weeks indoors to avoid stunted growth. Use biodegradable pots or peat pellets for easy transplanting later.
Why aren’t my tomato seeds germinating? Troubleshooting tips?
Try these fixes if your seeds are MIA:
Too cold? Tomato seeds need 70–85°F—use a heat mat or warm spot.
Not moist enough? Keep soil/medium damp (not soggy). Mist daily.
Old seeds? Store-bought seeds last 1–2 years; homemade may lose viability.
Buried too deep? Plant seeds ¼ inch deep—deeper = slower sprouts.
Still stuck? Test a few seeds in a damp paper towel to check viability.What’s the best fertilizer for young tomato seedlings?
Skip heavy fertilizers early on—they can burn tender roots. Instead, use a balanced, water-soluble fertilizer (10-10-10) at half-strength when seedlings have 2–3 true leaves. Later, switch to a tomato-specific feed high in phosphorus (like 5-10-10) to boost flowering.
How do I harden off tomato seedlings before transplanting?
Hardening off (acclimating seedlings to outdoor conditions) takes 7–10 days. Start by placing them outside for 1–2 hours daily, gradually increasing time. Shield from direct sun the first few days, and avoid hardening during extreme heat or cold. This toughens them up for the garden!
Wrapping up and next steps
Growing your first garden tomato from seed is an exciting journey—one that rewards patience with bursting, sun-ripened fruit right from your backyard! 🌱 With just a little time, the right tools, and a dash of care, you’ve got everything you need to nurture those tiny sprouts into thriving plants.
Now that you’re armed with pro tips and answers to common questions, it’s time to roll up your sleeves and get planting!
Your next step? Pick a seed variety that suits your climate and space, then watch those seeds transform in just seven days. Before you know it, you’ll be harvesting tomatoes fresh from your own garden—what’s more rewarding than that? 🍅✨