Picking
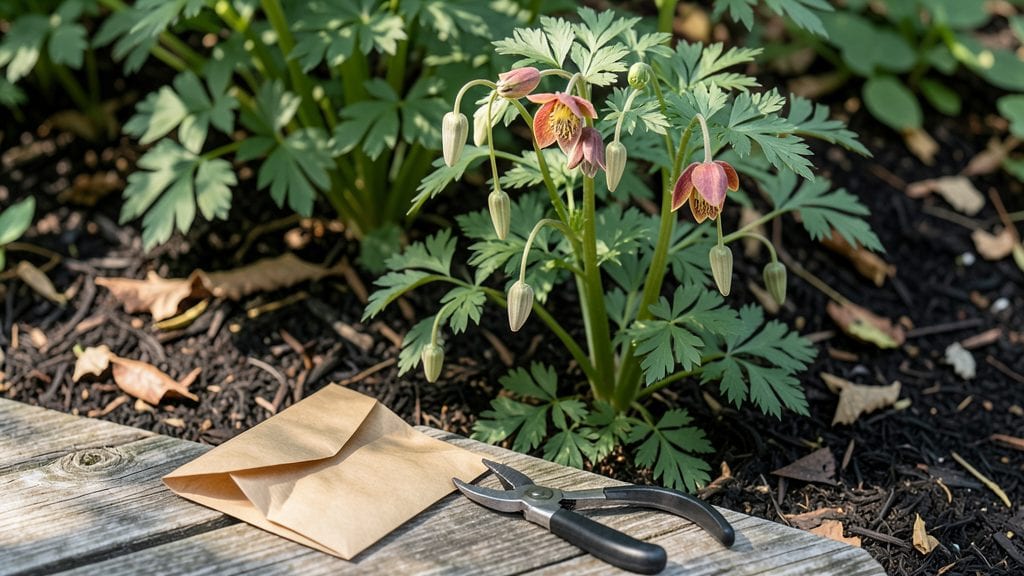
Harvesting columbine seeds at the perfect moment means next year’s garden will burst with nodding blue and pink blooms by early summer. 🌿 I’ve spent years watching these delicate seed pods transform from fuzzy green to dry brown, and I’ve learned the exact timing that makes all the difference between success and disappointment.
The key is acting before the pods split open—usually when they turn a papery brown but haven’t released their seeds yet.
Grab a pair of small pruning shears and snip them off the stem, then lay them in a single layer on paper towels in a warm, dry spot for about two weeks to finish drying. This step is non-negotiable if you want seeds that’ll germinate reliably.
Once dry, crack open the pods to reveal the tiny, wrinkled seeds inside. Store them in an envelope labeled with the harvest date in a cool, dark place until spring.
With proper cold stratification, these seeds will break dormancy and sprout with surprising vigor—often within just a few weeks of planting.
Here’s the thing—columbine seeds are notorious for dispersing too early, so keep an eye on your plants in late summer. If you miss the window, you’ll end up with a ground littered of seeds instead of a stash for next year’s garden.
Trust me, the payoff of watching those first blooms emerge is worth the patience.
📚 In This Guide
- What you need
- Instructions
- Tips and common mistakes
- Wrapping up and next steps
What you need
- ● Mature columbine plants (preferably with fully dried seed pods—wait until they turn brown and papery 🌿).
- ● Sharp pruning shears or scissors (for cleanly snipping seed pods without damaging stems).
- ● Paper bags or breathable fabric sacks (1–2 per plant; avoid plastic to prevent moisture buildup 📦).
- ● Labeling tags or masking tape + marker (to note varieties and harvest dates—trust us, you’ll forget! ✏️).
- ● Small paper towels or newspaper (for drying seeds before storage).
- ○ Air-tight containers or resealable plastic bags (with silica gel packets optional for extra dryness 🥫).
- ● Refrigerator or cold stratification setup (a standard fridge set to 35–40°F works perfectly 🧊).
- ● Desiccant packets (to absorb excess moisture in storage).
- ● Seed catalog or notebook (for tracking germination rates and notes on each variety 📖).
- ● Humidity tray or small fan (if drying seeds indoors—helps prevent mold 🌬️).
- ● Planting trays + potting mix (for direct sowing experiments after stratification).
Step-by-Step instructions for harvesting columbine seeds
Here’s how to collect and cold-stratify columbine seeds for next year’s vibrant blooms—no fancy tools needed.
🌱 Step 1: Identify and Collect Mature Seed Pods
Wait until the seed pods on your columbine plants turn brown and papery—this usually happens in late summer to early fall after the flowers fade. Gently twist or snip the pods with clean scissors when they’re dry but haven’t split open. If you miss this window, the seeds will scatter on their own.
Place the pods in a paper bag and let them dry in a shady, well-ventilated spot for 1-2 weeks. This prevents mold and ensures the seeds fully mature inside. Avoid plastic bags—they trap moisture and rot the pods.
⏰ Step 2: Extract Seeds and Remove Chaff
Once the pods are completely dry, open them carefully. You’ll see tiny, wrinkled black seeds mixed with fluffy, tan seed husks. Spread the contents on a clean sheet of newspaper and sift through it with your fingers to separate the seeds from the chaff.
Discard any seeds that look shriveled or discolored—these won’t germinate. Store the good seeds in a small envelope or jar labeled with the variety and harvest date. Keep them in a cool, dry place until stratification.
💧 Step 3: Cold Stratify Seeds for Germination
Columbine seeds need cold stratification to break dormancy. Place the seeds in a ziplock bag with a slightly damp paper towel (not soaking wet). Seal the bag, but leave a tiny gap for airflow—this mimics winter moisture without drowning the seeds.
Refrigerate the bag for 4-6 weeks at 35-40°F. Check the towel weekly—if it dries out, mist it lightly with water. Once the seeds pass this cold period, they’ll be ready to plant in early spring when soil temperatures rise.
🌿 Step 4: Plant Stratified Seeds Outdoors
After stratification, sow the seeds outdoors in well-draining soil during early spring (March-April, depending on your climate). Scatter them on the soil surface—do not bury them, as columbine seeds need light to germinate. Press them lightly into the top layer of soil.
Keep the area moist but not soggy until germination, which can take 2-4 weeks. Thin seedlings to 6-8 inches apart once they’re 2-3 inches tall to give them room to grow. Mulch lightly with straw or shredded leaves to retain moisture.
Tips & tricks for perfect columbine seed harvesting
A few simple tricks will help you maximize your columbine seed yield and ensure reliable germination next spring.
Timing is Everything: The 1-2 week drying period in Step 1 is crucial—don't rush it! Place your paper bags in a spot with good airflow, like a covered porch or garage shelf. I learned this the hard way after trying to speed up the process and ending up with moldy pods. If your pods start to split open before the 2-week mark, they're ready earlier than expected.
Seed Selection Tip: When separating seeds from chaff in Step 2, look for seeds that are uniformly dark and plump. Discard any that feel light or have white spots—they won't germinate. I keep a small magnifying glass handy to check seed quality more easily. Store your selected seeds in a labeled envelope with the harvest date to track their freshness.
Cold Stratification Hack: For the 4-6 week refrigeration period in Step 3, I place the ziplock bags in a produce drawer with a small bowl of water nearby. This maintains consistent humidity without overwatering. The tiny airflow gap is important—use a toothpick to poke a small hole if your bag seals completely. This mimics natural winter conditions perfectly.
Planting Strategy: When sowing in Step 4, I create shallow furrows with my finger rather than pressing seeds directly into soil. This gives them better contact with the surface while still keeping them lightly covered. After planting, I cover the area with a thin layer of straw mulch to maintain even moisture during germination.
Pro Tips for Harvest Columbine Seeds
- A few simple tricks will help you maximize your columbine seed yield and ensure reliable germination next spring.
- Timing is Everything: The 1-2 week drying period in Step 1 is crucial—don't rush it! Place your paper bags in a spot ...
- Seed Selection Tip: When separating seeds from chaff in Step 2, look for seeds that are uniformly dark and plump. Dis...
Frequently asked questions
Got questions about harvesting and storing columbine seeds? You’re not alone!
Here are answers to the most common queries to help you master the process and grow stunning blooms next season.
When is the best time to harvest columbine seeds?
Harvest columbine seeds once the seed pods turn tan or brown and begin to split open naturally—usually late summer to early fall. Wait until they’re dry but not cracked open; this ensures viability. Avoid harvesting too early, as seeds need full maturity for successful germination.
Do columbine seeds need cold stratification?
Yes! Columbine seeds require cold stratification to break dormancy. After harvesting, store them in a sealed bag with damp peat moss or sand in the fridge (33–40°F) for 4–6 weeks. This mimics winter conditions and boosts germination rates dramatically.
What if I forget to stratify the seeds?
Don’t panic! If you skip stratification, try planting seeds outdoors in fall—nature will handle the cold exposure. Alternatively, soak seeds in lukewarm water for 24 hours before planting in moist soil; this can sometimes trick them into germinating, though results may vary.
How long do harvested columbine seeds stay viable?
Columbine seeds remain viable for 2–3 years if stored properly in a cool, dry place (like a sealed container in the fridge). For best results, use them within the first year. Label your seed packets with the harvest date to track freshness!
Can I grow columbine from seeds bought from a store?
Store-bought columbine seeds may or may not need stratification—check the packet! Some hybrid varieties are pre-treated, while wild-type seeds often require cold stratification. If unsure, stratify them anyway; it won’t hurt and improves germination odds. Pro tip: Test a few seeds first!
What should I do if mold grows during stratification?
Mold is a red flag! If you spot fuzzy growth on your seeds or medium, discard them immediately—mold can kill seeds and spread to other plants. To prevent mold, use sterile peat moss, keep moisture lightly damp (not soggy), and store seeds in a paper towel-lined bag for better airflow.
Wrapping up and next steps
Harvesting columbine seeds and mastering cold stratification is your ticket to vibrant, homegrown blooms next season! 🌸 With the right tools, patience, and a little chilly know-how, you’ll be well on your way to a garden bursting with these delicate, cheerful flowers.
Now that you’re armed with the know-how, why not share your success with fellow gardeners—or even experiment with saving seeds from other perennials? Happy gardening!
🌱 Next Steps:
- Mark your calendar for next year’s planting season.
- Try your hand at propagating other native wildflowers!
- Join a gardening community to swap tips and seed-saving stories.