Flowers
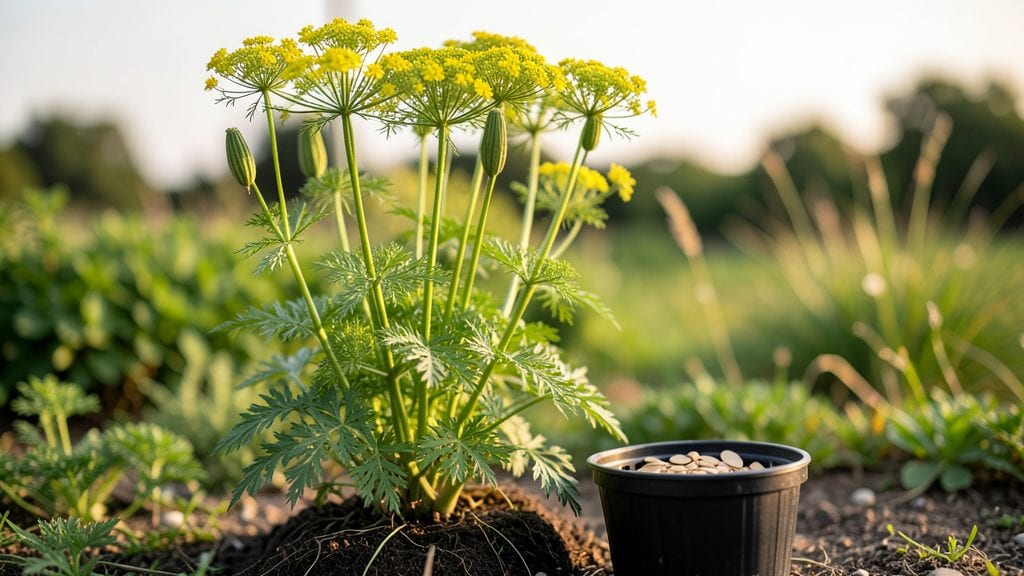
Growing dill from flower seeds is one of the fastest ways to get lush, fragrant plants that attract pollinators and add beauty to your garden. ✨ The secret lies in their quick germination—sprouts appear within 3-5 days, and you’ll see bushy growth in just a few weeks.
I’ve grown dill this way for years, and once you try it, you’ll never buy store-bought plants again.
You’ll need well-draining soil, a sunny spot with at least 6 hours of light daily, and a container or garden bed with 12-18 inches of spacing between plants.
Dill thrives in average soil but hates soggy roots, so mix in compost before planting. The key to bushy growth? Thin seedlings early—this prevents overcrowding and encourages stronger stems.
Within 4-6 weeks, you’ll have tall, feathery foliage that’s perfect for cooking or pollinator-friendly blooms. The flowers are edible too—add them to salads or let them self-seed for next year’s crop. Just watch for spider mites in dry weather; a quick spray of water keeps them at bay.
This method works for containers, raised beds, or in-ground planting—adjust spacing if growing in pots. Once you master it, you’ll have dill ready for harvest all season long, with minimal effort. Let’s get those seeds started!
📚 In This Guide
- What you need
- Instructions
- Tips and common mistakes
- Wrapping up and next steps
What you need
- ● Dill flower seeds: 1 packet (about 50-100 seeds, depending on your desired yield). Opt for Anethum graveolens varieties like ‘Fernleaf’ or ‘Bouquet’ for bushy growth.
- ● Growing containers or garden bed: For containers: 6-12 inch pots (2-3 plants per pot) with drainage holes.
- ● For direct sowing: A sunny spot (6+ hours of sunlight) with well-draining soil.
- ● Potting mix or garden soil: Lightweight, well-draining mix (add perlite or sand if your soil is heavy).
- ● Watering can or spray bottle: For gentle hydration (avoid oversaturating seeds!).
- ○ Plant labels (optional but helpful): To track varieties and planting dates.
- ● Seed-starting kit: Includes trays, domes, and heating mats for faster germination.
- ● Fertilizer: Balanced liquid fertilizer (5-10-5 ratio) or compost tea for bushier growth.
- ● Row covers or cloches: To protect seedlings from pests or cold snaps.
- ● Pruning shears: For harvesting flowers or shaping plants.
- ● Gloves: If you’re sensitive to dill’s aromatic oils.
Step-by-step instructions for growing dill flower seeds
Here’s how to get those delicate dill blooms thriving in just weeks.
🌱 Step 1: Prepare the Soil and Plant the Seeds
Fill your 4-inch pots with 3 gallons of potting mix—it should be light and well-draining. Press it down gently so the surface is firm but not packed. Dill seeds are tiny, so I like to sprinkle them directly onto the soil surface, spacing them about ½ inch apart. Cover them with just a thin dusting of potting mix—no need to bury them deep.
Mist the soil lightly with water until it’s evenly moist but not soggy. You’ll know it’s right when the surface looks slightly darker, not glistening. Place the pots in a warm spot, like a sunny windowsill or under a grow light, where the soil stays around 70°F. Germination happens fast—you’ll see tiny sprouts in just 3-5 days.
☀️ Step 2: Provide Bright Light for Strong Growth
Once the seedlings emerge, move them to a spot with full sun—at least 6 hours of direct light daily. If you’re using a grow light, keep it 4-6 inches above the plants and adjust as they grow. Dill loves light, and without enough, the stems stretch thin and leggy, which weakens the plant.
Watch for the first true leaves—these are the second set of leaves that appear after the initial seed leaves. When you see them, thin the seedlings to 1 plant per pot by snipping the weaker ones at the base with clean scissors. This gives your dill room to grow bushy and strong.
💧 Step 3: Water and Fertilize for Bushy Blooms
Water your dill once a week, letting the top inch of soil dry out between waterings. Overwatering causes the roots to rot, so always check the soil before adding more. I like to water at the base of the plant to keep the leaves dry, which prevents fungal issues.
After the plants have 4-6 true leaves, add 1 tablespoon of slow-release fertilizer mixed into the soil. This gives them a gentle nutrient boost to encourage lush foliage and strong flower stems. You’ll start seeing buds form in about 4-6 weeks—just keep the soil consistently moist but not waterlogged.
✂️ Step 4: Prune and Encourage More Blooms
When the dill starts flowering, you’ll notice delicate yellow blooms forming. To keep the plant bushy and encourage more flowers, pinch off the spent blooms as they fade. This redirects the plant’s energy into producing new flowers instead of setting seed.
If the stems get too tall and floppy, trim them back by ⅓ to encourage branching. You’ll see new growth within a week, and the plant will fill out nicely. Harvest the flowers as they open for fresh bouquets or let them go to seed for next year’s crop.
Tips & tricks for perfect dill flower seeds
Fast germination and bushy growth start with these simple tricks that'll have your dill blooming in record time.
Soil Temperature Secret: Keeping that soil at 70°F during germination is your secret weapon. Use a heating mat if your home runs cooler—dill seeds germinate fastest in warm soil. I've seen sprouts appear in just 3 days when conditions are perfect! Place your pots on a seedling heat mat set to 70°F for that extra boost.
Lighting Strategy: Those 6 hours of direct light are non-negotiable for strong stems. If natural light is limited, supplement with a grow light on a timer. Position it 4-6 inches above the plants and keep it running for 12-14 hours daily to mimic summer sunlight. The key is consistency—dill won't tolerate erratic light conditions.
Thinning Technique: When you see those first true leaves appear, don't be shy about thinning. Use clean scissors to snip at the base rather than pulling—this prevents disturbing the roots of remaining plants. I like to thin to 1 plant per pot immediately, which gives each plant plenty of room to develop strong stems and abundant flowers.
Fertilizer Timing: Wait until your dill has 4-6 true leaves before adding that 1 tablespoon of slow-release fertilizer. This timing ensures the roots are established enough to handle nutrients without burning. I mix the fertilizer directly into the top inch of soil and water lightly to help distribute it evenly.
Pro Tips for Dill Flower Seeds
- Fast germination and bushy growth start with these simple tricks that'll have your dill blooming in record time.
- Soil Temperature Secret: Keeping that soil at 70°F during germination is your secret weapon. Use a heating mat if you...
- Lighting Strategy: Those 6 hours of direct light are non-negotiable for strong stems. If natural light is limited, su...
Frequently asked questions
Got questions about growing dill flower seeds? You’re in the right place! Here are answers to the most common queries to help you cultivate lush, fragrant dill plants with ease.
How long does it take for dill flower seeds to germinate?
Dill seeds are fast germinators—typically sprouting in 7 to 14 days after planting! For quicker results, soak seeds in warm water for 4–6 hours before sowing. Keep soil consistently moist (but not soggy) and place pots in a sunny spot to encourage speedy germination. Patience pays off, but don’t worry if it takes up to 3 weeks!
Can I grow dill flowers indoors?
Dill thrives indoors with 6+ hours of sunlight daily (a south-facing window or grow lights work). Use a 5-inch pot with well-draining soil, and keep it in a warm spot (60–75°F). Just be mindful—indoor dill may grow taller and leggier than outdoor varieties. Pinch back stems to encourage bushiness!
How often should I water dill flower seeds?
Dill seeds need consistent moisture to germinate but hate soggy soil. Water lightly every 1–2 days to keep the top inch of soil damp. Once seedlings emerge, reduce to 1–2 times per week, letting the soil dry slightly between waterings. Overwatering can cause rot—so always check moisture with your finger!
What can I do if my dill seeds aren’t sprouting?
Don’t panic! Try these fixes:
- Check temperature: Dill needs soil temps of 70–85°F to germinate. If it’s too cold, move pots to a warmer spot or use a seedling heat mat.
- Test seed viability: Soak a few seeds in water overnight. If they sink, they’re likely still good!
- Adjust light: Seeds need bright light (not just warmth) to sprout. Place trays near a sunny window or under grow lights.
- Try fresh seeds: Dill seeds lose viability after 1–2 years. If your pack is older, grab a new one!
Can I use dill flowers for cooking like I would the leaves?
Yes! While dill leaves are the star in salads, soups, and pickles, the yellow umbrella-shaped flowers are edible too! They add a mild, tangy flavor similar to leaves but with a slightly sweeter note. Sprinkle them over pasta, fish, or yogurt dishes for a decorative (and delicious) touch. Just harvest them early—they lose potency as they mature!
Wrapping up and next steps
Growing dill flower seeds is a rewarding journey that brings fragrant blooms and lush greenery to your garden in just weeks! With their fast germination and bushy growth, these seeds are perfect for both beginner and experienced gardeners.
Whether you’re adding them to dishes, attracting pollinators, or simply enjoying their beauty, dill flowers are a versatile and easy-to-grow choice.
Now that you’re armed with the right tips and tricks, why not start your own dill patch today? Grab those seeds, find a sunny spot, and watch your garden transform in no time! 🌱✨