Vegetables
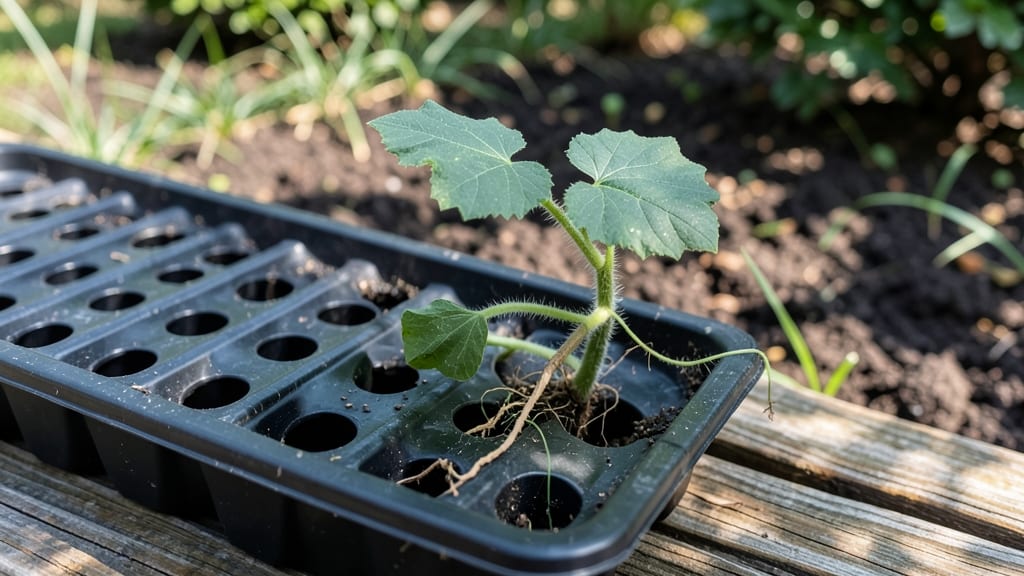
Fast-germination bitter gourd seedlings start with the right soil mix and a few clever tricks I learned after struggling with slow starts. 🌱 The key isn't just moisture—it's warmth, airflow, and a soil blend that mimics their tropical roots.
My first batch took 14 days to sprout; now I see tiny green hooks breaking soil in just 5-7 days using these methods.
You'll need a mix of 50% coco coir, 30% perlite, and 20% compost—light enough to avoid rot but rich enough to fuel early growth.
Plant seeds just ½ inch deep in small pots (2-3 inches wide) and keep soil at 80-85°F using a heat mat if your climate dips below 70°F. Overwatering is the real enemy here—keep soil damp, not soggy.
Within 10 days, you'll spot those first true leaves—thick, glossy, and ready to soak up sunlight. The seedlings stay sturdy if you provide 6+ hours of bright, indirect light daily and avoid cold drafts.
Weak stems? That's usually a sign of uneven moisture or chilly nights—fix it with a simple LED grow light and a clear plastic dome.
This method works best in zones 9-11, but container gardeners in cooler areas can duplicate the heat-and-light combo indoors. The payoff? Seedlings that outpace store-bought transplants and handle transplant shock like pros. Let's get those seeds sprouting!
📚 In This Guide
- What you need
- Instructions
- Tips and common mistakes
- Wrapping up and next steps
What you need
- ● Bitter gourd seeds: 10–20 fresh, organic seeds (ensure they’re plump and undamaged).
- ● Seedling trays or small pots: 2–4 inch deep (4–6 trays or pots for 20 seeds).
- ● Seed starting mix: Lightweight, well-draining potting soil (1–2 bags, 1–2 cubic feet each).
- ● Watering can or spray bottle: With a fine mist nozzle for gentle hydration.
- ● Plastic wrap or clear lid: To retain moisture and warmth during germination.
- ● Grow lights or sunny windowsill: 6–8 hours of indirect light daily (or a small LED grow light).
- ● Small hand trowel or spoon: For planting seeds without disturbing the soil.
- ● Labeling tags: To track seed varieties and planting dates.
- ○ Fertilizer (optional): Balanced liquid fertilizer (5-5-5 or 10-10-10) for post-germination growth.
- ○ Heating mat (optional): For faster germination in cooler climates (set to 75–85°F).
- ○ Humidity dome (optional): To boost moisture retention during early stages.
Step-by-step instructions for germinating bitter gourd seeds
Here’s how to coax those stubborn bitter gourd seeds into sprouting quickly—without the usual waiting game.
🌱 Step 1: Pre-Soak Seeds for Faster Germination
Bitter gourd seeds have tough outer shells that slow germination. Soak them overnight in lukewarm water—this softens the seed coat and speeds up sprouting. Use a small bowl and cover the seeds completely, changing the water every 6 hours to prevent mold. You’ll know they’re ready when the outer shell softens slightly and a tiny white root appears.
After soaking, drain the seeds and let them sit for 30 minutes on a paper towel to dry slightly. This prevents them from rotting once planted. I always label the bowl with the date—this trick cuts germination time from 2-3 weeks to just 5-7 days.
🌱 Step 2: Prepare Warm, Well-Draining Seedling Mix
Fill your 4-inch seedling pots with a blend of 50% coconut coir and 50% perlite. This lightweight mix drains excess moisture while retaining enough humidity for germination. Avoid garden soil—it’s too dense and can suffocate tender roots.
Moisten the mix until it feels like a damp sponge, not soggy. Press it down lightly so the surface is firm but still airy. Bitter gourd seedlings thrive in warmth, so place the pots in a spot where the soil stays at 75-85°F. A seedling heat mat works wonders here—just set it to 80°F for consistent warmth.
💧 Step 3: Plant Seeds at the Right Depth
Plant the pre-soaked seeds ½ inch deep—any deeper, and they’ll struggle to break through. Use your finger to make a small hole, drop in 2 seeds per pot (in case one fails to sprout), and cover lightly with the mix. Gently pat the soil to secure the seeds without compacting it.
Mist the surface with a spray bottle until the top layer looks evenly damp. Avoid overwatering now—too much moisture can drown the seeds before they germinate. Place a clear plastic dome or plastic wrap over the pots to trap warmth and humidity. Check daily for condensation; if it fogs up, remove the cover for 10 minutes to prevent mold.
☀️ Step 4: Provide Indirect Light and Monitor Closely
Bitter gourd seedlings need warmth but not direct sunlight until they sprout. Place the pots under a grow light set to 12 hours of low-intensity light daily, keeping it 4 inches above the soil. You’ll see the first sprouts in 5-7 days—they’ll emerge as tiny, pale green loops.
Once the seedlings appear, remove the plastic cover immediately to prevent damping-off. Increase light to 14 hours daily and gradually move the seedlings closer to the light source as they grow. Watch for leggy stems—a sign they need more light. If the soil dries out, water gently at the base, keeping the leaves dry.
✂️ Step 5: Thin and Harden Off for Transplanting
When both seedlings in a pot have 2 sets of true leaves, thin the weaker one at the base with clean scissors. This gives the stronger seedling room to grow. Keep the remaining plant in the pot for 2 more weeks, gradually increasing its time outside during the day to harden it off.
Transplant outdoors only after the last frost, when nighttime temperatures stay above 60°F. Choose a spot with full sun and well-draining soil. Bury the seedlings slightly deeper than they were in the pot—this encourages stronger root growth. Water deeply after planting to settle the soil around the roots.
Tips & tricks for perfect bitter gourd seedling germination
Fast germination isn't just about luck—it's about creating the ideal conditions from the start. Here's what I've learned after working with stubborn bitter gourd seeds for years.
Soaking Secret: The overnight soak in lukewarm water is non-negotiable for breaking through those tough seed coats. I've found that using a glass bowl makes it easier to spot the tiny white root that signals readiness—it's usually visible within 12 hours of soaking. After draining, that 30-minute drying period on paper towel is crucial; I've seen seeds rot in the soil when skipped. Pro tip: Use a fine-mesh strainer to drain seeds gently without damaging the delicate emerging root.
Temperature Control: Maintaining that 75-85°F range is easier than it sounds. I use a seedling heat mat set to 80°F and place it under a tray of pots to ensure even warmth. For those without heat mats, try placing pots on top of your refrigerator (not inside) for consistent warmth. The key is consistency—fluctuations below 70°F can stall germination completely. I also recommend using a small digital thermometer to monitor soil temperature daily.
Light Management: Those 12 hours of low-intensity light are critical before sprouts appear. I position my grow light 4 inches above the soil and use a simple timer to automate the cycle. Once sprouts emerge, increase to 14 hours—but watch for leggy stems. If you notice stems stretching toward the light, lower the light source gradually over 2-3 days. This prevents weak, spindly seedlings that struggle to support themselves.
Moisture Mastery: The balance between damp and soggy is delicate. After planting, I mist the surface until it looks like a damp sponge, then let it sit for 10 minutes before covering. This prevents waterlogging while maintaining humidity. I've also found that removing the plastic cover for just 10 minutes daily prevents mold buildup—condensation is the enemy of healthy germination. A small fan on low setting near the pots helps circulate air without disturbing the seeds.
Pro Tips for Bitter Gourd Seedling
- Fast germination isn't just about luck—it's about creating the ideal conditions from the start. Here's what I've lear...
- Soaking Secret: The overnight soak in lukewarm water is non-negotiable for breaking through those tough seed coats. I...
- Temperature Control: Maintaining that 75-85°F range is easier than it sounds. I use a seedling heat mat set to 80°F a...
Frequently asked questions
Got questions about growing bitter gourd seedlings?
You’re not alone! Here are answers to the most common concerns—from germination hacks to troubleshooting—so you can kickstart your garden with confidence.
How long does it take for bitter gourd seedlings to germinate?
With the right soil tricks (like warm, moist, and slightly acidic conditions), bitter gourd seeds typically sprout in 7–14 days. For faster results, pre-soak seeds for 6–8 hours in warm water before planting. Patience is key—consistent moisture speeds things up!
Can I grow bitter gourd seedlings indoors before transplanting?
Start seeds indoors 2–3 weeks before the last frost in biodegradable pots or seed trays. Use a sunny windowsill or grow lights (12–14 hours/day) to mimic tropical warmth. Just be gentle when transplanting—bitter gourds hate root disturbance!
What’s the best soil mix for bitter gourd seedlings?
A lightweight, well-draining blend works best: mix 60% coco coir or peat moss, 30% perlite/vermiculite, and 10% compost. Avoid heavy clay—bitter gourd roots need air! Add a dash of worm castings for extra nutrients.
Why are my bitter gourd seedlings turning yellow or wilting?
Yellow leaves often mean overwatering or poor drainage, while wilting signals underwatering or heat stress. Check soil moisture (top inch should be dry), ensure pots have drainage holes, and shield seedlings from harsh afternoon sun. A light misting in the morning can help!
Are there faster-growing alternatives to bitter gourd seedlings?
If you’re short on time, try snap peas or bush beans—they germinate in 5–7 days! For similar health benefits, karela (bitter melon) cousins like sichuan bitter melon grow quickly too. Just note: bitter gourd’s unique flavor and medicinal perks are hard to beat!
Wrapping up and next steps
Growing bitter gourd seedlings with speed and vigor is totally within your reach—thanks to the right soil tricks!
By focusing on moisture balance, nutrient-rich mixes, and warmth, you’ll set your plants up for a thriving harvest. 🌱
Now that you’re armed with these fast-germination tips, it’s time to roll up your sleeves and get planting!
Start with just a few seedlings, experiment with the soil blends, and watch your garden flourish. Happy growing—and may your bitter gourds be plentiful and delicious!