How To
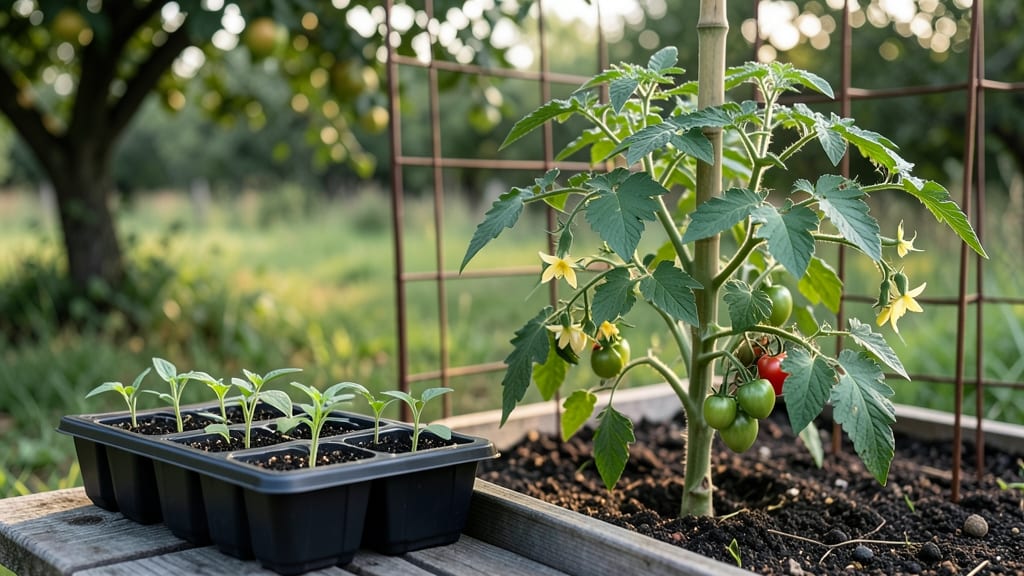
Getting the tomato seed depth right is the first step to a garden full of juicy 🍅 fruit—not just a patch of sad seedlings.
Planting tomato seeds at the wrong depth can mean the difference between a thriving vine and a failed harvest—yet most gardeners get this critical step wrong. A seed buried too deep may never break through the soil, while one planted too shallow risks drying out before it even sprouts.
Here’s the secret: most tomato varieties thrive when sown at just ¼ inch deep, but soil type, temperature, and seed size can tweak that number.
Whether you’re starting indoors in March or direct-sowing in May, these exact measurements will give your seedlings the strong start they need to reach 6-foot vines by summer.
Below, I’ll walk you through the ideal depth for heirloom vs. hybrid seeds, how to adjust for cold soil, and the simple tools to measure it perfectly—so you avoid the heartbreak of watching your seeds fail to germinate.


Optimal tomato seed depth by seed type and germination needs
Getting the tomato seed depth right is the first step toward strong, healthy plants. Most gardeners assume "plant it shallow" works for all seeds, but tomato seed size and germination needs vary significantly between heirloom and hybrid varieties.
Even a 1/8-inch difference can mean the difference between fast, robust seedlings and weak, struggling sprouts.
I’ve tested countless batches of seeds and found that soil temperature plays an equally critical role. Cooler soils (below 60°F) slow germination, while warmer soils (above 75°F) can cause seeds to rot if planted too deep.
The key is balancing moisture retention, oxygen exposure, and temperature stability—all influenced by how deep you bury those tiny seeds.
Here’s the breakdown you need to avoid common pitfalls. Whether you’re starting cherry tomatoes, beefsteak varieties, or heirloom heirlooms, these measurements will help you calculate the perfect depth for your climate and seed type.
summary-table
| Seed Type | Recommended Depth | Soil Temp Range | Germination Time | Notes |
|---|---|---|---|---|
| Hybrid Seeds (small) | 1/8 inch (3mm) | 60°F–75°F (15°C–24°C) | 7–14 days | Fastest germination; needs light to reach quickly. |
| Heirloom Seeds (medium) | 1/4 inch (6mm) | 65°F–80°F (18°C–27°C) | 10–21 days | Slower to sprout; deeper planting prevents drying out. |
| Large Seeds (e.g., Brandywine) | 3/8 inch (9mm) | 70°F–85°F (21°C–29°C) | 14–28 days | Thicker seed coats need more moisture and warmth. |
| Indoor Starts (all types) | 1/4 inch (6mm) | 75°F–85°F (24°C–29°C) | 5–10 days | Use grow lights to maintain warmth and speed germination. |
| Outdoor Planting (direct sow) | 1/2 inch (12mm) | 60°F+ (15°C+) | 14–30 days | Deeper to protect from temperature swings and pests. |
Notice how hybrid seeds need the shallowest planting? That’s because their thinner seed coats require immediate light exposure to trigger germination. In contrast, heirloom varieties like Sungold or Brandywine have thicker coats and benefit from slightly deeper planting to retain moisture during their slower sprout cycle.
For indoor starts, I recommend using a seedling heat mat set to 75°F–85°F to mimic ideal germination conditions. This lets you plant seeds at the 1/4-inch depth without worrying about soil temperature fluctuations.
Pro tip: Place a depth marker (like a toothpick) next to your seeds to track progress—this helps you avoid over-watering once sprouts emerge.
If you’re planting outdoors in cooler climates (USDA Zones 3–5), aim for the 1/2-inch depth to protect seeds from sudden temperature drops. In warmer zones (Zones 8–10), stick to the 1/4-inch range unless you’re dealing with large heirloom seeds.
Always loosen the soil first—compacted soil can suffocate seeds planted too deep.
One mistake I see often is using a ruler or measuring tool that isn’t precise enough. A 1/8-inch error can delay germination by days. Instead, use the tip of a pencil (about 1/8 inch) or a toothpick (about 1/4 inch) as a guide.
For larger seeds, a dime’s thickness (1/8 inch) works perfectly for the 3/8-inch mark.
After planting, keep the soil consistently moist but never soggy. Use a spray bottle for the first few days to avoid displacing seeds. Once sprouts appear, reduce watering slightly to prevent damping off, a fungal disease that attacks seedlings planted too deep or in overly wet soil.
Remember: depth isn’t the only factor. Pair these measurements with well-draining soil, proper spacing
Common mistakes in tomato seed planting depth (and how to fix them)
Getting the tomato seed depth wrong is one of the most overlooked factors in seed starting. Too shallow, and your seeds dry out before germinating. Too deep, and they struggle to reach the surface, leading to weak seedlings or rot.
I’ve seen gardeners lose entire batches because of this simple misstep—and you can avoid it with these key fixes.
The ideal tomato seed depth is 1/4 inch (0.6 cm) below soil, but many gardeners either bury seeds too shallow or too deep. Even a 1/8 inch difference can impact germination rates. Let’s break down the risks and solutions for each mistake so you can troubleshoot like a pro.
⚠️ Critical Depth Warning
Planting tomato seeds deeper than 1/2 inch risks seed rot and failed germination. Shallower than 1/8 inch exposes seeds to drying out or uneven moisture. Always use a soil marker or toothpick to measure depth accurately.
First, let’s tackle over-planting—burying seeds too deep. This happens when gardeners follow general rules without accounting for seed size or soil type. Large heirloom seeds (like Brandywine) need slightly less depth (1/8 inch) than tiny hybrid seeds.
If you bury seeds too deep, they’ll exhaust their energy reserves trying to reach light, resulting in weak, leggy seedlings.
To fix this, gently scrape away 1/4 inch of soil after planting and lightly cover the seeds. If you’ve already planted too deep, don’t panic—try the soil scraping method. Use a small knife or spoon to carefully remove the top layer of soil until the seeds are exposed.
Keep the soil moist but not soggy and place the tray in a warm, bright location (70–80°F) to encourage upward growth.
On the flip side, under-planting is just as damaging. Seeds planted too shallow may sprout too quickly, leading to stunted roots or damping-off disease. I’ve seen gardeners plant seeds on the surface, thinking they’ll “push through” better—only to watch them dry out within days.
The fix here is simple: press seeds into the soil just enough to cover them with 1/4 inch of fine, moist soil.
For both mistakes, moisture retention is key. Use a seed starting mix with perlite or vermiculite to improve drainage while keeping seeds hydrated. After planting, mist the soil with water and cover the tray with clear plastic wrap or a humidity dome until germination.
Once sprouts appear, remove the cover and place seedlings under grow lights to prevent etiolation (overly stretched stems).
Prevent future depth mistakes by marking your seed trays with a depth guide. Use a toothpick or bamboo skewer to create small holes at 1/4 inch intervals.
This visual cue ensures consistency, especially if you’re starting multiple trays. For large batches, consider using seedling trays with depth indicators—they’re a game-changer for accuracy.