
Planting
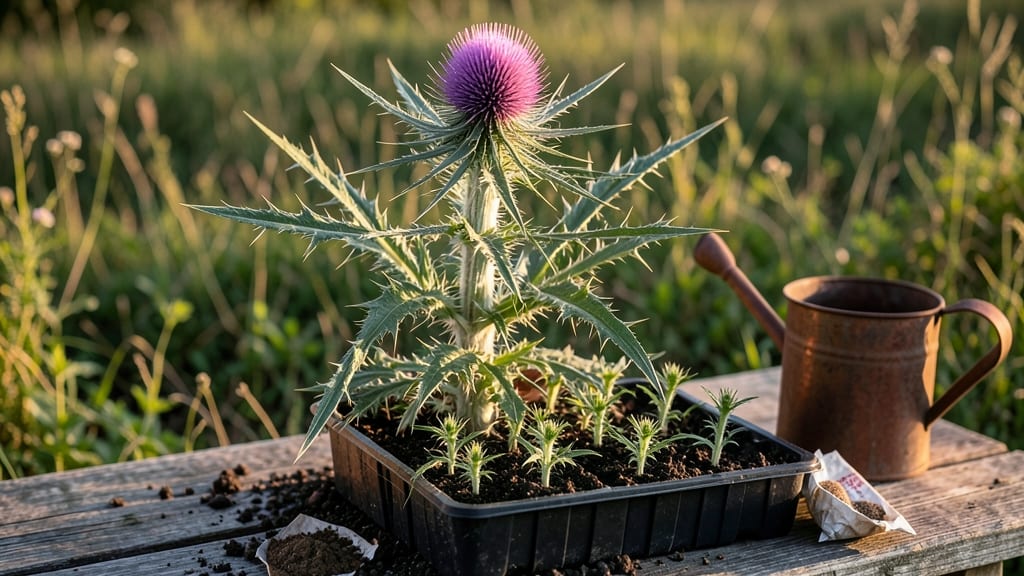
Growing thistle plant seeds turns your garden into a pollinator paradise with minimal fuss. 🌱 These hardy perennials thrive where others fail, offering striking foliage and a magnet for bees and butterflies.
I planted mine last spring in a sunny corner, and within weeks, the tall spiky stems became the talk of the neighborhood.
The secret lies in their resilience—thistles handle poor soil, drought, and even rocky ground better than most plants. You’ll need full sun, well-draining soil, and patience: germination takes 2-4 weeks, but once established, they’re nearly indestructible.
Varieties like the Scotch thistle or globe thistle add texture and height to borders or wildflower meadows.
Expect velvety purple blooms by midsummer, followed by seed heads that feed birds through winter. The trade-off? They spread aggressively—give them space or contain them with deep roots. With proper placement, you’ll enjoy years of low-maintenance beauty and wildlife support.
Perfect for cottage gardens, pollinator plots, or even urban edges where other plants struggle. Here’s how to get started without the guesswork—no green thumb required.
📚 In This Guide
- What you need
- Instructions
- Tips and common mistakes
- Wrapping up and next steps
What you need
- ● Thistle seeds: Choose native or well-adapted varieties (e.g., Cirsium or Onopordum species). Buy 1–2 oz (30–60g) per 100 sq ft for optimal coverage.
- ● Well-draining soil: Thistles thrive in poor, rocky, or sandy soil. Amend heavy clay with perlite or coarse sand (1 part perlite to 3 parts soil).
- ● Sunlight: A full-sun location (6+ hours of direct light daily). Partial shade (4–6 hours) works for shorter varieties.
- ● Water: A hose with a gentle spray nozzle or drip irrigation system (critical for seedling establishment).
- ● Planting site: Choose an area with minimal competition from grasses or weeds. Thistles dislike overcrowding!
- ● Garden gloves: Thistle spines are sharp—opt for heavy-duty leather or thick fabric gloves.
- ● Hand trowel or transplanting spade: For digging small holes (1/4–1/2 inch deep) or moving seedlings.
- ● Rake: A stiff-bristled rake to loosen soil and create a fine seedbed.
- ○ Mulch (optional but helpful): Straw or pine needles (2–3 inches thick) to retain moisture and suppress weeds.
- ● Stakes or labels: Biodegradable markers to track seed varieties if planting multiple types.
- ● Patience: Thistle seeds can take 2–4 weeks to germinate, especially in cooler weather.
- ● Pollinator-friendly mindset: Avoid herbicides—thistles are a critical food source for bees, butterflies, and birds!
- ● Space: Mature thistles can reach 6–10 ft tall (or taller for giant varieties). Plan for their height and spread.
Step-by-Step guide for growing thistle from seeds
These striking perennials thrive with minimal fuss—just follow my method for robust plants that attract pollinators.
🌱 Step 1: Prepare the Soil and Sow Seeds
Thistles love well-draining soil with plenty of organic matter. Work the 3 inches of topsoil in your chosen location until it’s loose and free of rocks. I like to mix in a handful of compost to boost fertility without overfeeding—thistles grow best in lean conditions. Scatter seeds ¼ inch deep and 6 inches apart in rows 18 inches apart to prevent overcrowding.
Don’t worry about perfect spacing—thistles self-seed prolifically, so you’ll have volunteers filling gaps next year. Lightly cover the seeds with a thin layer of soil and pat it down gently. This prevents seeds from washing away during watering while keeping them dark enough to germinate.
💧 Step 2: Water and Maintain Moisture
Keep the soil consistently moist but never soggy for the first 4-6 weeks—this is critical for germination. Water deeply every 2-3 days until the top 2 inches of soil feel damp. Use a gentle spray or drip irrigation to avoid displacing seeds. Once seedlings emerge, reduce watering to once weekly unless your region experiences extreme heat.
Thistles are drought-tolerant once established, but young plants need steady moisture to develop strong roots. You’ll see the first true leaves appear in 3-4 weeks. At this stage, thin seedlings to 12 inches apart to give mature plants room to spread their striking foliage.
☀️ Step 3: Provide Full Sun and Minimal Care
Thistles thrive in full sun—choose a site with at least 6-8 hours of direct sunlight daily. They tolerate partial shade but may produce fewer flowers. I’ve found that plants in hot, dry climates grow more vigorously with no additional fertilizer. In cooler regions, a light application of 5-10-10 fertilizer in early spring encourages lush growth.
Once established, thistles require almost no maintenance. Remove spent flower stalks in late fall to redirect energy into next year’s growth. If you notice yellowing leaves, it’s usually a sign of overwatering—thistles prefer dry conditions once roots are deep. Mulch lightly with 2 inches of straw to suppress weeds without smothering seedlings.
✂️ Step 4: Encourage Pollinators and Control Spread
Thistles are magnet plants for bees, butterflies, and birds. Leave some seed heads intact to provide food for wildlife, but cut back others in late fall to manage spread. If your plants become too aggressive, dig up unwanted volunteers in early spring before they establish deep roots. I like to transplant extras to borders or wildflower meadows—every pollinator appreciates the support.
By their second year, thistles will reach 3-5 feet tall and form dense clumps. This makes them excellent for privacy screens or naturalizing in wildflower gardens. Just be prepared for their striking presence—they’re as beautiful as they are bold.
Tips & tricks for growing hardy thistle plants
These simple strategies will help you cultivate thriving thistle plants that become pollinator magnets in your garden.
Soil Preparation Secret: The key to successful thistle growth starts with that 3 inches of topsoil preparation in Step 1. I recommend adding a thin layer of coarse sand if your native soil is heavy clay—this improves drainage dramatically while maintaining the lean soil conditions thistles prefer. The goal is to create a loose, almost crumbly texture that mimics their natural habitat. Don't overwork the soil though—just break up any large clumps and mix in that compost lightly.
Watering Wisdom: Those critical 4-6 weeks of consistent moisture in Step 2 are where most gardeners go wrong. I've found that using a moisture meter helps—aim for that top 2 inches staying consistently damp but never saturated. One trick I use is to water in the early morning so excess moisture evaporates by evening, preventing fungal issues. Once seedlings appear, I switch to drip irrigation on a timer set for 15 minutes every 2-3 days—this keeps water pressure gentle and prevents seed displacement.
Sunlight Strategy: When selecting your planting site, remember that 6-8 hours of direct sunlight is non-negotiable for optimal growth. I've planted thistles in partial shade and while they survive, they produce fewer flowers and grow more leggy. For maximum impact, choose a south-facing location. In hot climates, afternoon shade can actually help prevent leaf scorch during the critical first growing season. The plants will tell you what they need—if you notice leaves curling, they might need slightly more shade during peak afternoon hours.
Pollinator Preservation: Here's what nobody tells you about Step 4—the seed heads that remain through winter provide essential food for birds during harsh months. I leave at least 30% of seed heads intact until late winter, then cut back the rest. This simple practice transforms your garden into a year-round wildlife oasis. For extra pollinator appeal, consider planting thistles alongside native wildflowers—they create an irresistible buffet for bees and butterflies that will keep visiting season after season.
Pro Tips for Thistle Plant Seeds
- These simple strategies will help you cultivate thriving thistle plants that become pollinator magnets in your garden.
- Soil Preparation Secret: The key to successful thistle growth starts with that 3 inches of topsoil preparation in Step 1.
- Watering Wisdom: Those critical 4-6 weeks of consistent moisture in Step 2 are where most gardeners go wrong.
Frequently asked questions
Got questions about growing thistle plant seeds? You’re not alone! Here are some of the most common concerns—and straightforward answers—to help you get started with confidence.
When is the best time to plant thistle seeds?
Thistle seeds thrive in early spring (after the last frost) or late summer for fall blooms. Direct sowing works best—they dislike transplanting! For colder climates, start seeds indoors 6–8 weeks before the last frost if you’re eager for a head start. Pro tip: Thistles are hardy, so don’t stress if timing slips a little!
How long does it take for thistle seeds to germinate?
Germination usually takes 10–30 days, depending on soil warmth and moisture. Keep seeds lightly covered (¼ inch deep) in well-draining soil and water gently. Patience is key! If germination stalls, check for consistent moisture—thistles love damp (but not soggy) conditions. Cold stratification (a quick fridge soak for 2–4 weeks) can speed things up for slower starters.
Are thistle seeds invasive? Should I worry about them spreading?
While thistles can self-seed aggressively, they’re not typically classified as invasive in most regions. To control spread, deadhead spent blooms before seeds form or plant in containers if space is limited. Native thistles (like Cirsium species) are especially prized by pollinators—just monitor growth and remove unwanted volunteers as needed!
How do I protect my thistles from pests or diseases?
Thistles are generally low-maintenance, but watch for aphids, slugs, or powdery mildew in humid climates. Prevention tips:
Healthy soil (rich in compost) boosts resilience—thistles rarely need extra care once established! Thistles adapt well to large containers (12+ inches deep) with drainage holes. Use a well-draining potting mix and place pots in full sun. Dwarf varieties (like Cirsium rivulare) work best for containers. Remember: Thistles have deep roots, so opt for wide pots to prevent tipping. Fertilize lightly with compost tea in spring for extra vigor!
Can I grow thistle seeds in containers? What’s the best setup?
Wrapping up and next steps
Thistle plant seeds offer a low-maintenance, high-reward way to boost your garden’s beauty and biodiversity—while adding natural privacy and supporting pollinators! 🐝 Their hardy nature and striking blooms make them a standout choice for both beginners and seasoned gardeners alike.
Ready to plant your vision? Start small with a few seeds, observe their growth, and let their resilience inspire your next gardening project. Happy planting—your garden (and the bees!) will thank you! 🌱