
Transplanting
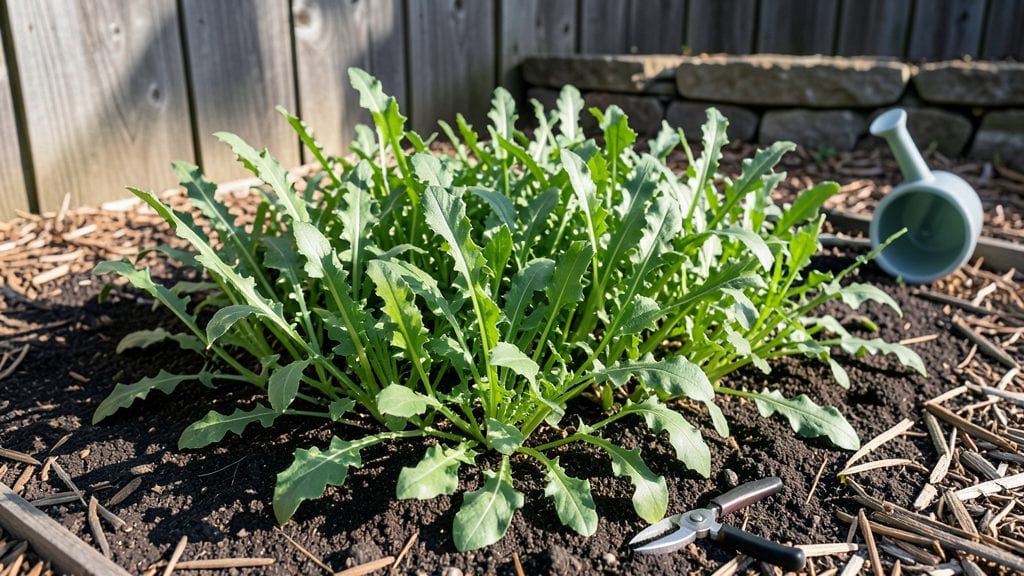
Thinning arugula seedlings isn't just about making space—it's the secret to lush, flavorful leaves that keep producing all season. I learned this the hard way when my crowded seedlings bolted by July, but now I thin every batch for plants that stay tender and sweet.
The key is timing and technique: do it right, and you’ll harvest for weeks instead of days.
You only need three things: sharp scissors (or your fingers), a sunny spot for transplants, and patience. Space mature arugula 12–18 inches apart—crowded plants compete for light and nutrients, leading to bitter leaves.
Thin when seedlings have 2–3 true leaves, and avoid pulling the whole plant to protect the roots of neighbors.
Here’s the game-changer: transplant thinned seedlings to a salad bowl or pot—they’ll keep growing for you. If you compost them, do it quickly to avoid attracting pests.
By the time your main plants hit 4–6 inches tall, you’ll have a second crop ready to harvest, and the flavor? Peak freshness, every bite.
Fair warning: the first time feels brutal, but those extra seedlings become free lunch for your kitchen. Master this step, and your arugula will outperform anything you’ve bought at the store. Ready to transform scraggly seedlings into a thriving patch?
📚 In This Guide
- What you need
- Instructions
- Tips and common mistakes
- Wrapping up and next steps
What you need
- ● Thinning shears or sharp scissors (sterilized to prevent disease) – 1 pair
- ○ Gloves (optional but recommended for hygiene) – 1 pair
- ● Watering can or spray bottle (with a gentle nozzle) – 1
- ● Compost or mulch (for replanting thinned seedlings or amending soil) – 1 small bag
- ● Ruler or measuring tape (for spacing—aim for 2–3 inches apart for mature plants) – 1
- ● Small trowel or transplanting tool (to gently lift seedlings) – 1
- ● Seedling trays or biodegradable pots (for relocating thinned sprouts) – 1–2 trays
- ● Organic fertilizer (low-nitrogen, like fish emulsion) – 1 small bottle
- ● Row cover or shade cloth (to protect seedlings from pests/sunburn) – 1 roll
- ● Notebook & pen (to track thinning dates and growth progress) – 1
Instructions for thinning arugula seedlings like a pro
Here’s how to transform crowded, weak seedlings into sturdy, bushy arugula plants ready for harvest.
Identify the Strongest Seedlings
Wait until seedlings have 2-3 true leaves—the second set after the initial cotyledons. At this stage, you’ll see clear differences in vigor: some stems will be thick and upright, while others look pale or leggy. Gently grasp each seedling between your thumb and forefinger to assess strength. The ones that snap easily or have yellowing leaves are the ones to remove.
I like to thin in the early morning when the soil is damp but not wet. This reduces stress on the remaining plants. Use a small pair of scissors or your fingers to avoid disturbing the roots of the seedlings you’re keeping. Never pull seedlings—this can uproot nearby plants and create gaps in your row.
Space Seedlings for Optimal Growth
Arugula thrives when spaced 2-3 inches apart in rows 12-18 inches apart. Use a ruler or spacing tool to maintain even gaps—crowding leads to competition for light and nutrients, resulting in bitter leaves. If your seedlings are too close, gently loosen the soil around the weaker ones with your fingers before removing them to minimize root disturbance.
For a 4-foot row, aim for about 16-20 plants spaced evenly. If you’re transplanting to a container, place 3-4 seedlings per 12-inch pot, ensuring they have room to spread without overcrowding. The goal is to mimic the density of a mature arugula patch, where leaves can grow freely without fighting for space.
Transplant Weak Seedlings to Another Location
Instead of discarding thinned seedlings, transplant them to a separate shallow tray or small pot filled with moist potting mix. This gives you extra plants for salads or filling gaps later. Water lightly after transplanting to help roots establish. If the seedlings are too small to handle, simply snip them at the soil line and compost them—just avoid pulling, which can damage roots.
Here’s the thing—arugula bolts (goes to seed) quickly when stressed. By thinning carefully, you’re ensuring the remaining plants have enough energy to stay tender and flavorful. Water the thinned row lightly immediately after to settle the soil and reduce shock. Avoid heavy watering, which can wash away loose soil and expose delicate roots.
Monitor and Adjust for Bushier Growth
After thinning, watch for signs of stress like wilting or yellowing. If you notice any, water at the base (not overhead) to prevent fungal issues. Arugula grows best in cool weather (50-65°F) and partial shade—if your seedlings start to bolt (send up flower stalks), provide afternoon shade to keep them producing tender leaves.
In 2-3 weeks, you’ll see the difference: thick, vibrant leaves instead of sparse, bitter growth. If you notice gaps after thinning, sow a few extra seeds in the empty spaces to maintain a continuous harvest. The key is consistency—check your arugula weekly for new growth and adjust spacing if needed as plants mature.
Tips & tricks for perfect arugula seedling thinning
Precision thinning transforms weak seedlings into robust plants—here’s how to avoid common pitfalls and maximize your harvest.
Timing is Everything: The early morning thinning in Step 1 works best because cooler temperatures reduce plant stress and damp soil makes seedlings easier to handle without disturbing roots. If you must thin later in the day, do it in the afternoon shade to prevent heat shock. I've learned the hard way that thinning in hot midday sun can cause the remaining plants to wilt within hours.
Visual Cues for Healthy Seedlings: In Step 1, look for seedlings with thick stems that feel firm when gently pinched—these are your keepers. The ones with yellowing leaves or stems that snap easily contain less chlorophyll and won't develop into strong plants. For a quick assessment, hold a seedling between your thumb and forefinger: if it bends easily, it's time to remove it.
Spacing Strategy: When spacing seedlings 2-3 inches apart in Step 2, use a simple tool like a ruler or even a wooden dowel to create consistent gaps. Uneven spacing leads to competition for sunlight, resulting in bitter leaves. For container gardening, remember that 3-4 seedlings per 12-inch pot gives each plant enough room to develop without crowding. I've found that using a grid pattern with string and stakes helps maintain perfect spacing in larger garden beds.
Transplanting Technique: When transplanting weak seedlings in Step 3, focus on preserving their root systems. Gently loosen the soil around the base before lifting, and avoid pulling—this can damage the roots of nearby plants. For seedlings too small to handle, snipping at soil level with clean scissors prevents disturbing the roots of your keepers while still allowing you to compost the removed plants.
Pro Tips for Thin Arugula Seedlings
- Precision thinning transforms weak seedlings into robust plants—here’s how to avoid common pitfalls and maximize your harvest.
- Timing is Everything: The early morning thinning in Step 1 works best because cooler temperatures reduce plant stress and damp soil makes seedlings easier to handle without disturbing roots.
- Visual Cues for Healthy Seedlings: In Step 1, look for seedlings with thick stems that feel firm when gently pinched—these are your keepers.
Frequently asked questions
Got questions about thinning arugula seedlings? You’re not alone! Here are answers to the most common concerns—plus pro tips to keep your greens thriving.
Why do I need to thin arugula seedlings at all?
Thinning prevents overcrowding, which leads to weak, leggy plants and poor flavor. By spacing seedlings properly (2–3 inches apart), you ensure they compete for sunlight, nutrients, and water—resulting in bushier, tastier leaves. Plus, it reduces the risk of pests and disease in dense patches!
When is the best time to thin arugula seedlings?
Thin as soon as seedlings have 2–3 true leaves (not just cotyledons). This is usually 2–3 weeks after germination, depending on your climate. Early thinning gives roots room to expand before they get tangled. Pro tip: Do it on a cloudy day to minimize stress on the plants!
How do I thin seedlings without harming the remaining plants?
Use sharp scissors or your fingers to snip at soil level—never pull. This avoids disturbing roots of the plants you’re keeping. For delicate seedlings, pinch the base gently. Bonus: Save the thinned seedlings for salads or compost!
What if my arugula seedlings are already too crowded?
Don’t panic! Gradually thin over 2–3 days to reduce shock. If roots are severely tangled, gently separate clumps with your hands before transplanting the healthiest seedlings. Water well after thinning to help recovery. Prevention tip: Sow in small batches every 2 weeks for a steady harvest!
Can I transplant thinned arugula seedlings elsewhere?
Arugula transplants well if done carefully. Choose a partially shaded spot (it bolts faster in hot sun) and keep soil moist. Space transplants 6–8 inches apart for larger leaves. Warning: Avoid transplanting in extreme heat—arugula prefers cool weather (50–65°F).
Still unsure? Drop your question in the comments—we’re happy to help your arugula grow like a pro!
Wrapping up and next steps
Growing lush, vibrant arugula starts with thinning seedlings the right way—patience and precision pay off in flavorful, bushy harvests! 🌱 By spacing plants properly and providing optimal care, you’ll avoid competition and encourage strong roots. Remember, thinning isn’t wasteful—it’s an investment in your garden’s future.
Ready to take the next step? Transplant your thinned seedlings into their final spot or share the extras with fellow green thumbs. Every snip is a step toward a thriving garden—so grab those shears and get growing! 🌿✨