Picking
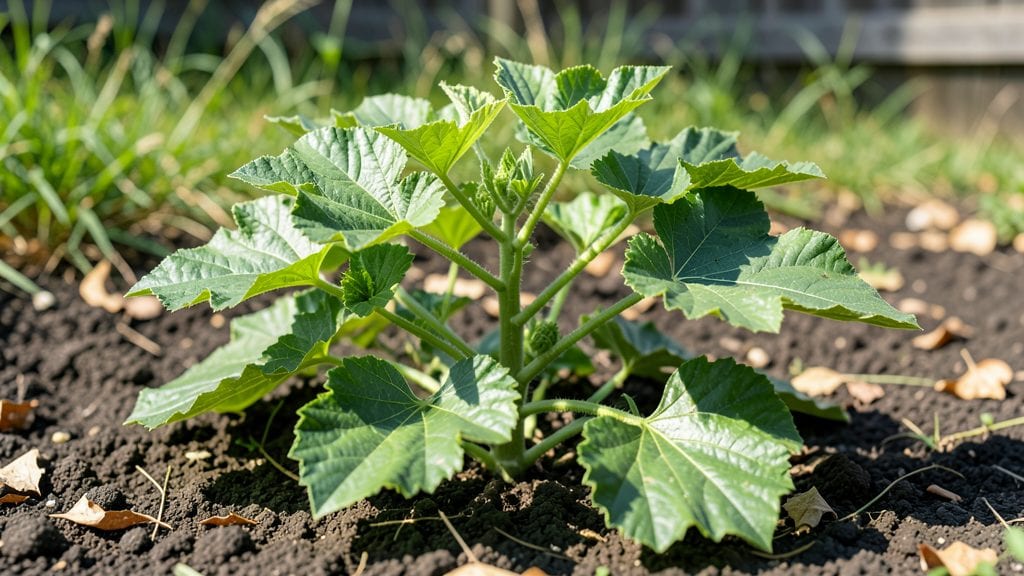
Summer squash seedlings can go from seed to bushy plants in just three weeks—if you use these germination tricks I perfected after killing my first batch last spring. 🌱 The secret isn’t just patience; it’s mimicking the warm, moist conditions squash crave right from the start.
Start with a 50/50 mix of potting soil and compost in a shallow tray—squash roots hate being buried deep. Keep the soil at 80-85°F with a heat mat or sunny windowsill, and cover seeds with just ¼ inch of soil (they need light to germinate).
Within 4-7 days, you’ll see those first stubborn little leaves pushing through.
Once sprouted, give them 12+ hours of sunlight daily and water only when the top inch feels dry—overwatering drowns tender roots. By week three, your seedlings will be stocky and ready for transplanting, with vibrant green leaves and no leggy stems.
The key is consistency: warm soil, bright light, and gentle care.
This method works for zucchini, yellow squash, and pattypan varieties alike, even in cooler climates if you start indoors. Skip the store-bought seedlings—your homegrown ones will outperform them every time. Let’s get those seeds going!
📚 In This Guide
- What you need
- Instructions
- Tips and common mistakes
- Wrapping up and next steps
What you need
- ● Summer squash seeds: 3–5 seeds per pot (or 1–2 seeds per cell in a seedling tray). Choose heirloom or hybrid varieties like Zucchini, Yellow Crookneck, or Patio Star for quick germination.
- ● Seed-starting mix: 2–3 quarts of sterile, seedling-specific potting soil (avoid garden soil—it’s too dense!). Look for mixes labeled "peat-free" if sustainability is a priority.
- ● Containers: Option 1: 4–6" biodegradable pots (peat or coconut fiber) for transplanting ease.
- ● Option 2: 2–3" cell trays (72–128 cells) for space efficiency.
- ● Watering can or spray bottle: With a fine mist nozzle to avoid disturbing seeds.
- ○ Heat mat (optional but recommended): A seedling heat mat (70–80°F) speeds germination from 7–10 days to just 3–5 days!
- ● Grow lights or sunny windowsill: A full-spectrum LED grow light (12–16 hrs/day) or a south-facing window (60°F+).
- ● Plant labels: Popsicle sticks or biodegradable tags to track varieties.
- ● Fertilizer: A balanced liquid fertilizer (5-5-5 or 10-10-10) diluted to half-strength for seedlings.
- ● Humidity dome or plastic wrap: To retain moisture while seeds germinate.
- ● Trowel or spoon: For gently pressing seeds into soil.
- ○ Thermometer (optional): To monitor soil temps—ideal range: 70–90°F for squash seeds.
Step-by-Step instructions for growing bushy summer squash seedlings
Skip the slow, leggy seedlings—here’s how to coax strong, compact squash plants in record time.
🌱 Step 1: Prep Seeds and Soil for Fast Germination
Summer squash seeds germinate best when prepped ahead. Soak them in lukewarm water for 12 hours—this softens the outer shell and speeds up sprouting. I use a shallow dish with a damp paper towel to keep them moist. After soaking, plant them 1 inch deep in warm, well-draining soil mix. The key is warmth: aim for 75-85°F soil temperature for fastest germination.
Use a seed-starting tray with individual cells to avoid overcrowding. Fill each cell with moistened soil, pressing lightly to remove air pockets. This ensures even contact between seeds and soil, which is critical for consistent germination. If your soil feels cool, place the tray on a seedling heat mat—it’ll cut germination time by nearly half.
💧 Step 2: Create a Humidity Dome and Monitor Moisture
Cover the tray with a clear plastic dome or plastic wrap to trap warmth and humidity. Summer squash seeds need consistent moisture but not soggy conditions. Check daily and mist the soil surface lightly if it feels dry to the touch. You’ll see condensation on the dome—this is normal and signals the right moisture balance.
Germination typically takes 5-10 days, but with these tricks, you’ll often see sprouts in 3-5 days. Once the first true leaves appear (not the initial seed leaves), remove the dome immediately. Trapped humidity after germination can lead to fungal issues like damping-off, which kills seedlings overnight.
☀️ Step 3: Provide Bright, Indirect Light Immediately
As soon as seedlings emerge, move them to a bright spot with 12-14 hours of light daily. A south-facing window works, but supplement with a grow light if natural light is weak. Position the light 2-3 inches above the seedlings and raise it as they grow to prevent stretching. Leggy seedlings are a red flag—this means they’re reaching for light and won’t recover without stronger illumination.
Rotate the tray a quarter turn daily so seedlings grow straight and sturdy. You’ll notice them leaning toward the light if you skip this step. Strong seedlings have thick stems and dark green leaves. If leaves look pale or stretched, the light isn’t intense enough—adjust immediately.
🌿 Step 4: Thin and Fertilize for Bushy Growth
When seedlings have 2-3 true leaves, thin to the strongest plant per cell. Use scissors to snip weak seedlings at soil level—this prevents disturbing roots of the remaining plants. Summer squash responds well to a light feeding once thinned. Mix ½ teaspoon of balanced fertilizer (10-10-10) per gallon of water and apply it to the soil surface. Avoid over-fertilizing, which can burn tender roots.
Keep soil consistently moist but not waterlogged. Let the top inch dry out between waterings to encourage deep root growth. You’ll see bushier plants developing within 2-3 weeks if you maintain these conditions. Watch for yellowing leaves—this usually means overwatering or poor drainage, so adjust accordingly.
⏰ Step 5: Harden Off and Transplant for Outdoor Success
Two weeks before your last frost date, start hardening off seedlings. Place them outside in a sheltered spot for 1-2 hours the first day, gradually increasing exposure over 7-10 days. This acclimates them to wind, sun, and temperature fluctuations. Hardened-off seedlings transplant with minimal shock and grow vigorously from day one.
Choose a sunny spot with 6-8 hours of direct sun daily and well-draining soil. Dig holes 12-18 inches apart (closer for bush varieties) and transplant seedlings at the same depth they were in pots. Water deeply after planting to settle the soil and reduce transplant stress. Mulch around the base with 2-3 inches of straw to retain moisture and suppress weeds.
Tips & tricks for perfect summer squash seedlings
Here's what nobody tells you about transforming leggy seedlings into sturdy, bushy summer squash plants.
Soil Temperature Secret: That 75-85°F soil temperature in Step 1 isn't just a suggestion—it's the difference between 5-day sprouts and 10-day struggles. I've seen germination cut in half when using a seedling heat mat during cooler spring nights. Place your thermometer in the soil, not on top of the tray, to get accurate readings. If your soil feels cool to the touch, it's too cold—warmth is what triggers those first critical sprouts.
Light Position Technique: In Step 3, those 12-14 hours of light need to be direct but not scorching. Position your grow light so the seedlings' tops just brush against it—this creates optimal light intensity without burning tender leaves. I rotate my tray every morning because seedlings naturally grow toward the light source, creating lopsided plants if left unchecked. Watch for that telltale leaning—it's your cue to reposition.
Hardening Off Strategy: The gradual 7-10 day hardening process in Step 5 works best when you mimic outdoor conditions. Start with morning sun only, then add afternoon exposure over several days. I've seen seedlings shocked by full sun too soon—leaves turn white and crispy within hours. A simple shade cloth over the sheltered area during the first few days prevents this common mistake while still letting them acclimate to outdoor elements.
Fertilizer Timing: That ½ teaspoon of balanced fertilizer per gallon in Step 4 should only be applied after you've thinned your seedlings. The roots are delicate at this stage, and over-fertilizing can actually stunt growth. I mix the fertilizer solution and let it sit for 5 minutes before applying—this allows the salts to slightly dilute, making it gentler on young roots. Yellowing leaves after fertilization usually means you've overdone it.
Pro Tips for Summer Squash Seedling
- Here's what nobody tells you about transforming leggy seedlings into sturdy, bushy summer squash plants.
- Soil Temperature Secret: That 75-85°F soil temperature in Step 1 isn't just a suggestion—it's the difference between 5-day sprouts and 10-day struggles.
- Light Position Technique: In Step 3, those 12-14 hours of light need to be direct but not scorching.
Frequently asked questions
Got questions about growing summer squash seedlings? You're not alone! Here are some of the most common concerns—plus quick fixes and pro tips to keep your plants thriving.
How long does it take for summer squash seedlings to germinate?
With the right conditions (warm soil, 70–90°F), summer squash seeds typically sprout in 3–10 days. For faster results, soak seeds overnight in warm water or use a heat mat. If germination takes longer than 2 weeks, check moisture and soil temperature—cold soil can stall growth!
When is the best time to plant summer squash seedlings outdoors?
Wait until after the last frost and soil temps hit 60°F+ (usually late spring/early summer). Harden off seedlings for 7–10 days first by gradually exposing them to outdoor conditions. Plant in full sun (6–8 hours/day) for bushy, productive vines.
What if my summer squash seedlings look leggy or weak?
Leggy seedlings mean they’re stretching for light. Prevent it by placing trays near a sunny window or under grow lights (12–16 hours/day). If already leggy, bury stems deeper when transplanting (they’ll root along the buried portion) or use a shade cloth to slow stretching.
Can I grow summer squash from store-bought squash seeds?
Yes! Save seeds from heirloom varieties (avoid hybrid labels like "F1"). Scoop out seeds, rinse, dry, and store in a cool, dark place. Germination rates drop after 1–2 years, so fresh seeds work best. Pro tip: Test a few seeds in damp paper towels first to check viability!
Why are my summer squash seedlings wilting or turning yellow?
Yellowing leaves often signal overwatering (check soil moisture—it should be damp but not soggy) or nutrient deficiency (use a balanced fertilizer like 10-10-10). Wilting can also mean underwatering or root stress (e.g., transplant shock). Ensure pots have drainage holes and mulch seedlings to retain moisture.
Wrapping up and next steps
Growing summer squash seedlings into lush, productive plants is totally within your reach—especially when you harness the right speed-germination tricks!
By following these steps, you’ll enjoy a bountiful harvest in just a few short weeks. Now that you’re armed with the knowledge, it’s time to roll up your sleeves and get planting!
🌱 Your Next Step: Plant with Confidence!
Start by gathering your supplies, prepping your soil, and sowing those seeds with the tips you’ve learned. Monitor your seedlings closely and watch them thrive—soon, you’ll be harvesting fresh, homegrown squash straight from your garden. Happy growing! 🌿