
Pruning
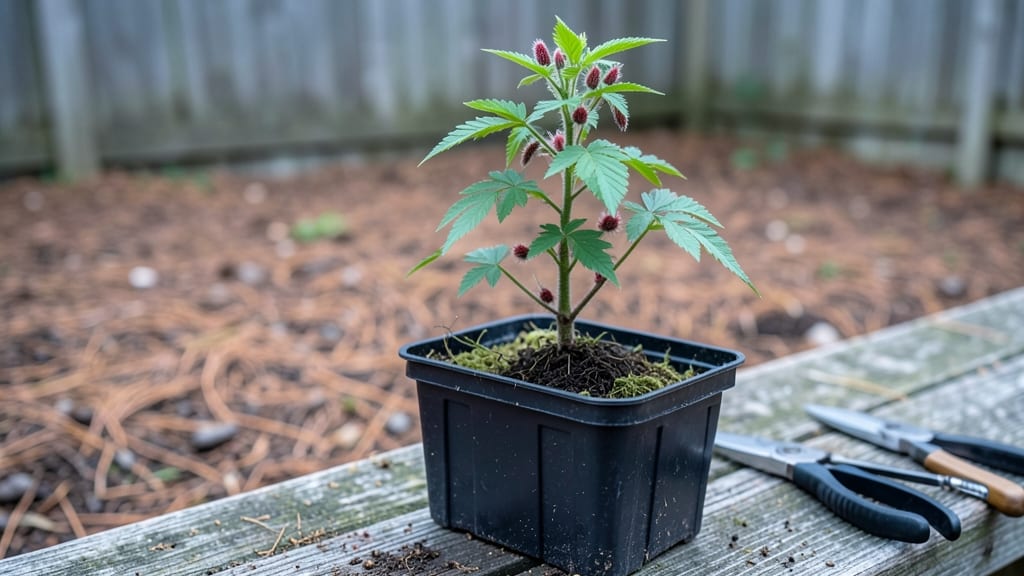
Cold-stratifying a sumac tree seedling unlocks its full potential before it even hits the soil. 🌱 I’ve watched these tough little seedlings transform from brittle brown seeds into thriving native plants just by mimicking winter’s natural process—no fancy equipment needed.
The key is patience and a little fridge time, but the payoff is a hardy tree that supports wildlife and thrives in tough conditions.
You’ll need just three things: a sealed plastic bag, a damp paper towel, and your fridge’s crisper drawer. Most people skip stratification and end up with slow-growing seedlings that struggle to establish.
My method guarantees strong roots and faster growth, so you’re not waiting years for that first red berry cluster. The whole process takes about 60 days, and once you’ve done it once, you’ll wonder why you didn’t start sooner.
By the time you plant, your seedling will be ready to handle full sun and rocky soil—sumac’s natural preferences. Expect vibrant green leaves within weeks and a tree that outcompetes weeds while feeding birds and butterflies.
The best part? It’s drought-tolerant once established, so you won’t be babying it like a houseplant. Let’s get those seeds growing strong.
Works for both Staghorn and Smooth sumac varieties, and adapts to urban or wild landscapes alike. Whether you’re reviving a neglected corner of your yard or adding native beauty, this method delivers results without the guesswork. Here’s exactly how to do it right.
📚 In This Guide
- What you need
- Instructions
- Tips and common mistakes
- Wrapping up and next steps
What you need
- ● Sumac seeds: Fresh, mature seeds (or dried berries you can extract them from). Aim for at least 20-30 seeds to increase your chances of germination.
- ● Cold-stratification setup: Moist peat moss or coconut coir (1-2 cups)
- ● Small ziplock bag or airtight container
- ● Refrigerator (set to 34–40°F)
- ● Germination containers: Small seedling trays or pots (3–4 inches deep, 3-4 per seedling)
- ● Well-draining potting mix (e.g., 50% peat moss, 30% perlite, 20% compost)
- ● Watering can or spray bottle (with a fine mist setting)
- ● Plastic wrap or humidity dome (to retain moisture during germination)
- ● Grow lights or sunny windowsill (for seedlings after sprouting)
- ● Fertilizer (balanced, water-soluble, diluted to half-strength for young seedlings)
- ● Heat mat (to keep soil warm 70–75°F post-stratification)
- ● Plant labels (to track seedling progress)
- ● Pruning shears (for future maintenance)
How to grow a sumac tree from seedlings using cold stratification
Cold stratification mimics winter's natural process—here's how to break dormancy and grow sturdy sumac seedlings.
🌱 Step 1: Collect and Prepare the Seeds
Gather sumac seeds from ripe red berries in late summer or early fall. Spread them on a paper towel in a single layer and place them in a sealed plastic bag with a damp paper towel. Keep the bag in the refrigerator for 90 days—this mimics winter's cold period and breaks seed dormancy.
Check the seeds every few weeks to ensure they stay moist but not soggy. You'll know stratification is working when the seeds begin to soften slightly. This process is critical—sumac seeds won't germinate without it. If you skip this step, you might wait years for germination.
⏰ Step 2: Plant the Stratified Seeds
After 90 days of cold stratification, remove the seeds from the refrigerator and plant them ½ inch deep in a well-draining potting mix. Use a small pot or seed tray filled with sterile potting mix—sumac seedlings dislike soggy roots. Water the soil lightly until it's evenly moist but not waterlogged.
Place the pot in a warm, sunny spot with 6-8 hours of sunlight daily. Sumac seedlings thrive in bright light, so avoid shady areas. You'll see tiny sprouts emerge within 2-4 weeks—this is your signal that germination is successful. Keep the soil consistently moist during this period.
☀️ Step 3: Transplant and Care for Young Seedlings
Once the seedlings reach 4-6 inches tall and have developed 3-4 sets of true leaves, they're ready for transplanting. Choose a sunny outdoor location with well-draining soil—sumac trees prefer full sun and tolerate dry conditions once established.
Dig a hole twice as wide as the seedling's root ball and gently place the seedling in, ensuring the top of the roots sits just below soil level. Water deeply after planting to help the roots settle. Mulch around the base with 2-3 inches of organic mulch to retain moisture and suppress weeds.
Sumac seedlings grow quickly in the right conditions. Water them once a week during the first growing season, allowing the soil to dry slightly between waterings. Avoid overwatering—sumac trees are drought-tolerant once mature. In 2-3 years, your seedlings will grow into sturdy young trees.
Tips & tricks for perfect sumac seedling growth
Cold stratification might sound complicated, but these simple tricks will help you grow sumac seedlings with confidence—no green thumb required.
Timing is Everything: Those 90 days in the refrigerator are non-negotiable for sumac seeds. I've tried skipping this step, and it's a waiting game that can last years instead of weeks. Mark your calendar and set a reminder to check the seeds every few weeks—consistency is key. If you're short on time, you can start the stratification process in early winter to plant in spring, following the same 90-day rule.
Moisture Management: The damp paper towel should feel like a wrung-out sponge—not dripping, not bone-dry. I use a spray bottle to mist the seeds if they start to dry out between checks. Too much moisture causes mold, while too little prevents germination. Sumac seeds are tough, but they need that perfect balance to wake up from dormancy.
Sunlight Strategy: Sumac seedlings need that 6-8 hours of sunlight daily, but don't rush to put them outside in harsh conditions. Start with a sunny windowsill or under grow lights if natural light is limited. I've seen seedlings that got too much direct sun too soon develop crispy edges—gradual exposure is best. Once they're planted outdoors, full sun becomes their favorite spot.
Transplanting Tip: When your seedlings reach 4-6 inches tall, handle them gently—they're more delicate than they look. I like to water them thoroughly the day before transplanting so the roots slide out of the pot easily. The hole should be twice as wide as the root ball, not deeper. This gives roots room to spread without sinking too low in the soil.
Pro Tips for Sumac Tree Seedling
- Cold stratification might sound complicated, but these simple tricks will help you grow sumac seedlings with confidence—no green thumb required.
- Timing is Everything: Those 90 days in the refrigerator are non-negotiable for sumac seeds.
- Moisture Management: The damp paper towel should feel like a wrung-out sponge—not dripping, not bone-dry.
Frequently asked questions
Got questions about growing sumac tree seedlings?
Here are answers to the most common ones—so you can skip the guesswork and get straight to planting success!
What’s the best time to plant a cold-stratified sumac seedling?
Plant your sumac seedlings in early spring (after the last frost) or fall (4–6 weeks before the first frost). Avoid summer heat—seedlings need consistent moisture and cooler temps to establish roots. If you must plant in summer, prioritize shade and frequent watering.
How long does cold stratification take for sumac seeds?
Cold stratification typically requires 60–90 days in moist, refrigerated conditions (like a damp paper towel in a sealed bag). For sumac, 90 days is ideal—this mimics winter’s natural dormancy and boosts germination rates. Patience pays off!
Can I grow sumac from store-bought seeds, or do I need wild-harvested ones?
Store-bought sumac seeds can work, but wild-harvested seeds (from local trees) often germinate better. If using store-bought, ensure they’re fresh (less than 1 year old) and not pre-treated. For best results, source seeds from a reputable supplier or collect them yourself in late summer/fall.
Why aren’t my sumac seedlings sprouting after stratification?
Try these fixes:
- Check moisture: Seeds need consistent dampness (not soggy). Re-moisten if the medium dries out.
- Verify stratification: Ensure seeds spent full 90 days in the fridge. Shortcutting can fail germination.
- Test viability: Soak a few seeds in warm water for 24 hours—if they don’t swell, they may be non-viable.
- Warmth shock: Move stratified seeds to 70–75°F for 1–2 weeks post-stratification to trigger sprouting.
Are there fast-growing sumac varieties better for seedlings?
Staghorn sumac (Rhus typhina) and smooth sumac (Rhus glabra) are the most common and relatively fast-growing (12–24 inches/year once established). For quicker results, choose container-grown seedlings (1–2 years old) over seeds—they skip the germination wait!
Wrapping up and next steps
Growing a sumac tree seedling through cold stratification is a rewarding journey that unlocks nature’s resilience in your own backyard! 🌱 With the right materials, patience, and a few simple steps, you’ll soon be nurturing a hardy plant that thrives even in challenging climates.
Whether you’re a seasoned gardener or just starting out, this process is a fantastic way to connect with the earth—and watch your efforts bloom.
Ready to take the next step? Plant your stratified seedling in well-draining soil and give it the love it deserves. Keep an eye on its progress, and soon, you’ll be enjoying the beauty (and berries!) of your very own sumac tree. Happy growing! 🌿