Picking
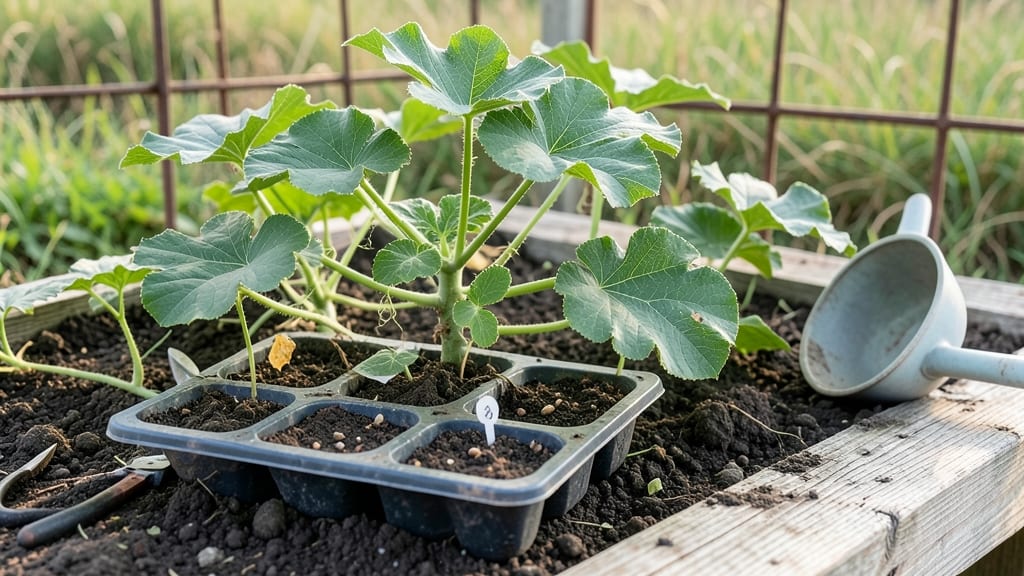
Watermelon seeds sprouting in just 3-5 days feels like magic—until you realize it’s all about the right setup. I’ve turned my slow-starting seeds into sturdy vines by mastering the early stages, and you can too.
The secret isn’t complicated: warmth, moisture, and patience work together to break through that stubborn outer shell.
Start with seeds soaking overnight in warm water to jumpstart germination. Plant them ½ inch deep in a mix of 50% peat moss and 50% perlite—this combo drains well while holding enough moisture to keep seeds happy.
A heat mat set to 80-85°F under your seed tray cuts germination time in half, and a clear plastic dome traps humidity just like a greenhouse.
Once those first leaves appear, move seedlings to bright, indirect light and water gently at the soil line—never overhead. You’ll see true leaves in 7-10 days, and by week 3, those vines will start stretching like they’re racing toward summer.
The payoff? Bursting vines that fruit weeks ahead of store-bought transplants.
This method works for any watermelon variety, from small sugar babies to giant seedless types. Just watch for damping-off (a fungal sneeze) by keeping trays clean and avoiding soggy soil.
With these steps, you’ll go from seed to sprout in record time—and your neighbors will be jealous of your early harvest. Let’s get those seeds going!
📚 In This Guide
- What you need
- Instructions
- Tips and common mistakes
- Wrapping up and next steps
What you need
- ● Watermelon seeds: Choose heirloom or hybrid varieties labeled for your climate zone (e.g., Sugar Baby, Crimson Sweet). You’ll need 5–10 seeds per container or 1–2 seeds per planting hole (if direct-sowing).
- ● Sprouting jar or mesh seedling tray: A 16–24 oz mason jar with a sprouting lid or a biodegradable mesh tray (3–4" diameter).
- ○ High-quality sprouting seeds: Alfalfa, radish, or broccoli seeds (¼ cup) to kickstart germination alongside watermelon seeds (optional but accelerates growth).
- ● Growing medium: Sprouting phase: Organic cotton pads or paper towels (2–3 layers).
- ● Transplanting phase: Seedling pots (3–4" diameter) or biodegradable peat pellets (2–3 per seed).
- ● Outdoor phase: Well-draining potting mix (5–10 gallons) or loamy garden soil (amend with compost).
- ● Water: Room-temperature, filtered water (2–3 cups daily for sprouting).
- ● Sunlight: A south-facing window or grow light (12–16 hours/day for seedlings).
- ● Fine mist spray bottle (for gentle hydration during sprouting).
- ● Small hand trowel (for transplanting seedlings).
- ● Fertilizer: Fish emulsion (1-2-2) or compost tea (diluted) to boost early growth.
- ● Row cover or greenhouse (if extending the growing season in cooler climates).
- ○ Trellis or stakes (4–6 ft tall) for vertical growth (optional but saves space!).
Step-by-Step instructions for speed-germinating watermelon seeds
Here’s how to coax watermelon seeds into vigorous sprouts in record time—no waiting months for vines to burst.
Prepare Seeds for Maximum Germination Energy
Watermelon seeds have tough outer shells that slow germination, so we’ll soften them first. Fill a small bowl with warm water (around 80°F) and add the seeds. Let them soak for 12 hours—this softens the seed coat and jumpstarts the sprouting process. After soaking, drain the water and spread the seeds on a damp paper towel.
Fold the towel to keep the seeds lightly moist but not soggy. Place the towel in a warm, dark spot (like on top of the fridge) for 24 hours. You’ll see tiny white roots emerge—this is your signal that germination is ready to accelerate. Real talk: Skipping this step can add 3-5 days to your timeline, and weak seedlings may struggle later.
Set Up the Germination Chamber
Use the 4-inch square seedling tray and fill it with moistened seed-starting mix—just damp enough to hold together when squeezed, but not dripping. Press the mix down lightly to create a firm, even surface. This prevents seeds from sinking too deep, which can suffocate them.
Plant the pre-soaked seeds ½ inch deep, spacing them 2 inches apart in the tray. Cover them lightly with a thin layer of additional mix, then mist the surface with a spray bottle until evenly damp. Place the tray in a clear plastic dome (or cover it with plastic wrap) to trap warmth and humidity. Watermelon seeds germinate best at 85-90°F, so if your home runs cooler, set the tray on a seedling heat mat to maintain that range.
Monitor and Transplant at the Right Moment
Check the tray daily for sprouts, which should appear in 3-5 days under ideal conditions. Once the first true leaves (not the initial seed leaves) emerge, remove the dome immediately to prevent fungal issues. Watermelon seedlings are sensitive to cold, so keep them in a warm, bright spot—a south-facing window or under grow lights for 14-16 hours daily. If leaves look pale or stretched, the light is too weak or too far away.
When seedlings reach 2 inches tall and have 2-3 true leaves, it’s time to transplant them into 4-inch pots filled with the seed-starting mix. Handle them gently by their leaves, not the stems, to avoid damage. After transplanting, water lightly to settle the soil and place the pots in a sunny, sheltered spot for 1 week to harden off before moving them outdoors.
Transition to Outdoor Growth
Wait until nighttime temperatures stay above 55°F before planting seedlings outdoors. Choose a sunny, well-draining spot with full sun exposure—watermelons thrive in hot, humid conditions and need at least 8 hours of direct sunlight daily. Dig holes slightly larger than the pots, place the seedlings in, and bury them to the same depth they were in the pots.
Water deeply at the base after planting to encourage root establishment. Mulch around the plants with 1 inch of straw mulch to retain moisture and suppress weeds. Watermelon vines grow aggressively, so give them plenty of space—3-4 feet apart in rows 6 feet apart. Watch for first true vine growth within 2 weeks of transplanting; this confirms your early germination efforts paid off.
Tips & tricks for speed-germinating watermelon seeds
These precision techniques will help you bypass the months-long wait for watermelon vines to emerge, ensuring your seedlings burst forth with vigor.
Temperature Precision in Step 1: The 80°F warm water for the initial 12-hour soak is non-negotiable—any cooler, and the seed coat won't soften properly, while hotter water risks damaging delicate seed membranes. Use a thermometer to verify if your tap water runs warm enough, or place the bowl in a sink with slightly hotter water. This step is where most germination delays begin, so don't rush it.
Germination Chamber Optimization: In Step 2, maintaining the 85-90°F range is critical for those 3-5 days until sprouts appear. If your home stays below 70°F, invest in a small seedling heat mat—even a simple 10-watt bulb placed 6 inches above the tray can provide the extra warmth needed. The plastic dome creates a greenhouse effect, but monitor daily for condensation buildup, which can lead to mold.
Light Management in Step 3: The 14-16 hours of daily light after transplanting to pots is essential for preventing leggy seedlings. If using grow lights, position them 2-3 inches above the plants and adjust as they grow. Natural south-facing windows work well, but rotate the tray daily to ensure even light exposure—uneven growth here will create weak stems that struggle later when vines need to support heavy fruit.
Transplant Timing Strategy: When moving seedlings outdoors in Step 4, wait until nighttime temperatures consistently stay above 55°F—this prevents transplant shock that can stall growth for weeks. A simple way to test is to place a thermometer outdoors overnight; if it drops below this threshold, delay planting by another week. The first true vine growth within 2 weeks confirms your accelerated germination paid off.
Pro Tips for Sprouts Seeded Watermelon
- These precision techniques will help you bypass the months-long wait for watermelon vines to emerge, ensuring your seedlings burst forth with vigor.
- Temperature Precision in Step 1: The 80°F warm water for the initial 12-hour soak is non-negotiable—any cooler, and the seed coat won't soften properly, while hotter water risks damaging delicate seed membranes.
- Germination Chamber Optimization: In Step 2, maintaining the 85-90°F range is critical for those 3-5 days until sprouts appear.
Frequently asked questions
Got questions about sprouts-seeded watermelon? You’re not alone! Here are answers to the most common queries—from impatient gardeners to first-timers. Dive in!
How long does it take for sprouts-seeded watermelon to germinate?
With the sprouts-seeded method, you’ll see tiny sprouts (1–3 inches) in just 3–7 days—far faster than traditional seeds! Plant them outdoors after the last frost when soil is 70°F+. Patience pays off: full vines emerge in 2–3 weeks!
Can I plant sprouts-seeded watermelon directly into the ground?
Skip the transplant shock—just pop those pre-sprouted seeds 1–2 inches deep into warm, well-drained soil. Space them 3–4 feet apart (or use trellises to save space). Pro tip: Add a mulch layer to retain moisture and speed up vine growth!
What if my sprouts-seeded watermelon doesn’t sprout?
Don’t panic! Check these fixes:
- Moisture: Keep soil damp (not soggy)—sprouts need hydration.
- Temperature: Sprouts thrive at 75–85°F. Use a heat mat if indoors.
- Light: Place near a sunny window or under grow lights.
- Seed viability: Test a few seeds in a damp paper towel first.
Are sprouts-seeded watermelons different from regular watermelons?
Not at all! The sprouts-seeded method is just a time-saver—you’ll grow the same variety (e.g., Sugar Baby, Crimson Sweet) but with faster germination and earlier harvests. The fruit’s size, taste, and texture stay identical—just enjoy the speed!
What’s the best alternative if I can’t find sprouts-seeded watermelon?
No sprouts-seeded watermelon? No problem!
- Traditional seeds: Soak watermelon seeds in warm water for 12–24 hours to kickstart germination.
- Transplants: Buy seedling watermelons from nurseries (just ensure they’re hardened off first).
- Hybrid varieties: Some, like ‘Black Diamond’, germinate faster than heirlooms.
Wrapping up and next steps
Growing sprouts-seeded watermelon is a game-changer for impatient gardeners—turning weeks into days with fast, vibrant vines! 🌱 By mastering the right techniques, you’ll enjoy juicy, homegrown fruit in record time while minimizing waste.
Whether you’re a beginner or a seasoned grower, this method proves that patience isn’t always a virtue when it comes to gardening.
Ready to harvest the rewards? Start by planting your sprouted seeds this weekend and track their progress daily. Share your first sprouts with fellow gardeners—your success might just inspire the next big harvest! 🌞