
Lawn
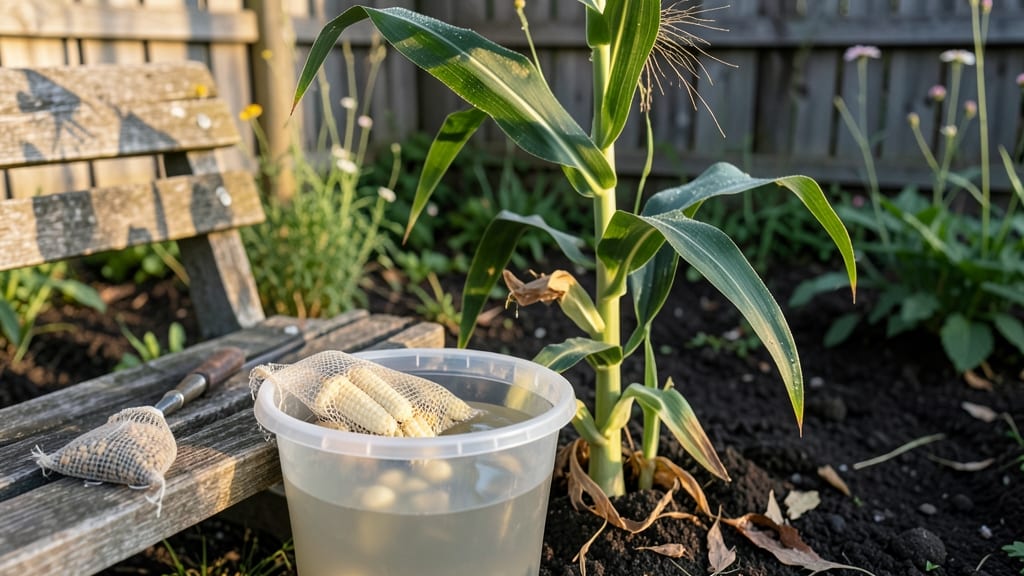
Soaking corn seeds before planting isn’t just a trick—it’s the secret to stronger, faster germination that saves you weeks of waiting. I learned this after struggling with slow sprouts in my first corn patch, where half the seeds took 10+ days just to crack through the soil.
That changed when I started soaking them overnight in warm water, and now my plants emerge within 3-5 days, thick and ready to grow.
The process itself is simple: you’ll need a bowl of warm water (not hot—just comfortably warm to the touch), a breathable container like a mesh bag or paper towel, and 8-12 hours of patience.
The warmth jumpstarts the seed’s metabolism, while the moisture softens the tough outer shell, letting roots break through effortlessly. This isn’t just about speed—it also boosts nutrient uptake and even deters some pests that target dry seeds.
What you’ll end up with is a uniform stand of corn that emerges at the same time, reducing gaps in your rows and making thinning easier. The seedlings are sturdier from the start, with deeper roots that anchor them against wind and drought.
Plus, you’ll notice fewer weak or stunted plants—no more patchy fields where some seeds lag behind.
This method works for both sweet corn and field corn, and it’s especially useful in cooler climates where soil stays chilly for longer. Just avoid soaking too long (24 hours max) or using cold water, which can leach nutrients or slow germination.
Ready to try it? Here’s exactly how to do it right.
📚 In This Guide
- What you need
- Instructions
- Tips and common mistakes
- Wrapping up and next steps
What you need
- ● Corn seeds: Choose high-quality, untreated seeds (e.g., Zea mays). For a small garden, 1–2 lbs (0.5–1 kg) covers ~1,000 sq ft.
- ● Water: Room-temperature or slightly warm (not hot!). Use 1 gallon (3.8 L) per pound of seeds.
- ● Container: A clean, non-reactive bucket, bowl, or jar (glass or food-grade plastic). Size should hold seeds + water with 1–2 inches (2.5–5 cm) of headroom.
- ● Strainer or mesh bag: A fine-mesh colander or breathable seedling bag to drain seeds easily.
- ○ Optional: A thermometer to monitor water temp (ideal: 65–85°F / 18–29°C).
- ○ Optional: A hydrometer to check water hardness (soft water speeds soaking).
- ○ Optional: Hydrogen peroxide (3%)—1 tsp per gallon—to disinfect water and boost oxygen.
- ○ Optional: A clock or timer for precise soaking (corn seeds need 12–24 hours, depending on variety).
- ● Check seed packaging for soaking recommendations—some varieties (like sweet corn) may need shorter soaks.
- ● Ensure seeds are dry and stored properly (moisture or mold = bad news!).
- ● Pick a warm, draft-free spot (e.g., near a sunny window or in a 60–75°F / 15–24°C environment).
Step-by-step guide to soaking corn seeds for faster germination
Here’s how to prep your corn seeds for planting—warmth and moisture work together to jumpstart growth.
Gather Your Supplies
You’ll need a clean bowl, warm water, and the corn seeds you’ve chosen. I always use a glass or ceramic container because it won’t absorb moisture or leach chemicals into the water. Fill the bowl with enough warm water to fully submerge the seeds—about 2 quarts should do for a standard batch. Avoid cold water; it slows the soaking process.
Check the water temperature with your finger—it should feel warm but not hot to the touch. If it’s too hot, let it cool slightly before proceeding. This step ensures the seeds absorb moisture evenly and activates enzymes that speed up germination.
Soak the Seeds
Place the corn seeds in the warm water and let them soak for 12-24 hours. The longer they soak, the faster they’ll germinate, but don’t exceed 24 hours—over-soaking can cause the seeds to split or rot. I like to stir them gently every few hours to ensure even exposure to the water.
After soaking, the seeds should feel plump and slightly firmer to the touch. If they float, they may not be viable—discard those and focus on the ones that sink. Drain the water completely and let the seeds sit in a strainer or colander for 10-15 minutes to remove excess moisture.
Prepare for Planting
While the seeds drain, fill your planting containers with the moistened potting mix—you’ll want it damp but not soggy. Press the mix gently into the container to remove air pockets, then create small furrows about 1 inch deep where you’ll place the seeds. Space them 4-6 inches apart to give roots room to grow.
Drop the soaked seeds into the furrows, covering them lightly with additional potting mix. Press the soil down just enough to secure the seeds but don’t compact it too tightly. Water the soil lightly with a spray bottle to settle everything in place. This keeps the seeds moist while they germinate without washing them away.
Maintain Moisture and Warmth
Place the planted seeds in a warm, humid environment—ideal temperatures for germination are 75-85°F. A seedling heat mat or a sunny windowsill works well, but avoid direct sunlight until the seeds sprout. Keep the soil consistently moist by misting it lightly every 1-2 days or when the top inch feels dry.
Germination should begin in 5-10 days, depending on the variety. You’ll see tiny green shoots pushing through the soil first, followed by the first true leaves. Once the seedlings reach 2-3 inches tall, they’ll be ready to transplant or thin out if needed.
Transition to Outdoor Conditions
If planting outdoors, wait until nighttime temperatures stay above 55°F before transferring seedlings. Harden them off by placing them outside in a shaded spot for 1-2 hours the first day, gradually increasing exposure over 5-7 days. This helps them adjust to sunlight and wind without shock.
After hardening off, transplant the seedlings into their final location, spacing them 12-18 inches apart in rows 3 feet apart. Water deeply at the base to encourage root growth. With proper soaking and care, your corn should show strong, healthy growth within weeks.
Tips & tricks for perfect corn seed germination
A few simple tricks can make all the difference between seeds that just sit there and ones that sprout in record time. The key is understanding how warmth and moisture work together to wake up those seeds.
Warm Water Temperature: The water should feel warm to your finger but not hot enough to cause steam. I use a thermometer to confirm it's between 75-85°F—this range activates the seeds' enzymes without cooking them. If you don't have a thermometer, let tap water sit out for 30 minutes before using it, especially in cooler climates. Cold water slows germination by 30-50%, so never use straight-from-the-fridge water.
Soaking Duration: The 12-24 hour soaking window is perfect for most corn varieties. For faster germination, aim for the upper end (20-24 hours) but never exceed 24 hours—after that, seeds can develop rot or split open. I set a timer and stir the seeds every 6 hours to ensure even moisture distribution. If you forget to stir, don't worry—they'll still germinate, but some seeds might take slightly longer.
Drainage Technique: After soaking, the 10-15 minute drainage in a strainer is crucial for preventing mold. I use a fine-mesh colander and gently shake it occasionally to help excess water drain completely. This step also helps the seeds harden slightly before planting, which prevents them from becoming too soft and fragile when they first sprout.
Planting Depth: The 1-inch planting depth might seem shallow, but corn seeds need that space to push through the soil easily. Deeper planting can cause the seedlings to struggle against soil resistance. I make the furrows with my finger and verify the depth by pressing the seed in—it should be just covered, not buried. This shallow planting also helps with faster emergence.
Pro Tips for Soak Corn Seed
- A few simple tricks can make all the difference between seeds that just sit there and ones that sprout in record time.
- Warm Water Temperature: The water should feel warm to your finger but not hot enough to cause steam.
- Soaking Duration: The 12-24 hour soaking window is perfect for most corn varieties.
Frequently asked questions
Got questions about soaking corn seeds? You’re not alone!
Here are answers to the most common concerns—from timing to troubleshooting—so you can get your corn growing strong and fast.
How long should I soak corn seeds?
Soak corn seeds for 12–24 hours in warm water (70–80°F) to soften the seed coat and kickstart germination. Avoid over-soaking—beyond 24 hours, seeds may absorb too much water and risk mold. Drain and plant immediately after soaking for best results.
When is the best time to soak corn seeds before planting?
Soak seeds 1–2 days before planting for optimal germination. If planting right away, soak them overnight (12–16 hours) and keep them moist until you’re ready to sow. Corn thrives in warm soil, so aim to plant after the last frost when soil temps reach 60°F+.
Can I reuse water from soaking corn seeds?
No, never reuse soaking water—it can harbor bacteria and fungi that harm seeds or seedlings. Always use fresh, warm water for soaking, and discard the old water after the first soak. For eco-friendly options, consider composting the drained water (if no mold is present) for your garden.
What if my corn seeds mold after soaking?
Mold is a red flag! If you see fuzzy spots or a foul smell, discard the seeds immediately—they’re no longer viable. To prevent mold, use clean containers, change water if it gets cloudy, and avoid overcrowding seeds. If mold appears, try soaking in a 1% hydrogen peroxide solution (1 part peroxide to 9 parts water) for 10 minutes before rinsing.
Are there alternatives to soaking corn seeds?
Yes! If soaking isn’t an option, try these tricks:
- Scarification: Lightly nick the seed coat with sandpaper to help water penetrate.
- g>Warmth Trick: Place seeds in a damp paper towel in a warm (75°F+) spot for 2–3 days.
- Direct Planting: Plant seeds 1–2 inches deep in moist, warm soil—they’ll germinate slower but may still succeed.
Wrapping up and next steps
Soaking corn seeds is a simple yet powerful way to boost germination rates and give your lawn a head start! 🌱 By using warmth and moisture—whether through warm water, a damp paper towel, or even a DIY soaking jar—you’re setting the stage for stronger, healthier seedlings.
Whether you’re a seasoned gardener or just starting out, these tricks make the process easier and more effective.
Ready to see those seeds sprout faster? Grab your supplies, follow the steps, and watch your lawn transform! Next, plant those pre-soaked seeds in well-prepared soil and keep an eye on their progress—you’ve got this! 🌟