Flowers
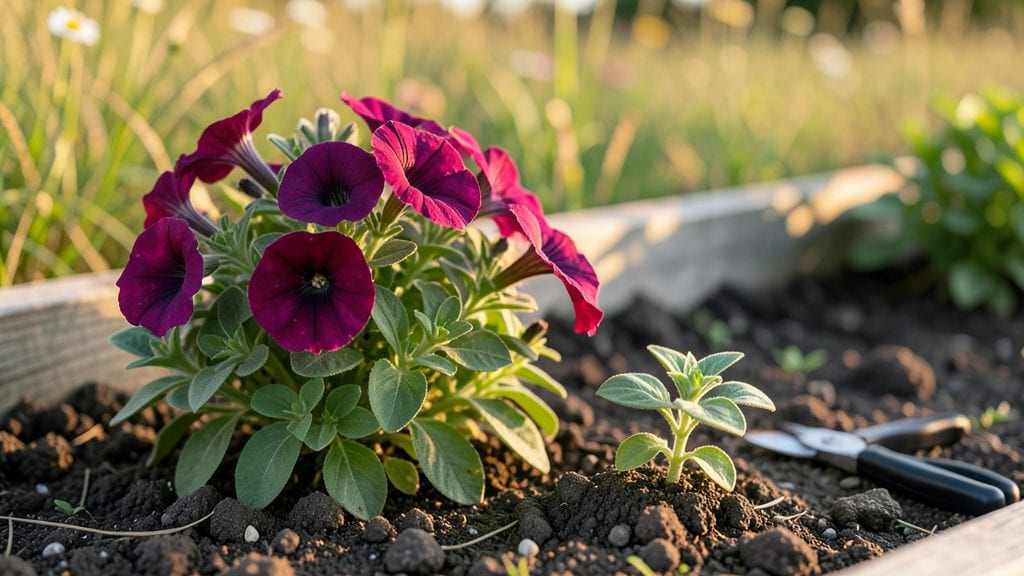
Turning seedlings into blooming plants faster than you’d expect is all about light, patience, and a few smart tricks. 🌱 I’ve watched tiny sprouts transform into vibrant flowers by focusing on just two things: consistent light exposure and the right timing for nutrient shifts.
The difference between a leggy, weak seedling and a sturdy, blooming plant often comes down to how you manage those first critical weeks.
You’ll need a grow light or south-facing window for 12+ hours of light daily, a small pot with drainage, and a balanced fertilizer once the first true leaves appear. Most beginners overwater or underfeed—both kill progress faster than anything else.
My first batch of zinnias nearly died from soggy soil, but once I adjusted, they bloomed in just 6 weeks instead of months.
By the time you’re pinching back leggy stems and switching to a bloom-boosting fertilizer, you’ll see buds forming within 4-8 weeks depending on the plant.
The key is watching for that first flower stalk—it’s your cue to cut back on nitrogen and let the plant focus on blooms instead of leaves. Snap a photo when you spot the first bud; it’s a milestone worth celebrating.
This works for annuals like petunias, perennials like coneflowers, and even finicky plants like orchids if you adjust light intensity. The same principles apply whether you’re growing in a windowsill garden or a greenhouse. Let’s get those seedlings on the fast track to flowers!
📚 In This Guide
- What you need
- Instructions
- Tips and common mistakes
- Wrapping up and next steps
What you need
- ● Seeds: Choose fast-growing, light-loving varieties like Zinnias, Marigolds, or Sunflowers (10–20 seeds per batch).
- ● Seedling Trays: 1–2 biodegradable or plastic trays (72–128 cell count) with drainage holes.
- ● Potting Mix: 2–3 gallons of lightweight, well-draining seed-starting mix (avoid garden soil).
- ● Grow Lights: 1–2 full-spectrum LED grow lights (12–16 hours/day) with adjustable height (e.g., 12"–18" above seedlings).
- ● Watering Can or Spray Bottle: With a fine mist nozzle for gentle hydration.
- ● Fertilizer: 1 bottle of balanced liquid fertilizer (5-5-5 or 10-10-10 NPK ratio) or slow-release granules.
- ● Transplant Pots: 4–6" pots (1 per seedling) or a larger container (12"–16" diameter) for group planting.
- ● Hand Trowel: For transplanting seedlings.
- ● Pruning Shears: To trim leggy seedlings or dead foliage.
- ○ Humidity Dome or Plastic Wrap: Optional, for retaining moisture during germination.
- ○ Thermometer/Hygrometer: Optional, to monitor ideal temps (65–75°F for most flowers).
- ● Stakes or Trellis: For tall varieties like sunflowers (1–2 per plant).
Step-by-Step instructions for light-focused seedling growth
Here’s how to coax seedlings into vigorous bloomers by mastering their light needs—critical for rapid, healthy development.
🌱 Step 1: Select Fast-Germinating Varieties and Prep Containers
Start with annual flowers like zinnias, marigolds, or cosmos—they thrive under focused light and bloom quickly. Use 4-inch biodegradable pots (one per seedling) filled with sterile seed-starting mix. Press the soil down lightly so it’s firm but not compacted; this prevents air pockets that stunt root growth.
Plant seeds at twice their diameter deep—too shallow and they’ll dry out before sprouting. Mist the surface with water until it’s evenly damp but not soggy. Cover the tray with a clear plastic dome to retain humidity, then place it in a warm spot (70-75°F) until germination. You’ll see sprouts in 5-10 days, depending on the variety.
☀️ Step 2: Introduce Light Immediately After Germination
The moment seedlings break through the soil, remove the dome and position them under a full-spectrum LED grow light (14-16 hours daily). Place the light 2-4 inches above the seedlings—closer than that can scorch tender leaves, while farther away leads to leggy, weak stems. Adjust the height as they grow to maintain that gap.
Watch for first true leaves (the second set after the initial cotyledons). These leaves signal the plant is photosynthesizing properly. If leaves appear pale or stretched toward the light, your light is too far away. Strong seedlings have dark green, compact leaves spaced evenly along sturdy stems.
💧 Step 3: Water and Fertilize for Blooming Growth
Water seedlings from the bottom by placing the pots in a tray of 1 inch of water for 10 minutes. This encourages deep root growth and prevents fungal diseases like damping-off. Let the soil dry slightly between waterings—top inch dry to touch—but never let it stay bone-dry. Overwatering here is the fastest way to kill young plants.
Once seedlings have 3-4 true leaves, switch to a balanced liquid fertilizer (10-10-10) diluted to half-strength. Apply it every 2 weeks to fuel rapid growth. You’ll notice leaves darkening and stems thickening within a week—that’s your sign the plant is gearing up for flowering.
✂️ Step 4: Pinch and Prune for Bushier Blooms
When seedlings reach 6 inches tall, pinch off the top set of leaves just above a pair of healthy leaves. This encourages the plant to branch out, producing more flowers later. Repeat this process for any leggy stems—you’re redirecting energy from vertical growth to lateral buds.
Remove any yellow or wilted leaves immediately. These sap-suckers drain energy from the plant and attract pests. Keep the area around seedlings clear of debris, and avoid overhead watering once they’re established. You’ll see new side shoots emerge within 7-10 days—these are the future bloom sites.
🪴 Step 5: Transition to Outdoor Light Gradually
Two weeks before your last frost date, start hardening off seedlings by placing them outside in a shaded, sheltered spot for 1-2 hours the first day. Gradually increase their outdoor time by 1 hour daily, moving them to brighter light each step. By day 10, they should tolerate a full day outside.
Watch for first flower buds forming at the stem junctions. These tiny green bumps mean your light strategy is working. Once buds appear, transplant seedlings to their final location in full sun (6+ hours daily). The transition should be seamless if you’ve been increasing light exposure steadily.
Tips & tricks for perfect seedling growth
Light-focused seedling growth isn’t just about following steps—it’s about understanding the subtle cues your plants give you. Here’s how to turn good intentions into garden glory.
Light Positioning: In Step 2, those 14-16 hours of light are non-negotiable for annual flowers like zinnias and cosmos, but placement matters just as much as duration. I’ve found that positioning the grow light at the 2-4 inch range creates the perfect balance—close enough to prevent leggy stems but far enough to avoid scorching those delicate first true leaves. Watch for leaves stretching toward the light (etiolation) as your first sign the light needs to move closer.
Soil Moisture Intelligence: The 10-minute bottom-watering technique in Step 3 is a game-changer, but timing is everything. After those 10 minutes, check the soil—it should feel like a wrung-out sponge. If water pools at the bottom, reduce time to 8 minutes next time. Overwatering at this stage is the silent killer of seedlings, and you won’t see the signs until it’s too late. I’ve lost entire trays this way when I ignored the subtle clues.
Temperature Consistency: Maintaining that warm spot at 70-75°F during germination is crucial, but don’t assume your home stays perfectly stable. Place your seedling tray near a thermometer—especially if you have drafty windows or AC vents nearby. I’ve seen germination times double when temps dipped below 68°F, and that’s time you can’t get back. A simple heat mat under the tray can make all the difference in cooler climates.
Pruning Precision: When you reach Step 4 and those seedlings hit 6 inches, pinching isn’t just about snipping—it’s about redirecting energy. Always pinch just above a pair of healthy leaves, never at a leaf node. I learned this the hard way when I pinched too low, and my plants developed weak growth points. Think of it like giving your plant a haircut—you want to encourage new growth at the strongest points.
Pro Tips for Seedling To Flower
- Light-focused seedling growth isn’t just about following steps—it’s about understanding the subtle cues your plants give you.
- Light Positioning: In Step 2, those 14-16 hours of light are non-negotiable for annual flowers like zinnias and cosmos, but placement matters just as much as duration.
- Soil Moisture Intelligence: The 10-minute bottom-watering technique in Step 3 is a game-changer, but timing is everything.
Frequently asked questions
Got questions about transforming seedlings into vibrant blooms? You’re not alone—growing flowers from seed can feel like a puzzle! Here are answers to the most common questions to help you navigate the journey with confidence.
How long does it take for a seedling to flower?
The timeline varies by plant type, but most annuals (like zinnias or marigolds) bloom in 6–12 weeks from seed, while perennials (like lavender) may take 3–4 months or longer. Light exposure, soil quality, and temperature play key roles—prioritize 12–16 hours of bright light daily to speed up flowering.
Why isn’t my seedling flowering yet?
Common culprits include insufficient light (use grow lights if natural light is weak), overcrowding (thin seedlings for better airflow), or nutrient imbalance (switch to a bloom-boosting fertilizer like 5-10-10). Check for pests or disease too—healthy leaves = happier flowers!
Can I use regular household lights for seedlings?
Not ideal! Seedlings need full-spectrum LED grow lights (or sunlight) to thrive. If you’re using bulbs, opt for cool-white or grow lights placed 2–4 inches above seedlings. Keep them on for 14–16 hours/day—just like a sunny windowsill, but brighter!
What’s the best way to encourage faster blooms?
Boost growth with these tricks:
- Light hack: Supplement natural light with a grow light for 12+ hours/day.
- Fertilizer swap: Transition to a low-nitrogen, high-phosphorus formula (like 10-20-10) when seedlings sprout true leaves.
- Prune strategically: Pinch back leggy stems to encourage bushier growth and more blooms.
What if my flowers bloom but then stop?
This often means your plant is exhausted or stressed. Try:
- Deadheading spent blooms to redirect energy.
- Adjusting watering (most flowers hate soggy roots).
- Adding a balanced fertilizer to refresh nutrients.
Wrapping up and next steps
From tiny seedling to vibrant bloom, the journey is all about light, patience, and care! 🌱✨ By mastering the right lighting techniques—whether natural, artificial, or a mix—you’ve unlocked the secret to faster, healthier growth. Remember, consistency is key, and even small adjustments can make a big difference.
Now that you’re equipped with the knowledge, roll up your sleeves and get growing! Start with just one plant, experiment with your setup, and watch your green thumb flourish. Ready to turn your space into a blooming paradise? Your first seedling is waiting—let’s make it bloom! 🌸💡