
Aphids
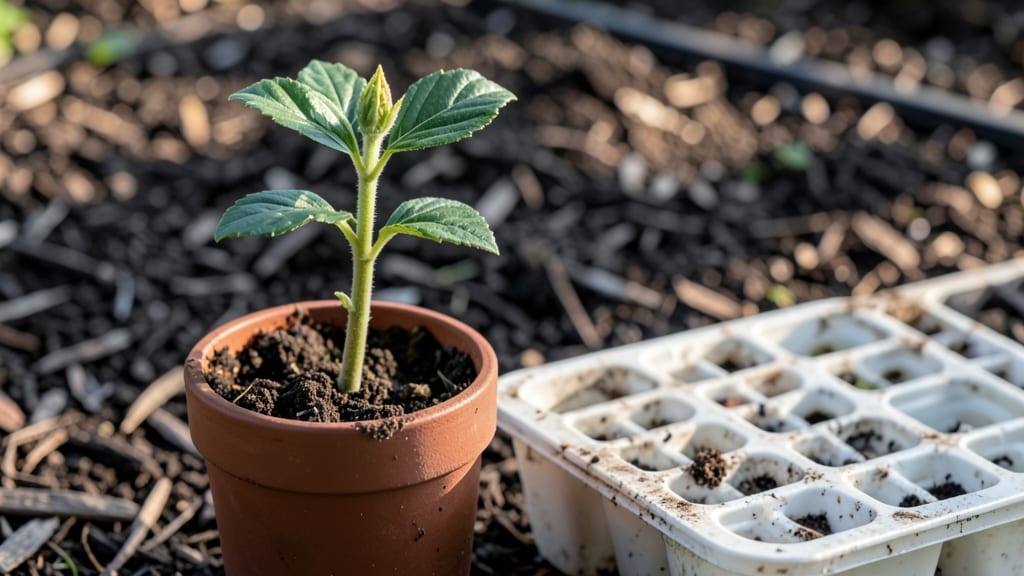
Growing roselle hibiscus seedlings from scratch means you’ll end up with a plant that gives you bold crimson blooms, edible calyces, and natural privacy all in one. 🌿 I’ve grown mine from seed twice now, and the first flush of deep red flowers in late summer makes every early struggle worth it.
The key is starting with the right soil mix and light balance—too much shade now means weak stems later.
You’ll need a sunny windowsill or grow light for those first weeks, since roselle seedlings crave 12+ hours of light daily. Most people overwater at this stage, but roselle roots hate soggy soil—let the top inch dry between waterings.
The real game-changer? Using a 50/50 mix of potting soil and perlite keeps roots oxygenated and prevents damping-off disease, which wiped out my first batch.
By the time you transplant at 4-6 inches tall, your seedlings should be sturdy enough to handle outdoor conditions. The first true leaves will appear in 2-3 weeks, and that’s when you can start hardening them off.
Once established, roselle grows 6-10 feet tall in a single season, making it perfect for hedges or dramatic backyard accents.
Here’s the secret I learned the hard way: leggy seedlings mean you’re not giving them enough light. Rotate trays daily and supplement with a grow light if your windowsill isn’t bright enough.
The payoff? A plant that thrives in heat, resists pests, and gives you both beauty and harvest—what’s not to love?
📚 In This Guide
- What you need
- Instructions
- Tips and common mistakes
- Wrapping up and next steps
What you need
- ● Roselle hibiscus seeds: 5–10 seeds (organic, non-GMO preferred for best results).
- ● Seed-starting trays or small pots: 2–4" deep, with drainage holes (biodegradable pots are eco-friendly!).
- ● Seed-starting mix: Lightweight, sterile potting soil (avoid garden soil—it’s too dense!).
- ● Grow lights or sunny windowsill: 6–8 hours of bright light daily (south-facing windows work if natural light is limited).
- ● Spray bottle: For gentle watering (avoid over-saturating seeds!).
- ● Plastic wrap or humidity dome: To retain moisture while seeds germinate.
- ● Trowel or small shovel: For transplanting seedlings later.
- ● Fertilizer (balanced, 10-10-10 or organic): Once seedlings sprout (dilute to half-strength!).
- ○ Heat mat (optional): Speeds up germination (70–80°F is ideal).
- ● Pruning shears: For trimming leggy seedlings as they grow.
- ● Mulch (straw or shredded leaves): Protects mature plants from weeds and retains soil moisture.
- ● Warmth: Roselle seeds germinate best in soil temps of 70–85°F (use a heat mat if indoors is chilly!).
- ● Patience: Germination takes 10–21 days—stay consistent with care!
- ● Space: Mature roselle plants need 3–5 feet of spacing (they grow tall and bushy!).
Step-by-Step guide for cultivating healthy roselle hibiscus seedlings
Here’s how I transform delicate roselle hibiscus seedlings into thriving, sun-loving perennials with vibrant blooms.
🌱 Step 1: Prepare the Seed Starting Mix and Containers
Roselle hibiscus thrives in well-draining soil, so start with a lightweight seed-starting mix—never garden soil. Fill 4-inch biodegradable pots (one per seedling) with the mix, leaving ½ inch of space at the top. Gently press the soil down to remove air pockets, but don’t compact it. The mix should feel like a damp sponge—squeeze it lightly to test.
Moisten the soil with lukewarm water until evenly damp, but avoid sogginess. Overwatering now can cause the seeds to rot before they even sprout. Place the pots in a shallow tray to catch any excess water, ensuring the bottom stays dry. This prevents damping-off, a fungal disease that kills seedlings overnight.
🌱 Step 2: Sow Seeds at the Right Depth and Temperature
Roselle hibiscus seeds are large and flat—plant them ½ inch deep, pressing them lightly into the soil so they make contact but aren’t buried too deeply. I like to use a toothpick to create small holes for each seed, then drop them in one at a time. Cover them with a thin layer of the same mix, just enough to shield them from light.
Place the tray in a warm, humid environment—I use a seedling heat mat set to 80-85°F for consistent germination. Without warmth, seeds may take 3-4 weeks to sprout instead of the usual 7-10 days. Keep the soil consistently moist by misting lightly daily, but never let it sit in water. A clear plastic dome or plastic wrap helps retain humidity until germination.
☀️ Step 3: Provide Bright, Indirect Light for Early Growth
Once the first true leaves appear (not the initial seed leaves), remove the humidity dome and move seedlings to bright, indirect light. A south-facing window works, but if the glass is cold, place a frosted plastic sheet over the window to diffuse harsh rays. Direct sun at this stage can scorch tender leaves, turning them yellow or crispy.
Rotate the pots ¼ turn daily so seedlings grow straight instead of leaning toward the light. You’ll notice them reaching for the brightest spot—this is normal, but uneven light causes weak stems. After 2 weeks, gradually introduce 2-3 hours of morning sun to harden them off. Strong seedlings will have deep green leaves and sturdy stems ready for transplanting.
🪴 Step 4: Transplant to Larger Pots or Garden Beds
When seedlings reach 4-6 inches tall with 4-5 true leaves, it’s time to transplant. Choose 6-inch pots or a garden spot with full sun (6+ hours daily) and well-draining soil. Dig a hole twice as wide as the root ball but only as deep as the pot’s base—planting too deep suffocates the stem.
Fill the hole with soil, pressing gently to remove air pockets, then water deeply until moisture reaches 2 inches down. Mulch with 1 inch of organic mulch (like shredded bark) to retain moisture and regulate soil temperature. Avoid mulching too close to the stem—keep it 2 inches away to prevent rot. Within 2 weeks, you’ll see new growth as roots establish.
✂️ Step 5: Prune and Support for Bushier Growth
Roselle hibiscus grows tall and leggy if not pruned early. Once seedlings hit 12 inches, pinch back the top 2-3 inches to encourage branching. This creates a bushier plant with more blooms later. Use clean, sharp scissors to avoid tearing stems, and always cut just above a leaf node where new growth will sprout.
As the plant matures, install stakes or a small trellis to support its weight. The stems can get 6 feet tall, and without support, they’ll flop over. Tie stems loosely with soft plant ties or old fabric strips—tighten only enough to hold them upright. Prune again in late summer to remove spent blooms and encourage a second flush of flowers.
Tips & tricks for cultivating thriving roselle hibiscus seedlings
Roselle hibiscus seedlings demand patience and precision—here’s how to avoid the common pitfalls that turn tender sprouts into casualties.
Soil Preparation Secret: In Step 1, don’t just fill those 4-inch biodegradable pots—fluff the lightweight seed-starting mix thoroughly before pressing it down. I learned this the hard way after watching seedlings struggle to push through compacted soil. The goal is a texture like a damp sponge: light enough to allow air circulation but moist enough to support germination. A simple test is to squeeze the mix—it should hold its shape but leave a slight imprint when released. This balance prevents both waterlogging and dryness, two of the biggest threats to young seedlings.
Germination Environment: That 80-85°F heat mat in Step 2 isn’t just a suggestion—it’s non-negotiable for consistent germination. Without it, roselle hibiscus seeds can take 3-4 weeks to sprout instead of the usual 7-10 days. I keep a small digital thermometer nearby to monitor the soil temperature constantly. If your home runs cooler, consider using a seedling heat mat with a built-in thermostat to maintain that critical range. The humidity dome isn’t optional either—it creates that microclimate where seeds feel like they’re in their tropical native habitat.
Light Transition Strategy: When you move seedlings to bright, indirect light in Step 3, resist the urge to rush the 2-week hardening process. I’ve seen many gardeners impatiently expose seedlings to full sun too soon, resulting in crispy, sunburned leaves. Start with just 2-3 hours of morning sun and gradually increase exposure. The key is to watch the seedlings’ reaction: if leaves develop yellow patches or appear wilted, they’re getting too much direct sunlight. Remember, these plants are used to dappled shade in their natural environment.
Transplanting Technique: In Step 4, the hole you dig should be twice as wide as the root ball but only as deep as the pot’s base—this is crucial for preventing transplant shock. I always use my finger to gently loosen the root ball before placing it in the hole, which encourages roots to spread outward rather than circling. After transplanting, water until moisture reaches 2 inches down—this ensures the roots make immediate contact with damp soil. The 2-inch clearance from mulch to stem is just as important as the mulch itself; too much mulch touching the stem creates a moist environment perfect for fungal growth.
Pro Tips for Roselle Hibiscus Seedling
- Roselle hibiscus seedlings demand patience and precision—here’s how to avoid the common pitfalls that turn tender sprouts into casualties.
- Soil Preparation Secret: In Step 1, don’t just fill those 4-inch biodegradable pots—fluff the lightweight seed-starting mix thoroughly before pressing it down.
- Germination Environment: That 80-85°F heat mat in Step 2 isn’t just a suggestion—it’s non-negotiable for consistent germination.
Frequently asked questions
Got questions about growing roselle hibiscus seedlings? You’re not alone! Here are answers to the most common queries to help you cultivate thriving plants with ease.
How long does it take for roselle hibiscus seedlings to germinate?
Roselle hibiscus seeds typically germinate within 7 to 14 days when kept in warm (70–85°F), moist soil. For faster sprouting, soak seeds overnight before planting and maintain consistent moisture. Patience is key—some seeds may take up to 3 weeks!
When is the best time to transplant roselle hibiscus seedlings outdoors?
Wait until after the last frost and soil temperatures reach at least 60°F (15°C)—usually late spring or early summer. Seedlings need 4–6 weeks of hardening off (gradual acclimation to outdoor conditions) before transplanting. Choose a sunny spot with well-draining soil for optimal growth.
How do I protect roselle hibiscus seedlings from pests like aphids?
Aphids can be a nuisance, but don’t worry! Spray seedlings with a mix of water + mild dish soap or introduce ladybugs (natural predators). For severe infestations, use neem oil or insecticidal soap. Keep plants healthy with balanced fertilization to boost their pest resistance.
Can I grow roselle hibiscus from cuttings instead of seeds?
Yes! Take 4–6 inch cuttings from healthy stems, remove lower leaves, and dip in rooting hormone. Plant in moist perlite or sand, then cover with a plastic bag to retain humidity. Roots usually form in 2–4 weeks. This method is faster than seeds but requires more care.
Why are my roselle hibiscus seedlings turning yellow or wilting?
Yellowing leaves often signal overwatering or nutrient deficiency. Wilting can mean underwatering or heat stress. Check soil moisture (top inch should be dry) and ensure well-draining soil. If leaves are crispy, increase humidity or move seedlings to partial shade temporarily.
Wrapping up and next steps
Growing a roselle hibiscus seedling is a rewarding journey that brings vibrant blooms, natural privacy, and even culinary benefits to your garden! 🌿 With the right care—sunlight, well-draining soil, and patience—you’ll enjoy lush foliage and stunning flowers year after year.
Whether you’re a beginner or seasoned gardener, this sun-loving perennial is a fantastic addition to your outdoor space.
Ready to take the next step? Start by planting your seedling in the ground or a spacious pot, and keep an eye out for those first beautiful blooms. Happy gardening! 🌸