
Transplanting
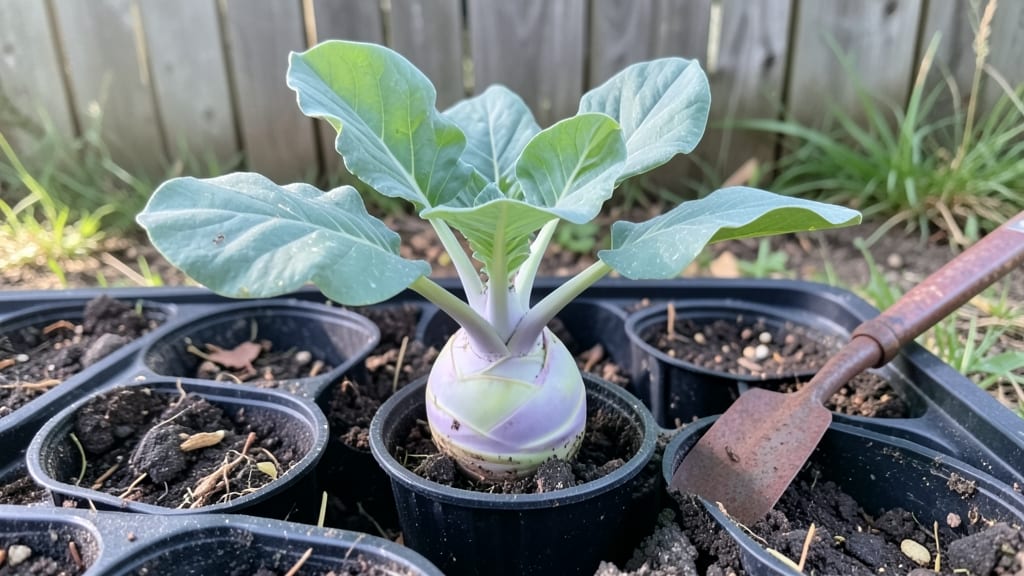
Planting kohlrabi seedlings is where the real magic happens—those little hardened-off plants transform into your next harvest. 🌱 I remember my first time planting them; I was nervous about getting the spacing wrong, but once they took off, there was no stopping them.
The key is starting with soil that’s loose and rich, so those swollen stems grow plump and sweet instead of tough and woody.
You’ll need a sunny spot that gets at least 6 hours of light daily, well-draining soil, and a little patience. Kohlrabi hates soggy roots, so if your garden holds water, mix in some compost or sand to improve drainage.
When planting, space seedlings 12-18 inches apart in rows that are 2 feet apart—this gives them room to bulk up without crowding. Dig a hole just deep enough to cover the roots but keep the top leaves above soil level.
After planting, water deeply to settle the soil around the roots, then keep the area moist but not soggy. Within 3-4 weeks, you’ll start seeing those distinctive bulbous stems forming—this is when regular watering and light fertilization pay off.
The goal is smooth, glossy stems that taste like a cross between broccoli and a turnip, and the sooner you harvest them, the sweeter they’ll be.
Here’s the thing—kohlrabi grows fast, but it’s also finicky about heat. If your summers get too hot, the stems can turn bitter, so plan to harvest them before temperatures hit 80°F consistently.
And if you’re growing in cooler climates, don’t worry: they’ll still thrive as long as they get enough sun and water. Ready to get those seedlings in the ground?
📚 In This Guide
- What you need
- Instructions
- Tips and common mistakes
- Wrapping up and next steps
What you need
- ● Kohlrabi seedlings: 6–12 healthy, hardened-off seedlings (check for sturdy stems and vibrant leaves).
- ● Garden soil: Well-draining, loose soil with a pH of 6.0–6.8 (amend with compost if needed).
- ● Transplanting tools: Trowel or small garden spade (for digging holes).
- ● Garden gloves (to protect your hands).
- ● Watering can or hose with a gentle spray nozzle.
- ○ Fertilizer (optional but recommended): Balanced organic fertilizer (e.g., 5-5-5 or compost tea).
- ● Slow-release granular fertilizer (follow package instructions).
- ● Mulch: Straw or shredded leaves (to retain moisture and suppress weeds).
- ● Row covers or netting: For early planting to protect from pests like cabbage moths.
- ● Plant markers: Biodegradable labels to track varieties (if planting multiple types).
- ● Copper tape or diatomaceous earth: To deter slugs and pests near seedlings.
Step-by-Step instructions for planting kohlrabi seedlings
Here’s how I get kohlrabi seedlings thriving in the garden—no wilting, no stunted growth.
🌱 Step 1: Choose the Perfect Spot and Prep the Soil
Kohlrabi loves cool weather and rich soil, so pick a location with full sun to partial shade (at least 6 hours of sunlight daily). Avoid spots where brassicas like cabbage or broccoli grew last year—diseases linger in the soil. Loosen the top 6 inches of soil with a garden fork to improve drainage and root spread.
Work in 2-3 inches of compost (from your materials list) to boost fertility. Kohlrabi is heavy-feeding, so don’t skimp—this ensures steady bulb growth. Smooth the soil surface with your hands to create a fine, crumbly texture. The goal is loose, airy soil that won’t compact around tender roots.
🪴 Step 2: Dig Holes and Space Seedlings Correctly
Dig holes 1 inch deeper than the seedlings’ root balls to encourage downward growth. Space them 12-18 inches apart in rows 24 inches apart—crowding leads to weak bulbs and disease. I like to use a small trowel to make precise holes, then gently remove each seedling from its container, shaking off excess soil to check for root damage.
If roots are circling, tease them apart with your fingers—this prevents girdling as the plant matures. Place each seedling in its hole so the top of the root ball sits just below soil level. Press the soil lightly around the base to eliminate air pockets, but don’t pack it down too firmly.
💧 Step 3: Water Deeply and Mulch Immediately
Water each seedling deeply right after planting—1 cup per plant—to settle the soil and encourage root expansion. Avoid wetting the leaves to prevent fungal diseases. Let the water soak in for 10-15 minutes, then add 1-2 inches of straw mulch (from your materials list) around the base, keeping it 2 inches away from stems to prevent rot.
Mulch keeps soil moisture even and suppresses weeds, which compete for nutrients. Check the soil 2-3 days later—it should feel damp but not soggy down to 2 inches deep. Kohlrabi bulbs expand quickly, so consistent moisture is key. Water at the base again if the surface feels dry.
☀️ Step 4: Monitor Sun and Protect from Pests
Kohlrabi needs bright light to form sweet, firm bulbs. If your seedlings start leaning toward the sun, rotate the entire row a quarter turn weekly to promote even growth. Watch for cabbage worms or flea beetles—they’ll chew holes in leaves. I handpick worms in the morning and cover young plants with floating row covers (if available) until they’re established.
You’ll notice first true leaves (the second set after the initial cotyledons) in 7-10 days. This is when you can start side-dressing with compost tea (if using) to give them a nutrient boost. Keep an eye on the bulbs—when they reach 2-3 inches in diameter, they’re ready to harvest before they get woody.
⏰ Step 5: Maintain Through Harvest for Maximum Yield
Water 1-2 times weekly, aiming for 1 inch of water per week—more in hot, dry spells. Kohlrabi bulbs swell rapidly, so harvest when they’re 2-3 inches wide for the best flavor. Use a sharp knife to cut the bulb cleanly from the stem, leaving the leaves intact if you want regrowth (though quality declines after the first harvest).
Here’s the thing—if you let bulbs grow too large, they become tough and pithy. I harvest mine every 2-3 weeks for a steady supply. After picking, rinse gently and store in the fridge for up to 2 weeks. The leaves are edible too—toss them into salads or sauté like greens!
Tips & tricks for perfectly planting kohlrabi seedlings
Confession: I've planted kohlrabi seedlings that either flopped or grew into bitter, tough bulbs—until I learned these game-changing tricks that make all the difference.
Soil Prep is Everything: The 2-3 inches of compost in Step 1 isn't just about nutrients—it's about creating the perfect loose, airy medium. I like to mix in a handful of perlite or coarse sand to improve drainage, especially if your garden soil tends to compact. Kohlrabi roots need that air space to expand properly, or you'll end up with stunted, misshapen bulbs. Think of it like giving your seedlings room to breathe.
Root Ball Handling: When you're removing seedlings from their containers in Step 2, don't just pull them out—gently squeeze the sides of the pot to loosen the root ball first. This prevents those delicate roots from breaking. And if you notice any circling roots, take an extra 30 seconds to tease them apart with your fingers. I've seen seedlings with roots growing in perfect circles that never expanded properly—this simple step prevents that girdling that can strangle your plants.
Watering Wisdom: That 1 cup per plant in Step 3 is your baseline, but here's what nobody tells you—the water should soak down to 4-6 inches deep, not just the top 2 inches. I use a long screwdriver to check moisture levels after watering. If it comes out dry, I'll water again. Kohlrabi bulbs need consistent moisture at all soil levels to develop properly, and surface watering just encourages shallow root growth.
Harvest Timing: The 2-3 inch diameter guideline in Step 5 is your sweet spot, but here's how to know for sure: Gently squeeze the bulb—it should feel firm but not hard. If it's rock-hard, you've waited too long. I harvest mine when they're about 1.5-2 inches in diameter for the sweetest flavor, then let them grow back for another harvest. The leaves stay productive even after bulb harvest, giving you a second crop!
Pro Tips for Planting Kohlrabi Seedlings
- Confession: I've planted kohlrabi seedlings that either flopped or grew into bitter, tough bulbs—until I learned these game-changing tricks that make all the difference.
- Soil Prep is Everything: The 2-3 inches of compost in Step 1 isn't just about nutrients—it's about creating the perfect loose, airy medium.
- Root Ball Handling: When you're removing seedlings from their containers in Step 2, don't just pull them out—gently squeeze the sides of the pot to loosen the root ball first.
Frequently asked questions
Got questions about planting your kohlrabi seedlings? You’re not alone!
Here are answers to the most common concerns—from timing to troubleshooting—to help you grow a thriving crop with confidence.
When is the best time to transplant kohlrabi seedlings outdoors?
Transplant kohlrabi seedlings after the last frost when soil temperatures reach at least 45°F (7°C). They thrive in cool weather (50–75°F / 10–24°C) and can even tolerate light frosts. Avoid planting in scorching heat—seedlings may struggle to establish roots. Pro tip: Morning transplanting reduces stress from afternoon sun!
How do I harden off kohlrabi seedlings before planting?
Hardening off takes 7–10 days. Gradually expose seedlings to outdoor conditions: Start with 1–2 hours of shade on day 1, increasing time and sun exposure daily. By day 7, they should handle full sun. Avoid hard winds—use a temporary shade cloth if needed. Watch for: Wilting (normal!) or yellowing (overstressed).
What should I do if my kohlrabi seedlings look wilted after transplanting?
Wilted seedlings are often just adjusting! Water deeply at the base (not overhead) to avoid fungal diseases. If wilting persists for 2+ days, check for root damage (gently tug a seedling—roots should stay intact). Mulch with straw to retain moisture. Quick fix: A light shade cloth can reduce stress while they recover.
Can I plant kohlrabi seedlings in containers or just the ground?
Yes! Kohlrabi grows well in containers 12+ inches deep with drainage holes. Use a well-draining potting mix and space seedlings 6–8 inches apart. Ground planting requires 12–18 inches between plants (they spread!). Containers are great for small spaces or urban gardens—just ensure they get 6+ hours of sun daily.
How do I protect kohlrabi seedlings from pests like cabbage worms?
Prevent pests with row covers (lightweight fabric) or neem oil spray (weekly). Remove eggs manually (tiny yellow ovals on leaves!). Companion plants like dill, thyme, or onions deter pests naturally. For severe infestations, use Bt (Bacillus thuringiensis), a bacterial pesticide safe for edibles. Act fast: Worms love young leaves! →
Still stumped? Drop your question in the comments—we’re happy to help your kohlrabi grow like a pro!
Wrapping up and next steps
Planting kohlrabi seedlings is a rewarding journey that leads to a bountiful harvest of crunchy, nutritious roots!
By following the right steps—like hardening off your seedlings and choosing the perfect spot—you’ll set yourself up for garden success. 🌱 With patience and care, you’ll soon enjoy fresh, homegrown kohlrabi straight from your garden.
Now that you’re ready to transplant, grab those seedlings and get planting! Next up: monitor their growth, keep the soil moist, and watch as your little plants thrive into delicious, garden-fresh treats.