Transplanting
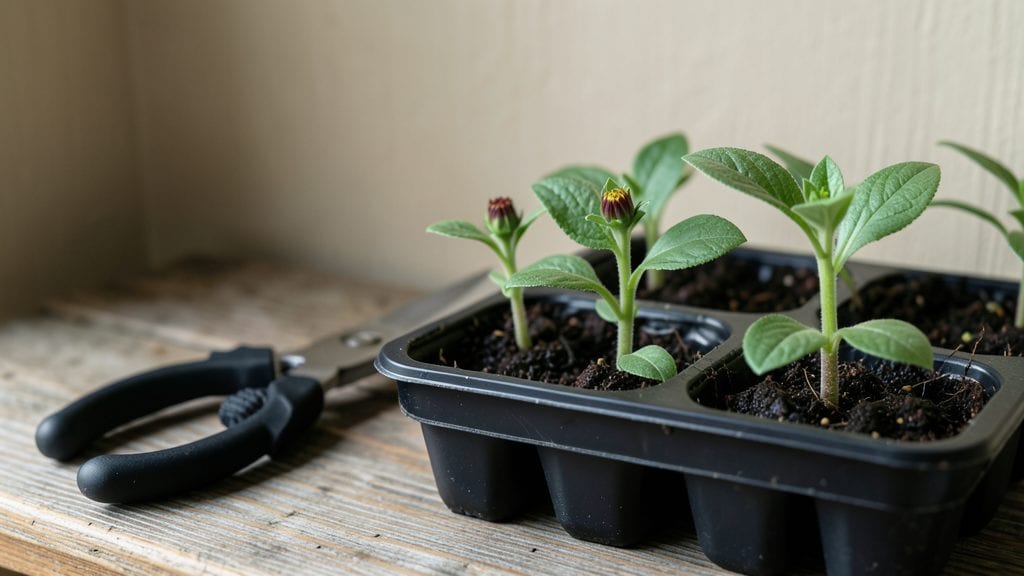
Pinching zinnia seedlings transforms leggy, weak stems into sturdy plants packed with blooms—here’s how to do it without stressing your plants or yourself. 🌱 I’ve spent years perfecting this technique after my first batch of zinnias flopped because I pinched too late (and too hard).
The key isn’t brute force; it’s timing and a light touch that encourages branching while keeping seedlings happy.
You’ll need just three things: sharp scissors or clean fingernails, a sunny windowsill or greenhouse, and a spray bottle for watering. Pinch when seedlings are about 6 inches tall and have 4-5 true leaves—never the tiny seed leaves.
This is the sweet spot where plants can handle the trim and still bounce back stronger. Overdo it, and you’ll stunt growth; skip it, and you’ll end up with tall, floppy stems that snap in the first breeze.
After pinching, give your seedlings bright light (12+ hours daily) and bottom-watering to avoid dampening leaves. Within 7-10 days, you’ll see new side shoots forming where you pinched. These become your future blooms, so resist the urge to pinch again—let those branches thicken first.
The result? A bushy zinnia plant that blooms 3-4 weeks earlier than unpinched varieties, with stems strong enough to support heavy flowers.
This method works for all zinnia types—dwarf, giant, or trailing—whether you’re growing in 5-gallon containers or garden beds. The only rule? Start early, pinch once, and let nature take over. Your zinnias will thank you with vibrant, long-lasting blooms that turn heads at the garden center—or your neighbor’s fence.
📚 In This Guide
- What you need
- Instructions
- Tips and common mistakes
- Wrapping up and next steps
What you need
- ● Zinnia seedlings: Healthy, 6–8 inches tall (with at least 4–6 true leaves, not just cotyledons). Aim for 10–20 plants if testing the technique.
- ● Clean, sharp pruning shears or scissors: 1 pair (sterilize with rubbing alcohol to prevent disease). Avoid dull tools—they crush stems!
- ○ Gloves (optional): 1 pair (nitrile or gardening gloves) to protect hands from sap or thorns.
- ● Watering can or spray bottle: 1 (for post-pinching hydration). Use room-temperature water to avoid shocking seedlings.
- ○ Balanced fertilizer (optional): 1 small container (e.g., 10-10-10 or fish emulsion) to apply 1–2 weeks post-pinching for recovery.
- ● Sunlight: Seedlings must be in a location with 6+ hours of direct sun daily (zinnia growth slows without it!).
- ● Well-draining soil: Ensure pots/containers have drainage holes to prevent root rot.
- ● Patience: Pinching is a growth hack, not an instant fix—wait 2–3 weeks for bushier results!
Step-by-step instructions for pinching zinnia seedlings
Here's the foolproof method I've used for years to transform leggy zinnia seedlings into sturdy, bushy plants ready for vibrant blooms.
🌱 Step 1: Identify the Right Time to Pinch
Wait until your zinnia seedlings have developed 4-5 sets of true leaves—those are the leaves that come after the initial seed leaves (cotyledons). You'll know they're ready when the stems are about 4-6 inches tall and the plants look strong, not spindly. Pinching too early stunts growth, while waiting too long reduces effectiveness.
I always check the seedlings in the morning when they're fully hydrated and upright. This is the moment that matters: if you pinch at the wrong time, you risk setting back your plants unnecessarily. The goal is to encourage branching before the plant puts all its energy into flowering.
✂️ Step 2: Use Sharp Tools for Clean Cuts
Grab your clean, sharp pruning shears or scissors—never pinch with your fingers, as this can crush stems and introduce disease. Position the tool just above a set of leaves where you want the new branch to grow. This is typically about ¼ inch above a leaf node, the small bump where leaves attach to the stem.
Make a clean, diagonal cut at a 45-degree angle to prevent water from pooling on the wound. This small detail helps the plant heal faster and reduces the risk of rot. If you're working with multiple seedlings, sanitize your tools between cuts with rubbing alcohol to avoid spreading any potential pathogens.
🌿 Step 3: Pinch at the Correct Growth Point
Locate the top set of leaves and find the leaf node just below it. This is where you'll make your cut to encourage lateral branching. Pinch off the top growth just above this node—this signals the plant to redirect its energy to the side shoots rather than growing taller. You'll see new leaves emerging from the sides within 7-10 days.
Real talk: if you pinch too close to the base, you risk damaging the main stem. Aim for the upper third of the plant, where the stem is still sturdy but flexible. This ensures the plant has enough energy reserves to recover and branch out properly. Avoid pinching more than once per season unless the plant is still leggy after the first pinch.
💧 Step 4: Provide Optimal Care After Pinching
After pinching, give your seedlings a light watering to help them recover. Avoid overwatering, as this can stress the plant further. Place them in a spot with bright, indirect light for the first 24-48 hours to allow the wounds to heal. Once new growth appears, gradually reintroduce them to full sun.
You'll notice the seedlings may look a bit shocked at first—they might wilt slightly or slow down in growth. This is normal! Keep an eye on them and ensure the soil stays consistently moist but not soggy. Within 2-3 weeks, you should see a noticeable bushier shape as new side shoots develop. This is your reward for the pinch.
☀️ Step 5: Monitor and Maintain Bushy Growth
Once your zinnia seedlings start branching, continue to monitor their growth closely. Remove any weak or leggy side shoots that aren't growing well to focus the plant's energy on the strongest branches. You'll know you're on the right track when the plant develops a full, rounded shape with multiple stems.
Pinched zinnias will eventually produce more flowers than their unpinched counterparts because they have more stems to support blooms. Keep an eye out for first flower buds and deadhead spent blooms regularly to encourage continuous flowering. This isn't just about pinching—it's about setting your zinnias up for a season of vibrant, long-lasting color.
Tips & tricks for pinching zinnia seedlings
Transforming leggy zinnia seedlings into robust flowering plants isn't just about pinching—it's about timing, technique, and post-care that most gardeners overlook. Here's how to maximize your success with this simple but game-changing technique.
Timing is Everything: The moment you pinch makes all the difference. I can't stress enough how critical those 4-5 sets of true leaves are—this is when the plant has enough energy reserves to recover and branch out properly. I've seen gardeners pinch too early and end up with stunted plants that never recover, or wait too long and lose the opportunity to encourage that bushy growth. The 4-6 inch height guideline is your golden ticket to success. Check your seedlings in the morning when they're fully hydrated; this is when the stems are upright and ready for pinching.
Tool Selection and Technique: Using your fingers to pinch is a common mistake that can crush stems and introduce disease. Invest in a pair of clean, sharp pruning shears or scissors—this isn't a place to cut corners. When making your cut, aim for that ¼ inch above a leaf node at a 45-degree angle. This precise cut prevents water pooling and helps the plant heal faster. Between seedlings, sanitize your tools with rubbing alcohol to avoid cross-contamination. I've learned this the hard way after seeing entire batches of seedlings develop rot from unclean tools.
Post-Pinching Recovery Strategy: The 24-48 hours of bright, indirect light after pinching is non-negotiable. This recovery window allows the wounds to heal while preventing stress from direct sunlight. You'll notice the seedlings may wilt slightly or slow down—this is completely normal and part of the recovery process. During this time, maintain consistently moist (not soggy) soil and resist the urge to overwater. Within 2-3 weeks, you should see those new side shoots emerge, and that's when you know your pinching paid off. The key is patience—rushing this step often leads to setbacks.
Ongoing Maintenance Secret: Once your zinnias start branching, don't let up on the maintenance. Regularly remove any weak or leggy side shoots to focus the plant's energy on the strongest growth. This might seem like extra work, but it's what transforms those pinched seedlings into vibrant, bushy plants with multiple stems supporting blooms. I've found that plants with more stems produce significantly more flowers throughout the season. Keep an eye out for the first flower buds and deadhead spent blooms regularly to encourage continuous flowering—this is how you get that showstopping display of color.
Pro Tips for Pinching Zinnia Seedlings
- Transforming leggy zinnia seedlings into robust flowering plants isn't just about pinching—it's about timing, technique, and post-care that most gardeners overlook.
- Timing is Everything: The moment you pinch makes all the difference.
- Tool Selection and Technique: Using your fingers to pinch is a common mistake that can crush stems and introduce disease.
Frequently asked questions
Got questions about pinching zinnia seedlings?
You’re not alone! Here are answers to the most common concerns—so you can grow lush, bushy zinnia blooms with confidence.
When is the best time to pinch zinnia seedlings?
Pinch zinnia seedlings when they reach 6–8 inches tall and have 4–6 true leaves. This is usually 4–6 weeks after germination, depending on your growing conditions. Avoid pinching too early—seedlings need strength to recover!
How much should I pinch off? Where exactly?
Use clean scissors or fingers to pinch just above a set of leaves (about ¼ inch above). Remove the top 1–2 inches of growth—this encourages branching. Never pinch below the first true leaves to avoid stunting the plant.
What if my seedlings look weak after pinching?
Weakness is normal! Give seedlings 1–2 weeks of recovery with bright, indirect light and consistent moisture. Avoid overwatering—root stress can delay regrowth. If leaves yellow, reduce water slightly and ensure good airflow.
Can I skip pinching? What’s the alternative?
Yes, you can! If you skip pinching, zinnia seedlings may grow tall and leggy with fewer blooms. Alternatives: Prune later (when stems are thicker) or plant closer together to crowd stems naturally. However, pinching doubles bushiness and flower production!
How often should I pinch zinnia seedlings?
Pinch once for most varieties, but repeat every 4–6 weeks for continuous blooms. After the first pinch, new side shoots will form—let them grow to 4–6 inches before pruning again. Over-pinching stresses plants, so moderation is key!
Pro Tip:
Use the pinched stems! Drop them into water—they’ll root and grow into new zinnia plants. It’s a free way to expand your garden without buying more seeds!
Wrapping up and next steps
Pinching zinnia seedlings is a simple yet powerful way to encourage lush, bushier plants with vibrant blooms—no stress required! 🌸 With the right tools, timing, and technique, you’ll transform leggy seedlings into sturdy, flowering powerhouses.
Remember, consistency is key, and soon you’ll be rewarded with a garden bursting with color.
Ready to put your new skills to the test? Grab those shears and start pinching! For extra confidence, watch a quick tutorial or share your progress with fellow gardeners—you’ve got this! 🌱