
Lawn
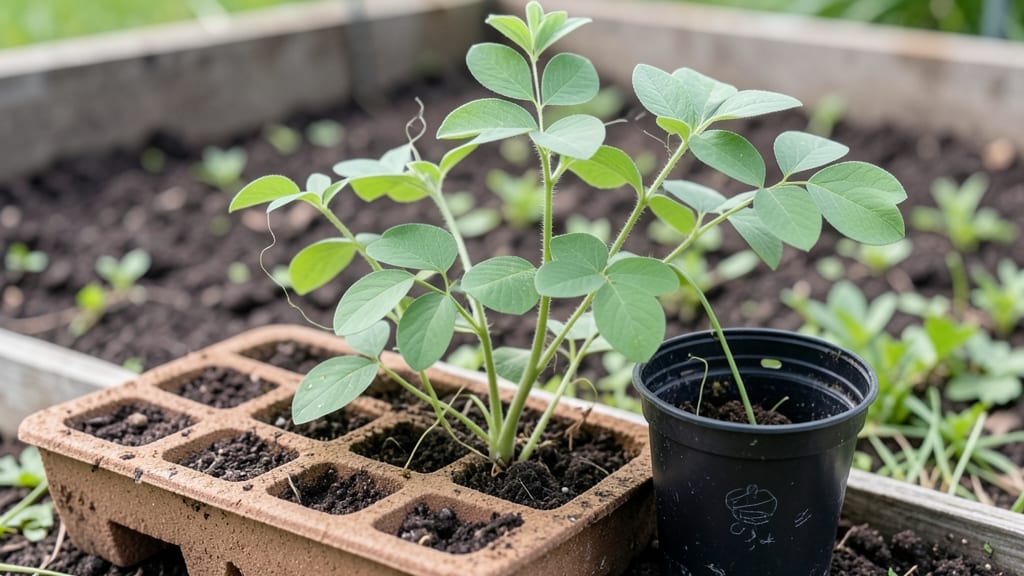
Using a peat seed starter cuts germination time in half while keeping roots happy and hydrated. I’ve used them for everything from delicate lettuce to stubborn tomatoes, and the difference in speed and consistency is night and day.
The secret lies in its ability to hold moisture without drowning roots—something regular soil struggles with when seeds are just starting to wake up.
You’ll need just three things: the peat starter itself, a spray bottle for gentle watering, and a warm spot near a window or under grow lights. No fancy equipment, no guesswork—just a simple setup that works even for beginners.
The peat blocks stay moist for days, so you’re not stuck watering every hour like with regular potting mix.
What you’ll end up with are seedlings popping up in 5-7 days instead of the usual two weeks, with strong roots that won’t break when you transplant. The blocks also keep seeds sterile, so mold and rot become a non-issue—just what you need when you’re dealing with tiny, fragile sprouts.
Works for both indoor starts and direct outdoor sowing, making it a versatile choice for any gardener. Ready to see those first green shoots in record time? Let’s get those seeds planted right.
📚 In This Guide
- What you need
- Instructions
- Tips and common mistakes
- Wrapping up and next steps
What you need
- ● Peat moss – 2-3 gallons (sterile, sphagnum-based for best moisture retention).
- ● Seed-starting tray or flat – 10x20 inches (with drainage holes) or biodegradable peat pots (2-3 inches deep).
- ● Seeds – Choose moisture-sensitive varieties (e.g., lettuce, tomatoes, or herbs).
- ● Watering can or spray bottle – Fine-mist nozzle to avoid displacing seeds.
- ● Plastic wrap or humidity dome – To lock in moisture and warmth.
- ○ Heat mat (optional but recommended) – 70-80°F range for faster germination.
- ● Grow lights or sunny windowsill – 12-16 hours of light/day (south-facing window or LED lights).
- ● Perlite or vermiculite – 1 part to 3 parts peat for aeration.
- ● pH testing kit – Ensure peat is 5.0-6.5 (ideal for most seeds).
- ● Seedling fertilizer – Diluted liquid (e.g., fish emulsion) for early nutrition.
- ● Labeling tags – To track seed types and planting dates.
Step-by-Step guide to using peat seed starter for quick germination
Here's how to harness peat's moisture magic for speedy, reliable sprouts every time.
Prepare Your Peat Starter Blocks
Start by soaking the peat seed starter blocks in water for about 10-15 minutes until they feel uniformly moist but not dripping. I like to place them in a shallow tray filled with an inch of water—this ensures even saturation without overwatering. The blocks should expand slightly as they absorb moisture, which helps create the perfect airy environment for seeds.
While the blocks soak, check the water temperature—it should be room temperature or slightly warmer. Cold water can slow germination, so avoid straight-from-the-fridge water. Once fully saturated, drain any excess water by placing the blocks on a clean towel for a minute or two. You want them damp, not wet.
Plant Your Seeds Directly Into the Blocks
Using the small indentations or holes in the peat blocks, place 1-2 seeds per spot at a depth of about ¼ inch—this is usually the depth of the seed itself. I find it easiest to use a toothpick to create a tiny hole if the block doesn't have pre-made indentations. Gently press the seeds in, but don't pack the soil too firmly around them.
Once planted, lightly mist the surface with water using a spray bottle. This keeps the seeds in contact with the moist peat without displacing them. Peat holds moisture exceptionally well, so you won’t need to water again until you see the first signs of sprouting—usually within 3-7 days, depending on the seed type. Keep the blocks in a warm spot, ideally around 70-75°F, to encourage quick germination.
Maintain Moisture and Light for Fast Growth
After planting, place the peat blocks in a clear plastic dome or cover them with a humidity tent to retain moisture. Peat dries out slower than regular soil, but it’s still important to keep it consistently moist—not soggy. Check the blocks daily and mist the surface if it feels dry to the touch. You’ll know the moisture level is right when the peat looks dark and slightly damp, not bone-dry or waterlogged.
Once the seeds sprout, remove the humidity cover immediately to prevent mold. Place the blocks under bright, indirect light for the first few days—direct sunlight can scorch tender seedlings. After a week, gradually introduce 4-6 hours of morning sun to strengthen the young plants. The peat’s moisture-retaining properties mean you’ll water less frequently, but always check the top layer before adding more water.
Transplant Seedlings Without Disturbing Roots
When seedlings have 2-3 sets of true leaves—usually about 3-4 weeks after planting—it’s time to transplant. The beauty of peat blocks is that they can be planted directly into the garden or pots without needing to remove the seedlings. Simply press the entire block into the soil, ensuring the top of the block is level with the ground. This minimizes root disturbance and shock.
Water the transplanted seedlings gently to help settle the peat into the soil. Over the next few days, keep the area moist but not waterlogged. The peat will continue to break down slowly, providing nutrients as the roots expand. If you notice the peat drying out too quickly, mulch the surface with a thin layer of compost to retain moisture and regulate temperature.
Monitor and Adjust for Ongoing Success
After transplanting, watch for signs of stress like yellowing leaves or wilting—these usually indicate either too much or too little water. Peat holds moisture well, but it’s not indestructible. Water deeply once a week unless your climate is particularly dry or hot, in which case you may need to water every 5-6 days. Always check the soil 1 inch below the surface before watering.
As the plants grow, you may notice the peat breaking down or drying out faster. This is normal, especially in hot weather. To keep the soil moist and fertile, top-dress with a thin layer of compost every 2-3 weeks. This replenishes nutrients and helps maintain the ideal moisture level without overwhelming the young plants. With peat, you’re giving your seedlings a head start that keeps paying off all season long.
Tips & tricks for perfect peat seed starter germination
Mastering peat seed starters comes down to understanding moisture control and timing—here's how to get flawless results every time.
Soaking Technique: In Step 1, those 10-15 minutes of soaking are crucial for even moisture distribution. I've found that using a shallow tray with just an inch of water creates the perfect balance—enough to saturate the blocks without making them soggy. If your blocks feel unevenly moist after this time, give them an extra minute or two, but never let them sit in standing water. The goal is to mimic natural rainfall conditions where seeds get just enough moisture to start without drowning.
Seed Placement Precision: When planting your seeds in Step 2, aim for that ¼-inch depth—this is the sweet spot where seeds get enough moisture but don't risk rotting. I've learned the hard way that pressing seeds too firmly can compact the peat around them, making it harder for roots to penetrate. Instead, think "gentle pressure" as you tuck them into place. For seeds that are particularly tiny or difficult to handle, a toothpick makes all the difference in creating those perfect planting holes.
Temperature Control: The 70-75°F range mentioned in Step 2 is ideal because it's warm enough to kickstart germination without being too hot. If your home runs cooler, consider placing the peat blocks near a sunny window or under a heat mat. I've seen germination times double when blocks are kept at 60°F compared to 75°F—those few extra degrees really make a difference. And remember, room temperature water is key here; cold water can actually shock the seeds and slow down the process.
Light Transition Strategy: In Step 3, the gradual introduction of 4-6 hours of morning sun is where many gardeners go wrong. I recommend starting with just 2 hours of indirect light on day 3, then adding 1 hour each subsequent day. This slow acclimation prevents the delicate seedlings from getting sunburned. You'll know you're doing it right when the seedlings stand tall rather than stretching toward the light—this means they're getting enough light but not too much at once.
Pro Tips for Peat Seed Starter
- Mastering peat seed starters comes down to understanding moisture control and timing—here's how to get flawless results every time.
- Soaking Technique: In Step 1, those 10-15 minutes of soaking are crucial for even moisture distribution.
- Seed Placement Precision: When planting your seeds in Step 2, aim for that ¼-inch depth—this is the sweet spot where seeds get enough moisture but don't risk rotting.
Frequently asked questions
Got questions about peat seed starters?
You’re not alone! Here are answers to the most common queries to help you grow confidently.
What’s the best time to use peat seed starter for lawn seeds?
Use peat seed starter when sowing cool-season grasses (like fescue or ryegrass) in early spring or fall—when soil temps are between 50–70°F. For warm-season grasses (like Bermuda or Zoysia), apply it in late spring when soil is 65°F+. Avoid extreme heat or frost!
How long does peat seed starter last in the bag?
Unopened bags stay fresh for 1–2 years if stored in a cool, dry place. Once opened, use it within 3–6 months for best moisture retention. If it dries out, sprinkle water to revive it—but avoid over-saturating, as clumping can happen.
Can I make a DIY peat seed starter at home?
Yes! Mix 70% peat moss with 30% perlite or vermiculite for aeration. Add a slow-release fertilizer (like 5-10-5) and moisten to a damp sponge. Store in a sealed container until use. Pro tip: Sterilize ingredients first to prevent mold!
Why aren’t my seeds germinating with peat seed starter?
Check these fixes:
- Moisture: Keep the starter consistently damp (not soggy). Use a spray bottle if needed.
- Depth: Seeds need ¼–½ inch of coverage—too deep = slow germination.
- Temp: Use a seedling heat mat (70–75°F) if soil is too cold.
- Light: Place trays in bright, indirect light (or under grow lights).
Is peat seed starter eco-friendly?
Traditional peat moss is sustainable but not renewable—it takes centuries to regenerate. Opt for coconut coir or compost-based alternatives if eco-conscious. Both retain moisture well and support seedling growth!
Wrapping up and next steps
Ready to transform your gardening game with peat seed starter? This moisture-retaining powerhouse isn’t just a trick—it’s your secret to faster, healthier germination and stronger seedlings. Whether you’re a lawn enthusiast or a plant parent, the key takeaway is simple: consistency and care unlock the magic.
Now’s the perfect time to grab your supplies, follow the steps, and watch your seeds sprout with confidence!
🌱 Your next step: Start small—try a single tray or pot with your favorite seeds. Once you see those first green shoots, you’ll be hooked! Happy planting! 🌿