
How To
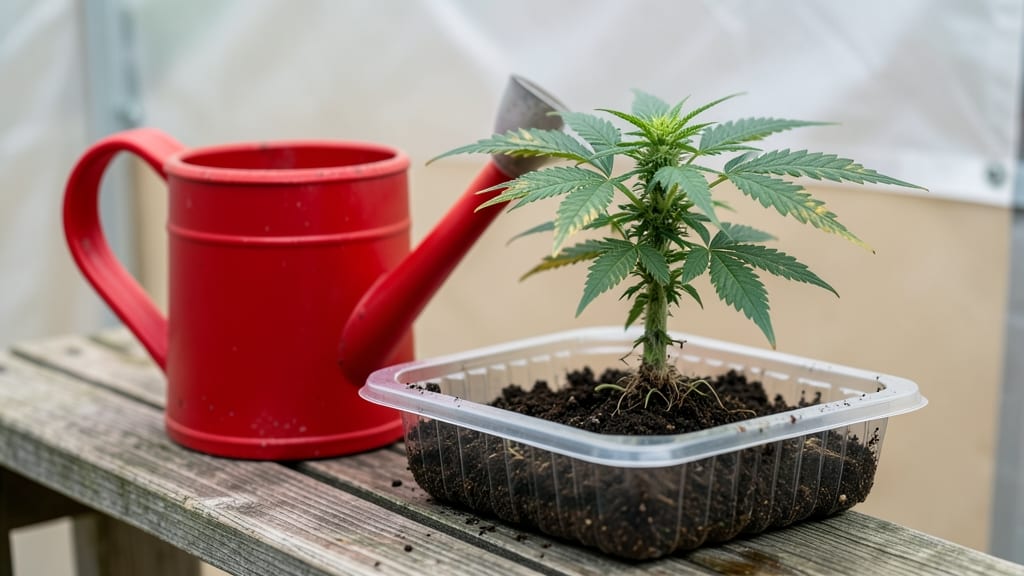
An overwatered autoflower seedling can go from lush to lifeless in days if you don’t act fast. I’ve nursed more than a few back from the brink by catching the early signs—yellowing leaves, mushy stems, and that dreaded sour smell.
Autoflowers are stubborn little things, but they’ll bounce back when you give them the right care.
The problem starts when roots drown in soggy soil, cutting off oxygen and inviting mold. Most growers overcompensate after seeing droopy leaves, but autoflowers hate soggy conditions—especially in their short 8-10 week life cycle.
The fix? Let the top inch of soil dry between waterings and upgrade to a well-draining mix if needed. Trust me, your plant will thank you.
Within 48 hours of adjusting care, you’ll see new growth pushing through. Trim any blackened stems with clean scissors, and keep humidity low to prevent further rot. Before you know it, that struggling seedling will be back on track—stronger than ever. Let’s get it growing again.
This method works for any autoflower strain, whether you’re growing indoors under LEDs or outdoors in a sunny spot. The key is patience and consistency. Your plants will reward you with thick, resinous buds once they’re back in balance.
Root Causes Of Overwatering Seedlings
When your autoflower seedling starts wilting despite a damp soil surface, the issue likely stems from one (or more) of these common watering mistakes. Understanding the why behind overwatering helps you adjust your approach before it’s too late. Let’s break down the science—and the solutions—behind each culprit.
Autoflower seedlings thrive in well-draining soil, but compacted or heavy soil mixes (like pure potting soil) can suffocate roots by preventing excess water from escaping.
Without proper drainage, oxygen can’t reach the root zone, leading to anaerobic conditions—a breeding ground for harmful bacteria and fungi like Pythium or Phytophthora.
Why it happens:
- Clay-heavy soil holds water like a sponge, leaving roots drowning in saturation.
- No drainage holes in pots force water to pool at the bottom.
- Overzealous fertilizing (especially with high nitrogen) clogs soil pores, reducing air space.
Actionable fix: Use a 60/40 mix of perlite/pumice to coco coir or add orchid bark for aeration. Elevate pots on saucers or trays to catch runoff.
Autoflowers have shallow root systems and can’t store excess water like mature plants. If you water on a rigid schedule (e.g., every 2 days) without checking soil moisture, you risk over-saturating the roots—especially in humid climates or small containers.
Why it happens:
- Ignoring environmental factors: High humidity or low light slows evaporation, keeping soil wet longer.
- Using tap water too often can leave mineral buildup, reducing soil porosity over time.
- Overcrowded trays create microclimates where moisture lingers between seedlings.
Actionable fix: Stick your finger 1 inch into the soil—if it’s damp, wait. Use room-temperature rainwater or filtered water to avoid chemical stress. Space seedlings 12+ inches apart in trays.
Autoflowers are sensitive to extreme conditions. While they love warmth (70–85°F), high humidity without airflow traps moisture on leaves and soil, creating the perfect environment for powdery mildew or root rot. Conversely, cold roots (below 60°F) slow nutrient uptake, making the plant more susceptible to waterlogging.
Why it happens:
- No airflow (e.g., sealed grow tents or dense foliage) prevents evaporation.
- Cold water shocks roots, reducing their ability to absorb oxygen.
- Nighttime temperature drops (common in unheated greenhouses) slow transpiration, keeping soil wet.
Actionable fix:
- Use a small fan on low speed (24/7) to improve airflow.
- Water in the morning when temps are stable (avoid cold water—let it sit out for 24 hours).
- Monitor humidity with a hygrometer; aim for 40–60% during veg.
Even if you’re gentle, moving a seedling from seedling tray to a larger pot can disrupt root development. If the new pot lacks proper drainage or the soil is too dense, the plant may overcompensate by absorbing more water to recover—leading to a vicious cycle of saturation.
Why it happens:
- Root damage during transplant slows water uptake, causing the plant to "drink" excessively when watered.
- Improper root pruning (cutting roots too aggressively) forces the plant to rely on surface roots, which are more prone to rot.
- Using fresh soil without acclimation can create a "water block" where roots struggle to penetrate.
Actionable fix:
- Use the "slip and dip" method: Gently slide the seedling out, trim no more than 10–15% of roots, and let it recover in water for 10 minutes before replanting.
- Add a rooting hormone (like Mycorrhizal fungi) to speed recovery.
- Wait 3–5 days before watering post-transplant to let roots establish.
Pro Tip: 💡 "Less is more" with autoflowers. They’re fast-growing but fragile—overwatering is the #1 killer. When in doubt, wait 24 hours before watering again. Your seedling’s roots will thank you!
Revive Your Dying Seedling Fast
An overwatered autoflower seedling can feel like a lost cause—but don’t panic! With the right steps, you can nurse it back to health before permanent damage sets in.
Below, we’ll break down cause-specific fixes, so you can act fast and prevent future disasters. Think of this as your emergency first-aid kit for soggy roots.
If your seedling’s leaves are yellowing (especially the older ones) and growth has slowed to a crawl, it’s likely suffering from root rot or oxygen starvation. Here’s how to turn it around:
1️⃣ Stop Watering Immediately
🚰 Action: Pause all watering for 24–48 hours to let the soil dry out slightly. If the pot feels heavy or squishy, hold off longer. 💡 Pro Tip: Use your finger to check moisture—if the top 1–2 inches of soil are damp, wait.
If it’s soggy deeper, you’ve got work to do.
2️⃣ Repot into Fresh, Well-Draining Soil 🔄 Action:
Gently remove the seedling from its pot and inspect the roots.
Healthy roots are white or light tan; mushy, black, or smelly roots are rotten and must be trimmed. - Snip off any dark, squishy roots with sterilized scissors (🔪✨). - Repot in a clean container (preferably with drainage holes) using a light, airy mix: - 60% coco coir or peat moss - 30% perlite or vermiculite - 10% worm castings or compost (for nutrients without compacting soil).
3️⃣ Adjust Your Watering Routine
💧 Action:
- Water only when the top 1–2 inches of soil are dry (stick your finger in—it’s the best tool!).
- Use the "drench-and-dry" method: Water thoroughly until it drains from the bottom, then wait until the soil is 50% dry before watering again.
- Avoid misting leaves—this can encourage fungal growth.
4️⃣ Boost Airflow & Light
🌬️ Action:
- Move your seedling to a bright spot with indirect light (no harsh midday sun yet—it’s still fragile).
- Increase airflow with a small fan (set to low) for 1–2 hours daily to prevent humidity buildup.
If your seedling looks limp or sad but isn’t yellow, it might be root-bound or struggling from overly dense soil. Here’s how to revive it:
1️⃣ Loosen the Soil Gently
👩🍳 Action:
- Use a wooden skewer or chopstick to poke holes in the soil around the roots to improve aeration.
- If the soil is hard as a rock, it’s time to repot (see steps above).
2️⃣ Water Lightly & Frequently
💦 Action:
- Instead of deep watering, give your seedling small sips of water every 1–2 days to encourage shallow root growth.
- Use a spray bottle to mist the soil (not leaves) if it’s extremely dry.
3️⃣ Support the Stem
🌿 Action:
- If the seedling is too weak to stand, prop it up with a toothpick or small stake to prevent further stress.
If you spot white, fuzzy mold or black spots on leaves or soil, your seedling is fighting fungus. Act fast:
1️⃣ Isolate & Remove Affected Areas
🚫 Action:
- Move the plant away from other seedlings to prevent spread.
- Trim any moldy leaves with clean scissors (don’t leave stubs!).
2️⃣ Apply a Fungal Treatment
💊 Action:
- Hydrogen peroxide (3%): Mix 1 part H₂O₂ with 4 parts water, spray lightly on soil and leaves, and let dry in sunlight.
- Neem oil spray: Combine 1 tsp neem oil + 1 tsp mild soap + 1 quart water, spray every 3–4 days for a week.
- Baking soda spray (for mild cases): Mix 1 tsp baking soda + 1 quart water + a few drops of soap, spray lightly.
3️⃣ Improve Air Circulation
🌬️ Action:
- Place a small fan near the seedling (but not blowing directly on it) to reduce humidity.
- Avoid overcrowding—give your seedling space to breathe.
Once your autoflower is back on track, prevent future watering disasters with these habits:
✅ Use the Right Pot: Always choose containers with drainage holes—no exceptions! ✅ Monitor Soil Moisture: Invest in a moisture meter or use the finger test daily. ✅ Water in the Morning: This gives excess moisture time to evaporate during the day. ✅ Avoid Overpotting: Small seedlings don’t need big pots—1–3 gallons max for early stages. ✅ Train Your Hands: If you’re a heavy-handed waterer, try the "less is more" rule—better to underwater slightly than drown. ✅ Use a Light, Fast-Draining Mix: Avoid garden soil—it compacts and holds too much water.
Autoflower seedlings are tougher than they look—with quick action, most can bounce back in 3–7 days. The key is patience and precision: dry out the roots, improve airflow, and adjust your watering habits. Once you’ve mastered this, you’ll be a pro at keeping your autoflowers thriving!
💡 Remember: If your seedling is completely mushy or smells terrible, it may not recover—but don’t give up without trying! Some roots can regenerate if you act fast.
Frequently asked questions
How can I tell if my autoflower seedling is overwatered vs. underwatered?
Check the leaves and soil: overwatered seedlings show yellowing (especially older leaves), mushy stems, and a sour smell. The soil stays soggy for days. Underwatered seedlings have crispy brown edges, dry soil pulling away from pot sides, and droopy leaves that spring back when watered.
Can I save an autoflower seedling with black, smelly roots?
Yes, but act fast! Trim all black/mushy roots with sterilized scissors, repot in fresh 60% coco/40% perlite mix, and stop watering for 48 hours. Add a small fan for airflow. Most seedlings recover in 3–7 days if you catch it early.
Why does my autoflower keep getting root rot even after I fix it?
Root rot often returns if you’re using heavy soil (like garden soil) or pots without drainage holes. Switch to a light mix (coco + perlite) and always water only when the top 1–2 inches are dry. Check your water source too—chlorine or minerals can harm roots over time.
Is it better to underwater or overwater autoflower seedlings?
Autoflowers handle slight underwatering better than overwatering. Their shallow roots need oxygen, and soggy soil suffocates them fast. Water only when the soil is 50% dry—better to wait an extra day than drown them. Think of it like a sponge: squeeze out excess water before adding more.
How often should I water my autoflower seedlings?
There’s no set schedule—check the soil! For most setups, water every 2–3 days in warm conditions, but every 4–5 days in cooler or humid climates. Use your finger: if the top 1 inch feels damp, wait. Autoflowers are fast-growing but fragile—consistency beats routine.