Trees
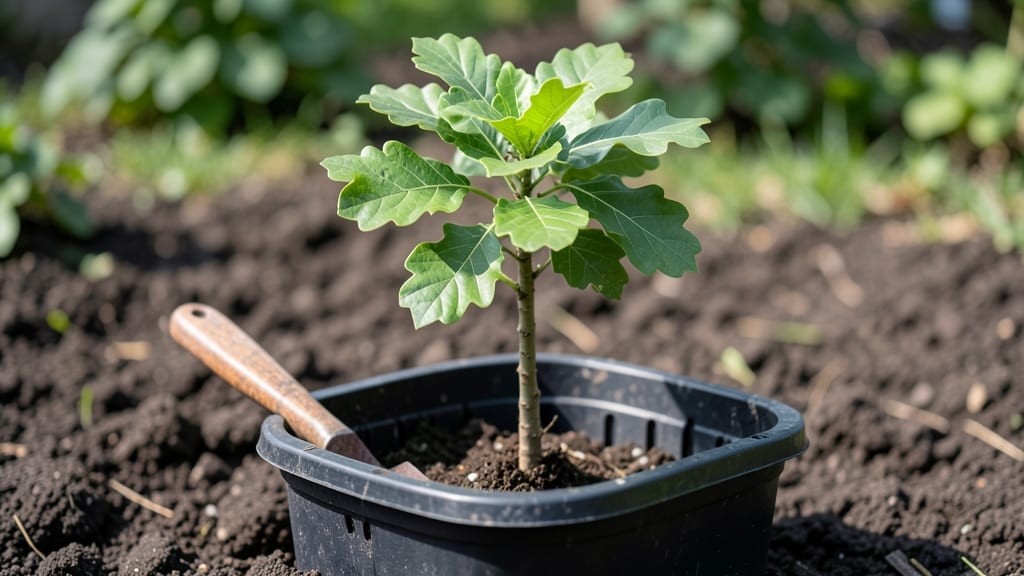
Caring for oak seedlings transforms a tiny acorn into a towering shade tree—if you nail the first two years. 🌱 I’ve watched my own acorns grow from fragile sprouts into sturdy saplings by sticking to a few non-negotiable habits: keeping soil moist but not soggy, shielding them from deer, and avoiding over-pruning.
The key isn’t complicated, but skipping these steps means years of stunted growth—or worse, losing your seedling entirely.
You’ll need well-draining soil mixed with compost, a location with at least 6 hours of sunlight daily, and a 4-foot-tall cage to protect young stems from wildlife. Water deeply twice a week (more in summer heat), and mulch heavily to lock in moisture while blocking weeds.
The first year is all about root development—if you rush pruning or ignore pests like borers, you’ll pay for it later when the tree struggles to establish.
By year two, your seedling will stand 3-5 feet tall with a strong trunk, ready for its first transplant if needed. The leaves will darken to rich green, and new shoots will emerge along the branches.
This is when you can start shaping it—just remove no more than 10% of the foliage at a time to avoid stress. The goal? A tree that outgrows its nursery pot and thrives in the ground for decades.
Works for red, white, or pin oak seedlings—just adjust watering for your climate. Here’s how to keep yours alive and growing strong through the critical early years.
📚 In This Guide
- What you need
- Instructions
- Tips and common mistakes
- Wrapping up and next steps
What you need
- ● Oak seedling: 1 healthy, disease-free seedling (choose between Quercus robur or Quercus alba for best results).
- ● Growing container: 1 nursery pot (5–7 gallons) or
- ● 1 gallon-sized biodegradable pot (if transplanting directly into the ground).
- ● Well-draining soil: 1 bag of acidic, loamy soil mix (pH 5.0–6.5) or a blend of: 60% topsoil
- ● 30% peat moss or coconut coir
- ● 10% perlite or sand (for drainage).
- ● Fertilizer: 1 slow-release balanced fertilizer (10-10-10) or organic options like composted oak leaves or worm castings.
- ● Watering can or hose: With a gentle spray nozzle (avoid high pressure).
- ● Mulch: 2–3 inches of wood chips or pine straw (keep 6 inches away from the trunk).
- ● Pruners: 1 pair of sterilized, sharp pruners (for trimming dead branches).
- ○ Stakes & ties (optional): 2 bamboo stakes + soft plant ties (if seedling is top-heavy or in windy areas).
- ● Soil moisture meter (to monitor watering needs).
- ● Mycorrhizal fungi inoculant (boosts root growth—mix into soil).
- ● Shade cloth (30–50% coverage for young seedlings in hot climates).
- ● Pest control: Neem oil or insecticidal soap (for aphids or mites).
- ● Garden gloves (to protect hands while handling soil or mulch).
Step-by-step oak seedling care: from tiny sprout to sturdy sapling
Turn those fragile acorns into strong young trees with this simple, science-backed approach.
🌱 Step 1: Create the Ideal Germination Environment
Oak acorns need cold stratification to break dormancy—nature's way of timing germination with spring. Place your acorns in a sealed container with slightly damp peat moss or sand, then refrigerate for 90-120 days. Check monthly to ensure the mix stays barely moist (like a wrung-out sponge). This mimics winter conditions and tricks the seed into thinking spring has arrived.
After stratification, plant the acorns ½ inch deep in individual 4-inch pots filled with a mix of 50% potting soil and 50% perlite. Use a toothpick to make small holes—oaks resent being disturbed later. Water gently until moisture seeps from the bottom drainage holes. Place pots in a bright, indirect light spot (no direct sun yet). Germination takes 3-6 weeks—patience is key.
💧 Step 2: Master Watering Without Drowning Roots
Once sprouts appear, water when the top ½ inch of soil feels dry. Oak seedlings hate soggy roots but also can't handle drying out completely. I use the "thumb test": press your thumb into the soil—if it feels dry, it's time to water. Use room-temperature water and aim for the soil, not the leaves, to prevent fungal issues.
Reduce watering slightly in winter (let the top inch dry out between waterings), but never let the soil become bone-dry. Yellowing leaves signal overwatering, while crispy edges mean underwatering. Keep pots on a saucer with pebbles to catch excess water—never let seedlings sit in standing water.
☀️ Step 3: Gradually Introduce Sunlight and Outdoor Conditions
After 4-6 weeks of steady growth (when seedlings reach 4-6 inches tall), begin hardening them off. Start with 1 hour daily in partial shade, then increase by 1 hour every 3-4 days until they tolerate 6+ hours of sun. I place mine on a shaded patio first, then move to a north-facing window for morning sun exposure.
Watch for leaves that look scorched or wilted—this means they're getting too much sun too soon. Oak seedlings can handle full sun by age 2**, but take it slow. By spring of their second year, they'll be ready for full sun exposure. Always water before moving them outside to prevent shock.
🪴 Step 4: Transplant to Larger Containers or Ground
When seedlings fill their 4-inch pots (usually by 6-12 months), transplant to 1-gallon containers or directly into the ground. Choose a spot with well-draining soil and partial shade to full sun, depending on your climate. Dig a hole twice as wide as the root ball but no deeper—oaks resent being buried too deeply.
Water deeply after transplanting, then let the soil dry slightly before watering again. Mulch with 2-3 inches of wood chips to retain moisture and protect roots. Avoid fertilizing for the first year—young oaks are sensitive to excess nutrients. Instead, focus on consistent watering and gradual sun exposure.
✂️ Step 5: Prune and Protect for Long-Term Health
Prune only to remove dead, damaged, or crossing branches. Use clean, sharp pruners to make cuts just above a leaf node. Never prune more than 25% of the canopy in one season—oaks are slow to recover. The best time to prune is late winter before new growth begins, but avoid heavy pruning after June (it stresses the tree).
Watch for pests like oak leaf gall wasps or borers. If you see unusual holes or growths on leaves, treat with neem oil or insecticidal soap. Oak seedlings are tough but need protection from deer and rabbits—use tree guards or fencing until they reach 6 feet tall. With proper care, your seedlings will grow into majestic trees for generations.
Tips & tricks for perfect oak seedling care
Here's what nobody tells you about turning acorns into healthy saplings—these tricks make all the difference between thriving seedlings and sad, stunted growth.
Cold Stratification Secret: Don't skip the 90-120 day refrigeration period—this mimics winter and breaks dormancy. I've tried planting fresh acorns without stratification, and they simply won't sprout. Place a small air hole in your container lid to prevent mold while keeping moisture in. If you're short on time, you can extend this to 140 days for better germination rates, but don't go shorter.
Planting Precision: When planting your ½-inch deep in 4-inch pots, use a toothpick to make the hole—it's gentler than your fingers and prevents compressing the soil around the acorn. The 50/50 mix of potting soil and perlite is crucial; perlite prevents root rot while providing aeration. I've found that adding a tiny pinch of cinnamon to the planting mix helps prevent fungal issues during germination.
Hardening Off Strategy: The 1 hour daily outdoor exposure in Step 3 is where most people fail. Start with a completely shaded spot like under a tree or on a covered patio. I like to move my seedlings to a north-facing window for morning sun after their initial outdoor session—this gradual transition prevents sunburn. Watch for leaves that look like they've been dipped in coffee; that's your sign to slow down the sun exposure.
Transplanting Timing: Wait until your seedlings fill their 4-inch pots (usually 6-12 months) before transplanting—this gives their root systems time to establish. When moving to 1-gallon containers, water the seedlings thoroughly first so the root ball stays intact. I've learned the hard way that oaks resent being transplanted too early; their roots are delicate and take time to recover from disturbance.
Pro Tips for Oak Seedling Care
- Here's what nobody tells you about turning acorns into healthy saplings—these tricks make all the difference between ...
- Cold Stratification Secret: Don't skip the 90-120 day refrigeration period—this mimics winter and breaks dormancy. I'...
- Planting Precision: When planting your ½-inch deep in 4-inch pots, use a toothpick to make the hole—it's gentler than...
Frequently asked questions
Got questions about nurturing your oak seedlings?
You’re not alone! Here are answers to the most common concerns—so you can grow confidently from seed to sapling.
How long does it take for an oak seedling to sprout?
Oak acorns typically sprout in 4–8 weeks if kept moist and warm (60–70°F). Cold stratification (refrigerating seeds for 3–4 months) can speed up germination. Patience is key—some stubborn acorns may take up to 6 months!
How often should I water oak seedlings?
Keep soil consistently moist but not soggy—water when the top inch feels dry. Seedlings need 1–2 inches of water weekly, but reduce frequency as roots develop. Overwatering suffocates roots, while drought stress stunts growth. Mulch helps retain moisture!
Can I transplant an oak seedling once it’s sprouted?
Yes, but timing matters! Transplant after the first true leaves appear (when roots are ~2 inches long). Use a small trowel, keep soil intact, and water thoroughly post-transplant. Avoid moving seedlings in extreme heat or cold. Harden them off first by gradually exposing to outdoor conditions.
What’s eating my oak seedlings? How do I protect them?
Common pests include slugs, deer, and acorn weevils. Use organic deterrents like diatomaceous earth (for slugs), fencing (for deer), or neem oil (for insects). Healthy seedlings with proper spacing and mulch are less vulnerable. Monitor regularly—early action prevents damage!
How do I know if my oak seedling is healthy?
A thriving seedling has vibrant green leaves, firm stems, and steady growth. Yellowing leaves signal overwatering or nutrient deficiency (try a balanced fertilizer). Wilting or brown spots? Check for pests or fungal issues. Strong roots (test by gently tugging) mean it’s ready for the next stage!
Wrapping up and next steps
Caring for an oak seedling is a rewarding journey that connects you to nature’s timeless beauty. With the right soil, sunlight, and patience, your tiny sapling can grow into a mighty oak—one that future generations will admire. 🌳✨
Now that you’re armed with the essentials, take that first step: plant your seedling today! Whether you’re a seasoned gardener or a beginner, every small effort nurtures a legacy. Happy growing—your future oak is counting on you!