
Vegetables
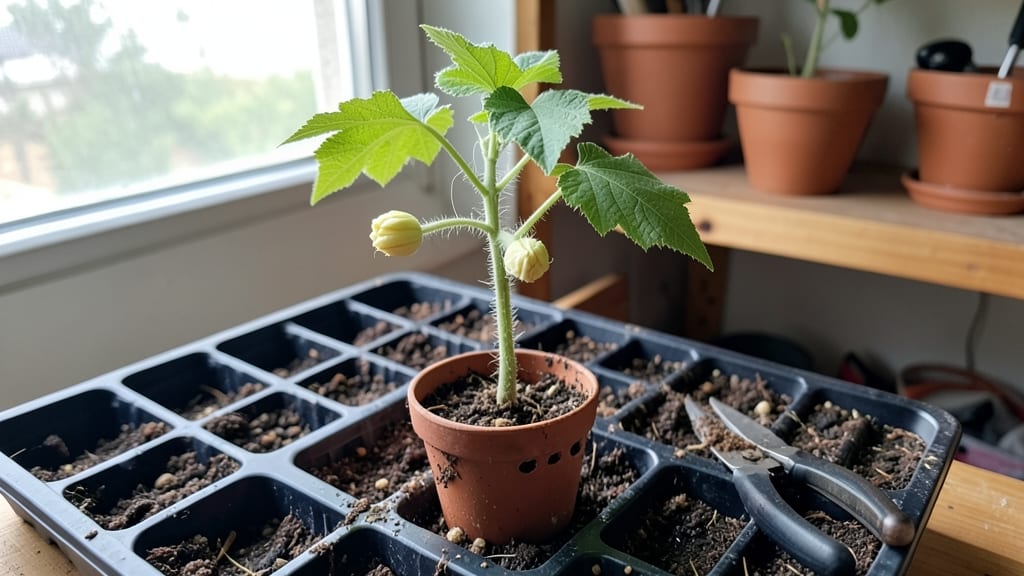
Luffa gourd seedlings grow faster than you’d expect when you nail the first few weeks right—bushy vines in weeks isn’t just hype, it’s what happens when you start with the right warmth, soil, and light.
I’ve watched these tropical vines go from tiny sprouts to 6-foot climbers in just six weeks, and the secret isn’t complicated: it’s about mimicking their natural jungle conditions at home. The key? A heat mat, loose soil, and patience for those first fragile leaves to unfurl.
You’ll need just three simple supplies to get started: biodegradable pots (so you can transplant without disturbing roots), a 75-85°F heat mat or sunny windowsill, and a mix of 50% compost, 30% coconut coir, and 20% perlite to keep moisture even while preventing rot.
Water lightly—just enough to keep the soil damp, not soggy—and watch for those first true leaves (not the initial seed leaves) before you even think about hardening off. Most people rush this step, and that’s when seedlings flop.
By week three, you’ll see the real magic: velvety green tendrils reaching for anything vertical, and those signature luffa leaves—broad, lobed, and thirsty for sunlight. Keep them in full sun (6+ hours daily) and fertilize lightly with fish emulsion every two weeks, but don’t overdo it.
The goal is strong stems, not just fast growth. Weak seedlings collapse under their own weight later, and nobody wants to prop up a luffa vine with sticks by summer.
Here’s the thing about luffa—they’re forgiving once established, but those first weeks are make-or-break. If your seedlings look leggy or pale, it’s not too late to adjust: move them closer to light, thin crowded pots, and avoid cold drafts.
The payoff? By midsummer, you’ll have vines heavy with fruit that’ll outlast your zucchini by months. Let’s get those seeds sprouting.
📚 In This Guide
- What you need
- Instructions
- Tips and common mistakes
- Wrapping up and next steps
What you need
- ● Luffa gourd seeds: 5–10 seeds (choose organic, non-GMO for best results).
- ● Seed-starting mix: 2–3 gallons of lightweight, well-draining potting soil (avoid garden soil—it’s too dense!).
- ● Containers: 4–6 small pots (3–4 inches wide) or a seed tray with drainage holes.
- ● Watering can or spray bottle: For gentle hydration (no drowning seedlings!).
- ● Grow lights or sunny windowsill: 6+ hours of sunlight daily (or a LED grow light for indoor setups).
- ● Plastic wrap or humidity dome: To retain moisture while seeds germinate.
- ● Trowel or small spoon: For planting seeds at the right depth (½ inch deep).
- ○ Fertilizer (optional but helpful): A balanced, water-soluble fertilizer (5-5-5 NPK) or compost tea for young seedlings.
- ○ Support structure (optional): Small stakes or trellis pieces (3–4 feet tall) for early training.
- ○ Thermometer (optional): To monitor soil temps (ideal: 70–90°F for germination).
Simple instructions for growing healthy luffa gourd seedlings
Here's my straightforward approach to get your luffa vines off to a strong start.
Prepare Containers and Warm Soil
Luffa gourds love warmth, so begin by filling your 4-inch pots with 2 gallons of seed-starting mix—this gives roots plenty of room to establish before transplanting. I like to mix in a handful of compost to give seedlings a nutrient boost right away. Press the soil down gently so it's firm but not packed, creating a solid foundation for those first roots.
Place the pots in a warm spot, ideally between 75-85°F, since luffa seeds need consistent warmth to germinate. A seedling heat mat works wonders if your home runs cooler. The soil should feel warm to the touch, not just room temperature. This warmth ensures your seeds break through the soil within 5-7 days—patience is key here, but don’t let the soil dry out during this waiting period.
Plant Seeds at the Right Depth
Sow 2-3 seeds per pot at a depth of about ½ inch, which is roughly twice the size of the seed itself. Planting too deep delays germination because the seedling has to work harder to reach the surface. Cover the seeds lightly with the remaining mix, then mist the soil with a spray bottle until it’s evenly moist but not soggy.
I tap the pot gently on the table to settle the soil around the seeds—this prevents air pockets that could slow down germination. Place a clear plastic dome or wrap over the pot to trap warmth and moisture. Check daily to ensure the soil stays damp; condensation on the dome is a good sign everything is working. Once the first sprouts appear, remove the dome immediately to prevent fungal issues.
Provide Bright, Indirect Light
Luffa seedlings need 6-8 hours of bright, indirect light daily to prevent leggy growth. Place them near a south-facing window or under a grow light positioned 4-6 inches above the plants. If you notice the seedlings stretching toward the light with thin stems, they’re not getting enough intensity. Adjust the light source or move the pots closer to the window.
Watch for the first true leaves—these are the second set of leaves that appear after the initial seed leaves. Once they emerge, you’ll know the seedlings are strong enough to handle a bit more direct sunlight. Rotate the pots a quarter turn every few days so the vines grow evenly rather than leaning toward the light source. This simple step keeps them sturdy from the start.
Water and Fertilize Gently
Water the seedlings when the top inch of soil feels dry, but avoid soaking the soil—luffa roots prefer consistent moisture without being waterlogged. I use a small watering can with a narrow spout to target the base of the plants, which prevents disturbing the delicate roots. Overwatering at this stage can lead to damping-off, a fungal disease that causes seedlings to collapse suddenly.
After the first true leaves appear, feed the seedlings with a balanced liquid fertilizer diluted to half strength. This gives them a gentle nutrient boost without overwhelming their young roots. I apply the fertilizer every 2 weeks to encourage bushy, healthy growth. Keep an eye out for yellowing leaves—a sign they might need more nitrogen or less water.
Harden Off Before Transplanting
About 2 weeks before your last frost date, start hardening off the seedlings by placing them outside in a sheltered spot for 1-2 hours the first day. Gradually increase their outdoor time over 10-14 days, letting them adjust to wind, sun, and temperature fluctuations. This slow transition prevents shock and ensures they thrive once planted in the ground.
Choose a sunny spot in your garden with well-draining soil, then transplant the seedlings 12-18 inches apart in rows 3-4 feet apart. Luffa vines grow long and need space to sprawl. Water deeply after planting to help the roots settle into their new home. With consistent care, you’ll see those vines take off in no time, ready to produce luffas in just a few months.
Tips & tricks for growing healthy luffa seedlings
A few simple tricks will help you avoid common pitfalls and give your luffa seedlings the best possible start.
Soil Warmth is Non-Negotiable: In Step 1, when placing your pots between 75-85°F, I recommend using a seedling heat mat if your home runs cooler than 70°F. The soil should feel warm to the touch—almost like a warm bath. If you notice condensation on the plastic dome, that's a great sign the warmth is working. Cold soil can delay germination by up to a week, so don't skip this step even if your home feels warm to you.
Germination Timing Secret: The 5-7 day germination window in Step 1 can vary based on seed freshness. If you're not seeing sprouts after 7 days, gently press the soil surface with your finger to check for moisture—dry soil is the most common reason for delayed germination. I've found that keeping a small spray bottle nearby to mist the soil daily makes all the difference during this critical period.
Light Positioning Matters: When providing those 6-8 hours of bright indirect light in Step 3, pay attention to the angle of your light source. South-facing windows work best in the morning but can become too intense by afternoon. If you notice seedlings stretching toward the light, they're telling you they need more intensity. I like to rotate my grow lights every few days to ensure even growth on all sides—this prevents lopsided seedlings that struggle later.
Fertilizer Timing Tip: In Step 4, when you're ready to fertilize after the first true leaves appear, I suggest mixing your diluted fertilizer with water in a separate container first. This prevents clumping in your watering can and ensures even distribution. The 2-week interval is perfect for luffa seedlings—any more frequent and you risk burning their delicate roots.
Pro Tips for Luffa Gourd Seedling
- A few simple tricks will help you avoid common pitfalls and give your luffa seedlings the best possible start.
- Soil Warmth is Non-Negotiable: In Step 1, when placing your pots between 75-85°F, I recommend using a seedling heat mat if your home runs cooler than 70°F.
- Germination Timing Secret: The 5-7 day germination window in Step 1 can vary based on seed freshness.
Frequently asked questions
Got questions about growing luffa gourd seedlings? You’re not alone! Here are answers to the most common queries to help you cultivate thriving vines with ease.
How long does it take for luffa gourd seedlings to sprout?
Luffa gourd seeds typically sprout within 7–14 days after planting, depending on soil warmth (ideal: 70–90°F). Keep soil moist but not soggy, and place seeds in a sunny spot or under grow lights. Patience pays off—consistent moisture speeds up germination!
When is the best time to transplant luffa seedlings outdoors?
Wait until all frost risk has passed and soil temps are above 60°F—usually 2–3 weeks after the last frost in your zone. Seedlings should have 2–4 true leaves and be at least 3–4 inches tall. Harden them off for 5–7 days first to avoid shock.
Can I grow luffa gourds from store-bought luffa sponges?
Yes! Soak a clean, organic luffa sponge in water for 24–48 hours to soften, then scrape out seeds. Plant them like fresh seeds—they’re just as viable! Pro tip: Store-bought sponges may have been treated; opt for organic or home-grown sponges for best results.
Why are my luffa seedlings wilting or turning yellow?
Wilting or yellowing often signals overwatering, underwatering, or pests. Check soil moisture (top inch should be dry); luffas prefer well-draining soil. Inspect leaves for aphids or spider mites—spray with neem oil if needed. Too much shade? Move seedlings to 6+ hours of sunlight daily.
Are luffa gourds easy to grow in containers?
Use a 5-gallon+ container with drainage holes and fill with potting mix. Luffas are vigorous climbers, so add a trellis or cage. Just ensure containers get full sun and you fertilize every 2–3 weeks with a balanced, low-nitrogen feed (e.g., 5-5-5). Dwarf varieties like ‘Tiger Baby’ work well in pots!
Wrapping up and next steps
Growing luffa gourd seedlings into thriving vines is easier than you think—just follow the right steps! With the right soil, sunlight, and a little patience, you’ll soon be harvesting luffas for natural sponges or fresh veggies in no time. 🌱
Now that you’re armed with tips and tricks, take the next step—plant those seedlings and watch your garden transform! Whether you’re a beginner or a seasoned gardener, your luffa vines will reward you with bushy, productive growth in just a few weeks. Happy gardening! 🌿