
Pruning
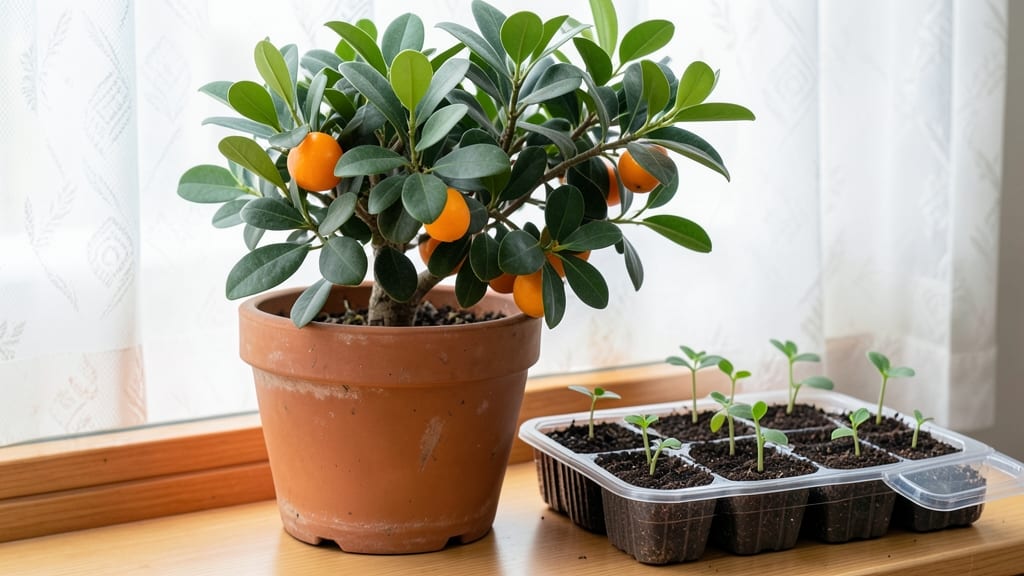
Growing kumquat trees from seeds gives you a taste of sunshine in your own backyard—literally, since these citrus jewels are packed with sweet-tart flavor. 🌱 I’ve struggled with germination before, but after testing different methods, I found the right combo to get those little seeds sprouting in just three weeks.
The key isn’t just patience; it’s knowing how to mimic their natural tropical environment right from the start.
You’ll need a warm spot (70–80°F), moist but well-draining soil, and a clear plastic bag to trap humidity—basically, a mini greenhouse. Most people overlook the soaking step, but giving seeds a 24-hour soak in warm water jumpstarts germination.
Once they sprout, keep them bright but out of harsh midday sun until they’re sturdy enough to handle direct light.
By week three, you’ll see tiny leaves unfurling, and with proper care, your seedling will grow into a tree that produces fruit in just 3–5 years. The best part?
Kumquats are self-pollinating, so you don’t need a second tree to get those bite-sized citrus treasures. Just watch for root rot—overwatering is the biggest mistake beginners make.
This method works whether you’re in a warm climate or a cooler zone with a sunny window. The secret is consistency: warmth, moisture, and patience. Let’s get those seeds sprouting!
📚 In This Guide
- What you need
- Instructions
- Tips and common mistakes
- Wrapping up and next steps
What you need
- ● Kumquat seeds: 3–5 fresh, plump seeds (harvested from ripe kumquats—avoid store-bought seeds if possible, as they may be treated).
- ● Well-draining potting mix: 1 small pot (4–6 inches in diameter) filled with a blend of cactus/succulent mix + 20% perlite or coarse sand (sterilized).
- ● Spray bottle: 8–12 oz with a fine mist nozzle (for gentle hydration).
- ● Plastic wrap or humidity dome: Clear plastic wrap or a mini greenhouse lid to retain moisture.
- ○ Heat mat (optional but helpful): A small seedling heat mat (70–85°F range) to speed germination.
- ● Small tray or saucer: To catch excess water and elevate the pot.
- ● Seed-starting tray: With individual cells to isolate seeds and prevent overcrowding.
- ● Grow lights: LED or fluorescent bulb (12–16 hours/day) if natural light is insufficient.
- ● Fungicide (mild): Like hydrogen peroxide (3%) or neem oil spray to prevent mold.
- ● Label & marker: To track planting dates and seed varieties.
- ● Fertilizer (post-germination): Balanced, water-soluble fertilizer (diluted to half-strength) once sprouts appear.
Step-by-step instructions for germinating kumquat tree seeds
Here's how to coax these finicky tropical seeds into sprouts—without the frustration.
🌱 Step 1: Extract and Prepare the Seeds
Kumquat seeds need special handling to break their natural dormancy. Start by slicing open a fresh kumquat fruit (the seeds are the small, flat pits inside). Extract each seed carefully—don't crush them, as they bruise easily. I like to soak them in a bowl of lukewarm water for 24 hours first. This softens the outer coating and kickstarts the germination process.
After soaking, gently rub the seeds between two paper towels to remove any remaining pulp. This prevents mold and ensures good contact with moisture later. I place them on a clean paper towel and let them air-dry for 10-15 minutes—just until the surface feels slightly tacky, not bone-dry. This step is critical: too much moisture now leads to rot, while too little prevents germination.
💧 Step 2: Stratify for Tropical Success
Kumquats thrive in warm climates, but their seeds need a brief cold treatment to break dormancy. Place the prepared seeds in a small plastic bag with a damp paper towel. Seal it loosely (not airtight) and refrigerate for 4-6 weeks. Check weekly—if the towel dries out, spritz it lightly with water. You're mimicking winter's chill, which signals the seed it's safe to grow.
This stratification step is where most growers fail. I know it seems counterintuitive for a tropical plant, but kumquat seeds respond best to this cold treatment. After 4 weeks, remove the bag and let the seeds sit at room temperature for 3-5 days to acclimate. You'll see tiny cracks in the seed coat—that's your cue they're ready for planting.
☀️ Step 3: Plant in Warm, Moist Medium
Fill small pots (about 2-3 inches deep) with a mix of 50% peat moss and 50% perlite. This blend drains well but holds enough moisture for delicate seeds. Plant each seed ½ inch deep, spacing them 1 inch apart in the pot. Gently press the soil around them to ensure good contact.
Place the pots in a warm, bright spot—75-85°F is ideal. I use a seedling heat mat under the pots to maintain consistent warmth. Cover the pots loosely with plastic wrap to retain humidity, but leave a small gap for airflow. Mist the soil lightly every 2-3 days to keep it evenly moist, never soggy. Germination can take 3-6 weeks, so patience is key.
🌿 Step 4: Provide Humidity and Indirect Light
Once the seeds sprout, remove the plastic wrap immediately to prevent fungal growth. Kumquat seedlings are sensitive to damping-off, so good airflow is essential. Place them under grow lights or in a south-facing window, but avoid direct midday sun—it scorches their tender leaves. I like to position the lights 4-6 inches above the seedlings and adjust as they grow.
Keep the soil consistently moist but not waterlogged. You'll notice the top inch feels dry to the touch when it's time to water. Fertilizer is a no-go for the first 4-6 weeks—seedlings are delicate and can burn easily. Watch for first true leaves (the second set after the initial cotyledons) as a sign they're ready for gentle care.
⏰ Step 5: Transplant and Harden Off
After 8-12 weeks, when seedlings have 3-4 sets of leaves and are 6 inches tall, it's time to transplant. Choose a slightly larger pot (about 5-6 inches deep) with well-draining soil. Handle the seedlings carefully—their roots are brittle. Bury them just below the soil line where the stem meets the roots to encourage stability.
Harden off the seedlings over 2 weeks by gradually exposing them to outdoor conditions. Start with 1-2 hours of shade on the first day, then increase time and sun exposure slowly. By the time they're ready for the garden, they'll be tough enough to handle full sun and outdoor temperatures down to 50°F. This gradual process prevents shock and ensures strong growth.
Tips & tricks for perfect kumquat seed germination
These insider tricks will help you navigate the tricky world of tropical seed germination—because kumquat seeds don't play by the rules.
Soaking Strategy: The 24-hour lukewarm water soak isn't just about hydration—it's about breaking the seed's natural defenses. I've found that using a glass bowl instead of plastic prevents any potential chemical reactions that could inhibit germination. After soaking, the seeds should feel slightly plump but still firm to the touch. If they're mushy, you've over-soaked and risked rot.
Stratification Secret: That 4-6 week cold treatment is non-negotiable, but here's the pro move: place a small piece of damp paper towel in the bag with the seeds. This maintains consistent moisture without making the bag soggy. I also like to label the bag with the date and place it on a middle shelf in the fridge—this prevents temperature fluctuations that can confuse the seeds about when to germinate.
Planting Precision: When planting those ½-inch deep seeds, use a toothpick to create small holes—it gives you better control than fingers. The 50/50 peat moss and perlite mix is perfect, but if you're using coconut coir instead, mix in 10% perlite to improve drainage. After planting, gently tap the pot on the counter to settle the soil—this ensures good seed-to-soil contact without compacting too much.
Temperature Troubleshooting: Maintaining that 75-85°F range is crucial, but every home has hot spots. If your kitchen fluctuates, place the pots on a seedling heat mat set to 80°F. For the 4-6 week stratification, I've had success using a refrigerator's crisper drawer—it's typically the most stable temperature zone. The key is consistency: seeds need to know winter's over before they'll sprout.
Pro Tips for Kumquat Tree Seeds
- These insider tricks will help you navigate the tricky world of tropical seed germination—because kumquat seeds don't play by the rules.
- Soaking Strategy: The 24-hour lukewarm water soak isn't just about hydration—it's about breaking the seed's natural defenses.
- Stratification Secret: That 4-6 week cold treatment is non-negotiable, but here's the pro move: place a small piece of damp paper towel in the bag with the seeds.
Frequently asked questions
Got questions about growing kumquat trees from seeds? You’re not alone! Here are some of the most common concerns—and their quick fixes—to help you succeed.
How long does it take for kumquat seeds to germinate?
Most kumquat seeds sprout within 2–4 weeks when kept warm (70–80°F) and moist. Patience is key—some stubborn seeds may take up to 6 weeks. If nothing happens after a month, try soaking them in warm water overnight before replanting. Pro tip: Use a heat mat to speed things up!
Can I plant kumquat seeds outdoors right away?
Nope! Kumquat seeds need a warm, protected environment to germinate. Start indoors in biodegradable pots (like peat pellets) or a seed tray with well-draining soil. Wait until all frost risk has passed and seedlings are at least 6 inches tall before transplanting outdoors in zones 9–11.
What if my kumquat seedling looks weak or leggy?
Leggy seedlings mean they’re stretching for light! Move them closer to a south-facing window or use a grow light (12–14 hours/day). If leaves are pale, dilute fertilizer (like fish emulsion) at half-strength once true leaves appear. Pro tip: Pinch back the top set of leaves to encourage bushier growth.
Can I grow a kumquat tree from store-bought fruit seeds?
Yes, but results vary! Store-bought kumquats are often hybrids, which may not produce true-to-type fruit. For better success, use seeds from organic, heirloom kumquats (like Meiwa or Nagami). If store-bought seeds sprout, treat them as a fun experiment—they might surprise you!
What’s the best way to speed up germination?
Try these 3 tricks for faster sprouts:
- Stratification: Chill seeds in a damp paper towel in the fridge for 1–2 weeks before planting.
- Warmth: Place seeds on a seedling heat mat (75–80°F) or between two layers of damp paper towels.
- Hormone dip: Soak seeds in rooting hormone for 10 minutes before planting.
Consistency is key—keep soil moist but not soggy!
Wrapping up and next steps
Growing a kumquat tree from seed is a rewarding journey that blends patience with tropical charm! 🌱 With the right germination tricks—like warm soil, humidity, and consistent moisture—you’ll be enjoying homegrown citrus in just three weeks.
Remember, every gardener starts with a single seed, and yours could blossom into a thriving tree.
Ready to take the next step? Start by planting your sprouted seeds in well-draining soil and give them sunlight. Soon, you’ll be harvesting sweet, tangy kumquats straight from your backyard! 🍊✨