
Pruning
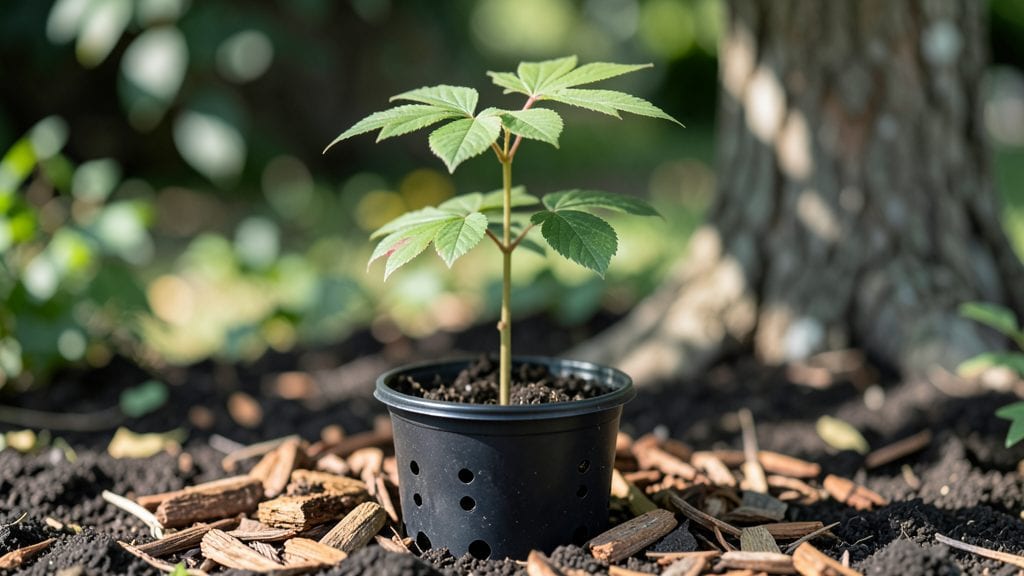
A fragrant katsura tree seedling starts with patience and the right conditions. ✨ I’ve nurtured these delicate seedlings through their first year, and the key is mimicking their natural understory habitat—moist, well-drained soil and dappled sunlight.
The scent of their leaves alone makes the effort worth it, especially when you imagine how they’ll mature into a graceful, multi-stemmed tree.
You’ll need a spot with partial shade, rich organic soil mixed with compost, and a gentle hand during transplanting. Katsura seedlings hate root disturbance, so dig a hole twice as wide as their container and water deeply right after planting.
Mulch helps retain moisture while protecting young roots from temperature swings.
Pruning comes later—these trees grow slowly but steadily, and shaping happens naturally. By year three, you’ll notice that signature papery bark and the first hints of their famous honey-scented foliage. The real reward? A tree that thrives in zones 4-8 without fuss.
Fair warning: They’re not fast growers, but the payoff is a low-maintenance shade tree with autumn colors that rival maples. Start small, stay consistent, and let nature handle the rest.
📚 In This Guide
- What you need
- Instructions
- Tips and common mistakes
- Wrapping up and next steps
What you need
- ● Katsura tree seedling: 1 healthy, 1- to 3-year-old seedling (nursery-grown or from seed). Check for vibrant leaves and no signs of disease.
- ● Well-draining soil: 1 bag (50 lbs) of high-quality, slightly acidic soil mix (pH 5.5–6.5). A blend of garden soil, compost, and perlite works well.
- ● Container or planting site: For container growing: 1 large pot (15+ gallons) with drainage holes.
- ● For outdoor planting: A hole twice as wide as the seedling’s root ball.
- ● Organic mulch: 2–3 inches of shredded bark or wood chips to retain moisture and regulate soil temperature.
- ● Watering can or hose: With a gentle spray nozzle for even moisture distribution.
- ● Fertilizer: 1 slow-release, balanced fertilizer (10-10-10 or similar) or organic options like composted manure.
- ● Pruning tools: 1 pair of bypass pruners (for small branches).
- ● 1 hand saw (for thicker stems, if needed).
- ● Gloves and safety glasses: To protect hands and eyes during pruning.
- ● Soil pH test kit: To ensure optimal growing conditions.
- ● Root stimulator: A powder or liquid to encourage root growth when transplanting.
- ● Shade cloth: For young seedlings in hot climates (30–50% shade initially).
- ● Tree support stake: If planting in windy areas (1–2 stakes, 4–6 feet tall).
- ● Seasonal mulch top-up: Extra mulch for winter protection in colder zones.
Step-by-Step guide to cultivating a katsura tree seedling
This adaptable beauty thrives with minimal fuss once you nail these foundational steps.
🌱 Step 1: Select and Prepare the Planting Site
Katsura seedlings (Cercidophyllum japonicum) prefer partial shade to full sun but tolerate a range of conditions—ideal for urban landscapes or woodland edges. Choose a spot with well-draining soil (they hate soggy roots) and 6-8 feet of vertical space to mature. I always test soil drainage by digging a 12-inch hole, filling it with water, and watching it drain in under 30 minutes. If water pools, amend with 2 inches of compost or plant on a slight mound.
Spring is the best time to plant, but seedlings tolerate fall planting in USDA Zones 5-8 if given 4-6 weeks before the first frost. Avoid transplanting during extreme heat—roots stress easily when soil temperatures exceed 85°F. If you're starting from seed (not common but possible), cold-stratify seeds for 60-90 days in a moist medium at 35-40°F before sowing.
🪴 Step 2: Plant with Care to Avoid Root Trauma
Dig a hole twice as wide as the root ball but only as deep—planting too deep suffocates the graft union (if using a grafted seedling). Loosen the root ball gently with your fingers to encourage outward growth. Place the seedling in the hole, backfill with native soil (no amendments needed unless your soil is extremely poor), and tamp lightly to eliminate air pockets.
Water deeply immediately after planting—1-2 gallons for small seedlings—to settle the soil. I always create a 2-inch-high berm around the base to direct water toward the roots. Mulch with 3 inches of wood chips, keeping it 6 inches away from the trunk to prevent rot. This mulch ring also regulates soil temperature and reduces weed competition.
☀️ Step 3: Establish Watering and Light Routines
Young katsura seedlings need consistent moisture but despise wet feet. Water once weekly during the first growing season, providing 1-2 gallons per watering until the top 6 inches of soil feel dry. You’ll know it’s time when the soil pulls away slightly from the pot edges. Overwatering causes leaf yellowing and root rot, while underwatering leads to crispy leaf edges—both are easily reversible if caught early.
Monitor sunlight exposure closely. While mature katsura trees tolerate shade, seedlings grow best in morning sun with afternoon shade, especially in hotter climates. If leaves develop a bronze cast, they’re getting too much direct afternoon sun—relocate to a shadier spot. The fragrant foliage is your reward for getting this balance right.
✂️ Step 4: Prune for Structure and Health
Prune in late winter or early spring before new growth begins. Remove dead, diseased, or crossing branches first—these compete for energy and invite pests. I always use clean, sharp pruners (disinfected with 70% isopropyl alcohol) to make cuts just outside the branch collar. For larger branches over ½ inch thick, make a 3-step cut to prevent tearing.
Shape the tree by thinning out 10-20% of the canopy to improve airflow. Katsura trees naturally grow in a pyramidal form, so avoid heavy topping—it encourages weak, water-sprout growth. If you notice suckers at the base, remove them immediately. These aggressive shoots drain energy from the main trunk and should never be allowed to establish.
🌿 Step 5: Monitor for Pests and Seasonal Adjustments
Katsura trees are relatively pest-resistant, but aphids and scale occasionally appear on new growth. Treat infestations early with a soapy water spray (1 tablespoon mild dish soap per gallon of water) applied in the early morning. Avoid chemical pesticides—they harm beneficial insects that control pests naturally.
In fall, reduce watering as temperatures drop below 50°F. The tree enters dormancy when leaves turn buttery yellow—this is normal and signals it’s storing energy for next year. Apply a 2-inch layer of mulch in late fall to insulate roots against winter temperature swings. Young seedlings may need winter protection (burlap wrap) in Zone 5 during harsh winters, but mature trees handle cold beautifully.
Tips & tricks for perfect katsura tree seedling cultivation
These foundational insights will help you nurture a thriving katsura tree that rewards you with fragrant foliage for decades.
Soil Drainage Test: That 30-minute drainage test in Step 1 is non-negotiable. I've seen katsura seedlings struggle with soggy roots after just 48 hours in poorly draining soil. If your soil drains slower than 30 minutes, consider planting on a slight mound or amending with additional compost. The goal is to mimic the tree's natural woodland habitat where water doesn't pool around roots.
Root Ball Preparation: When loosening the root ball in Step 2, resist the urge to aggressively tease the roots—gentle separation is key. I learned this the hard way after creating micro-tears that took weeks to heal. Focus on encouraging outward growth by creating small channels with your fingers rather than pulling roots apart. This technique promotes faster establishment in the new planting site.
Watering Strategy: The once-weekly watering guideline in Step 3 assumes average conditions, but your actual needs may vary. In hotter climates, you might need to water every 4-5 days, while cooler areas may only require watering every 10 days. Always check the top 6 inches of soil—if it's dry to the touch, it's time to water. The key is maintaining consistent moisture without creating waterlogged conditions that lead to root rot.
Pruning Technique: For branches over ½ inch thick in Step 4, the 3-step cutting method prevents tearing that can introduce disease. First make an undercut about ½ inch below your target cut, then cut just outside the branch collar, and finally clean up the stub. This method also helps the wound seal faster. Remember, katsura trees respond well to light pruning—never remove more than 20% of the canopy in a single session.
Pro Tips for Katsura Tree Seedling
- These foundational insights will help you nurture a thriving katsura tree that rewards you with fragrant foliage for decades.
- Soil Drainage Test: That 30-minute drainage test in Step 1 is non-negotiable.
- Root Ball Preparation: When loosening the root ball in Step 2, resist the urge to aggressively tease the roots—gentle separation is key.
Frequently asked questions
Got questions about growing a katsura tree seedling? You’re not alone! Here are some of the most common queries—plus clear, practical answers to help you nurture a thriving tree.
How long does it take for a katsura tree seedling to mature?
A katsura tree seedling typically takes 10–15 years to reach full maturity (20–30 feet tall). However, you’ll start seeing its signature fragrant foliage and delicate flowers within 3–5 years. Patience pays off—these trees reward long-term care with stunning autumn colors and a sweet, spicy scent!
Can I grow a katsura tree from seed, or should I buy a seedling?
While you can grow a katsura from seed, it’s a slow process (germination can take 1–3 months, and growth is unpredictable). For faster, more reliable results, opt for a 1–2 year-old nursery seedling. They’re already hardened off and more likely to thrive in your climate zone (USDA 5–8).
How cold-hardy are katsura tree seedlings, and do they need winter protection?
Katsura trees are highly cold-resistant (USDA zones 5–8), but young seedlings (1–3 years old) may need extra care in harsh winters. Mulch the base with 3–4 inches of wood chips and wrap the trunk with burlap if temps drop below -10°F. Established trees handle frost like a champ!
Why are my katsura tree seedling’s leaves turning yellow or brown?
Yellowing leaves often signal overwatering or poor drainage, while brown edges can mean underwatering or sunburn. Check soil moisture (keep it evenly moist but not soggy) and ensure the seedling gets partial shade (especially in hot afternoons). If pests like spider mites are present, treat with neem oil.
Are there dwarf varieties of katsura trees for small yards?
While katsura trees don’t have true “dwarf” cultivars, you can find compact-growing selections like Cercidiphyllum japonicum ‘Pendulum’, which stays under 15 feet tall with a weeping habit. For tight spaces, consider pruning mature trees to shape them—or opt for a container-grown seedling (repot every 2–3 years).
Wrapping up and next steps
Growing a katsura tree seedling is a rewarding journey—whether you're drawn to its delicate fragrance, vibrant foliage, or adaptable nature.
With the right care, patience, and a few pruning tricks, you’ll nurture a stunning addition to your landscape that thrives in various climates. Now’s the time to take action! Grab your tools, assess your seedling’s needs, and start shaping its future—one careful trim at a time. 🌿✂️
- Next step: Pick a sunny day, gather your supplies, and begin with confident cuts!