
Picking
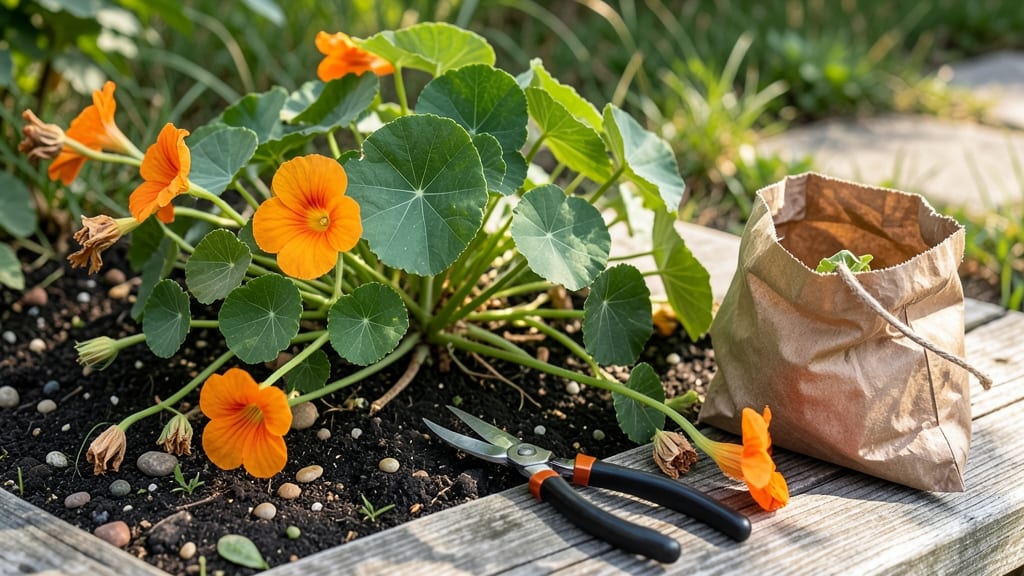
Harvesting nasturtium seeds saves you money and guarantees next year’s vibrant blooms—here’s how to do it right. 🌻 I learned the hard way that waiting too long means tough pods that crack open on their own, scattering seeds everywhere.
The key is timing: those round, plump seed pods turn from green to papery brown when they’re ready, usually in late summer or early fall.
You’ll need just a few simple supplies: sharp scissors or pruners, paper bags for drying, and a cool, dark spot to store finished seeds. The process is straightforward—snip the pods when they’re dry but still intact, then lay them out to finish drying for a week or two.
No fancy equipment needed, just patience and a little space.
Once dried, the seeds pop right out of their pods with a gentle squeeze. Store them in a sealed container in your fridge’s crisper drawer, where they’ll stay viable for up to five years.
Imagine walking into next spring’s garden and seeing those same bright orange and yellow blooms you love, all from seeds you saved yourself.
Troubleshooting is easy: if pods mold, they were too damp when harvested—next time, dry them faster. And if seeds don’t sprout? Check for freshness or try soaking them overnight.
This method works for every nasturtium variety, from trailing types to bush varieties. Ready to turn this year’s plants into next year’s garden stars?
📚 In This Guide
- What you need
- Instructions
- Tips and common mistakes
- Wrapping up and next steps
What you need
- ● Mature nasturtium plants: Choose healthy, fully bloomed plants with seed pods that have turned brown and papery (usually 4–6 weeks after flowering). Aim for at least 3–5 plants for a good seed yield.
- ● Pruning shears or sharp scissors: 1 pair (sterilized with rubbing alcohol to prevent disease transfer).
- ● Brown paper bags or breathable mesh bags: 2–3 bags (size: ~8" x 10") to collect pods and allow airflow.
- ○ Tweezers or small forceps: 1 pair (optional but helpful for delicate seed pod handling).
- ● Labeling tags or masking tape + marker: 5–10 tags to note varieties (e.g., ‘Alaska,’ ‘Jewel Mix’) and harvest dates.
- ● Flat, dry surface or seed tray: 1 (e.g., cardboard box lined with newspaper or a wire rack). Avoid plastic—it traps moisture!
- ● Newspaper or paper towels: 2–3 sheets for spreading pods to dry.
- ○ Air-tight glass jars or envelopes: 3–5 jars (quart-size mason jars work great) with desiccant packets (optional but recommended for long-term storage).
- ● Permanent marker or label maker: 1 to label jars with variety names and harvest year.
- ○ Fine-mesh strainer (optional): 1 for separating seeds from chaff if pods are fibrous.
- ● A dry, well-ventilated space with consistent temperatures (60–70°F) for drying pods (2–4 weeks).
- ● Indoor location away from direct sunlight (to prevent mold) but with indirect light.
- ● Low-humidity area (humidity <50% ideal)—use a dehumidifier if needed!
Step-by-step guide to harvesting and storing nasturtium seeds
Here’s how to save seeds from your nasturtium plants—simple, rewarding, and perfect for next year’s garden.
🌱 Step 1: Identify and Select Healthy Seed Pods
Wait until late summer or early fall when the seed pods on your nasturtium plants turn from green to brown and begin to dry out. These pods will feel papery and crinkly to the touch—this is your signal they’re ready. I always pick pods from the healthiest, most vigorous plants to ensure strong seeds for next season.
Gently twist the pod between your fingers until it releases a cluster of tiny, flat seeds. Avoid pods that are still green or have started splitting open on their own—these seeds may not store well. You’ll need about 4 pods per serving to yield enough seeds for replanting.
💧 Step 2: Dry the Seeds Thoroughly
Spread the seeds and their dried pods on a clean, dry surface like a paper towel or mesh screen. Place this setup in a warm, dry spot with good airflow—think a sunny windowsill or a well-ventilated room. The goal is to dry the seeds completely, which takes about 7-10 days. You’ll know they’re ready when the pods crumble easily and the seeds inside feel light and dry.
Don’t rush this step. Damp seeds will mold in storage, so take your time. If you notice any signs of moisture or mold after a few days, move the seeds to a drier location immediately.
☀️ Step 3: Separate and Store the Seeds
Once fully dry, gently crush the seed pods between your fingers or use a small sieve to separate the seeds from the debris. Nasturtium seeds are tiny and flat, so take your time to avoid losing any. I like to place them in a small envelope or paper bag—these materials allow the seeds to breathe while keeping them safe from pests.
Store the seeds in a cool, dark place like a pantry or seed drawer. Label the envelope with the variety and harvest date—this helps you keep track of what you’ve saved. Properly stored, nasturtium seeds stay viable for 2-3 years, though they germinate best when used within the first year.
⏰ Step 4: Test Germination Before Next Season
Before planting your saved seeds in spring, do a quick germination test. Moisten a paper towel, place a few seeds on it, and fold it over. Keep the towel damp in a warm spot for 3-5 days. If most of the seeds sprout, you’re good to go! If fewer than half sprout, consider buying fresh seeds for better results.
This test also helps you gauge how quickly your seeds will germinate, so you can plan your planting schedule accordingly. Nasturtiums are fast-growing, so knowing their germination speed means you can enjoy blooms sooner.
Tips & tricks for perfectly harvested nasturtium seeds
Here's what I've learned from years of saving nasturtium seeds—little tricks that make all the difference between seeds that store well and ones that mold before next spring.
Timing is Everything: Harvest those seed pods when they're just starting to turn brown and feel papery, but before they split open on their own. I've found that pods harvested at this stage yield the most viable seeds. If you wait too long, the seeds scatter everywhere—or worse, birds get to them first! In late summer or early fall, check your plants every 2-3 days for the perfect moment.
Drying Secrets: The 7-10 day drying time in Step 2 is non-negotiable, but here's my pro move: place a small fan nearby to create gentle airflow. This speeds up drying slightly while preventing mold. I also avoid using plastic containers—paper towels or mesh screens let moisture escape completely. If you notice any seeds looking damp after 5 days, move them to a warmer, drier spot immediately.
Storage Upgrade: While paper envelopes work fine, I've had better luck with small glass jars with tight-sealing lids. The glass protects against moisture while still allowing seeds to "breathe." Just be sure to place a tiny piece of silica gel packet inside to absorb any lingering moisture. For extra organization, use separate jars for different nasturtium varieties—you'll thank yourself next spring when you're ready to plant!
Germination Test Hack: Don't just do the germination test—use it to learn about your seeds! After the 3-5 day test, plant the sprouted seeds directly in your garden. They'll grow into healthy plants, giving you a head start on next year's blooms. This also helps you gauge how quickly your seeds will germinate in real soil conditions, so you can plan your planting schedule more accurately.
Pro Tips for Harvesting Nasturtium Seeds
- Here's what I've learned from years of saving nasturtium seeds—little tricks that make all the difference between seeds that store well and ones that mold before next spring.
- Timing is Everything: Harvest those seed pods when they're just starting to turn brown and feel papery, but before they split open on their own.
- Drying Secrets: The 7-10 day drying time in Step 2 is non-negotiable, but here's my pro move: place a small fan nearby to create gentle airflow.
Frequently asked questions
Got questions about harvesting, drying, or storing nasturtium seeds? You’re not alone! Here are some of the most common concerns—and their simple solutions—to help you save seeds like a pro.
When is the best time to harvest nasturtium seeds?
Harvest seeds when the seed pods just start to turn brown and dry out but before they split open. This usually happens in late summer to early fall, about 6–8 weeks after flowering. If you wait too long, the seeds will scatter, and you’ll miss your chance!
Can I save seeds from store-bought nasturtiums?
Technically yes, but it’s not ideal. Store-bought flowers may be hybrids (like ‘Alaska’ or ‘Jewel Mix’) and won’t grow true to type. For reliable seeds, save from open-pollinated heirloom varieties or grow your own from saved seeds for consistency.
Why are my nasturtium seed pods rotting before they dry?
Overly moist conditions (like heavy rain or poor airflow) can cause seed pods to rot. To prevent this, harvest pods as soon as they brown, or grow nasturtiums in a spot with good drainage and partial shade. If pods are already damp, spread them on a tray in a dry, well-ventilated area to dry.
How long can I store nasturtium seeds before planting?
Properly dried and stored seeds stay viable for 2–3 years in a cool, dark place (like a sealed envelope in the fridge). For best results, label them with the harvest date and plant within a year. Test viability by planting a few—if they sprout, the rest are good to go!
What if I don’t have time to dry seeds indoors?
No problem! Hang seed pods in a paper bag (not plastic) from a plant or clothesline in a dry, shaded spot. The pods will dry naturally, and seeds will drop into the bag. Just shake it occasionally to check for readiness.
Wrapping up and next steps
Harvesting nasturtium seeds is a rewarding way to ensure vibrant blooms year after year—plus, it’s a fun and easy process!
With the right timing, tools, and storage techniques, you’ll be ready to grow a fresh batch of these cheerful flowers next season. Now that you’re equipped with the know-how, why not share your new skills? Try swapping seeds with fellow gardeners or even gifting them to friends. Happy gardening! 🌱✨
- Next step: Start a seed-sharing journal to track varieties and success rates!