Picking
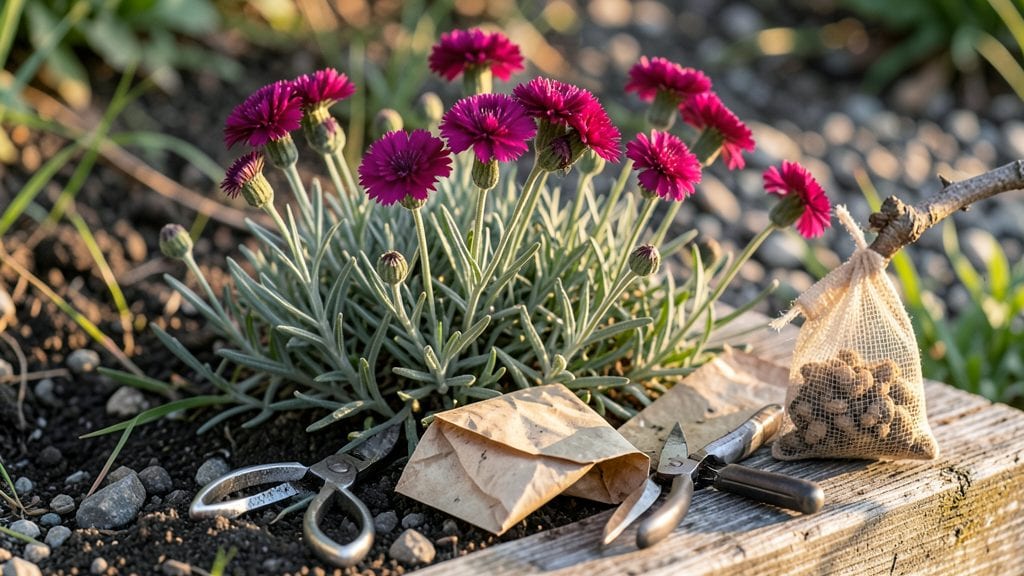
Harvesting dianthus seeds turns last year’s blooms into next season’s star performers—no fancy equipment needed. 🌻 I’ve saved seeds from my cottage garden for years, and the key is timing: wait until those papery seed pods turn from green to tan, then snip them carefully before they split open.
One wrong move and you’ll lose the harvest to wind or birds.
You’ll need just a few things: sharp scissors, a paper bag for drying, and a labeled envelope for storage. The pods are delicate, so handle them like you would a baby bird’s nest—gently!
Different varieties mature at slightly different times, but most are ready by late summer or early fall, depending on your climate. I mark my calendar for when the first pods dry out.
Once you’ve collected the seeds, let the pods dry completely in a warm, dry spot for about two weeks. Then crack them open to release the tiny black seeds inside. Store them in a cool, dark place until spring, and you’ll have a head start on next year’s garden.
The payoff? A patch of fragrant, long-blooming dianthus that keeps giving year after year.
Pro tip: If you’re growing heirloom varieties, label your seeds right away—those little black specks all look the same until they sprout. And here’s the best part: these seeds often outperform store-bought plants because they’re already adapted to your local conditions. Happy saving!
📚 In This Guide
- What you need
- Instructions
- Tips and common mistakes
- Wrapping up and next steps
What you need
- ● Mature Dianthus Plants: Healthy, fully bloomed plants with seed pods (typically Dianthus barbatus or Dianthus chinensis varieties). Aim for at least 3-5 plants for a good seed yield.
- ● Pruning Shears or Sharp Scissors: Clean, sterilized tools to snip seed pods without damaging the plant. 1 pair is sufficient.
- ● Paper Bags or Envelopes: Breathable, labeled bags (e.g., kraft paper) to collect and dry seeds. Use 1 bag per plant variety.
- ● Permanent Marker: For labeling bags with plant names and harvest dates.
- ● Fine-Mesh Screen or Sieve: To separate seeds from chaff. A small handheld sieve (¼-inch mesh) works well.
- ○ Small Containers (Optional for Storage): Airtight jars or envelopes for long-term seed storage (e.g., 1-ounce paper envelopes or glass jars with lids).
- ● Desiccant Packets: Silica gel packets to absorb moisture in storage containers and extend seed viability.
- ● Hand Lens or Magnifying Glass: For inspecting seed pods and seeds for quality before storage.
- ● Garden Journal or Notebook: To track harvest dates, plant varieties, and growing conditions for future reference.
- ● Spray Bottle with Water: To lightly mist seeds during the drying process (if humidity is low).
How to harvest dianthus seeds for next season’s blooms
Skip the guesswork—here’s my tested method for collecting dianthus seeds that guarantee strong, vibrant plants year after year.
🌱 Step 1: Identify and Select Healthy Seed Pods
Wait until late summer or early fall when the spent flowers form dry, papery seed pods. These pods will turn from green to tan or brown—that’s your cue they’re ready. Gently squeeze a pod between your fingers; if it crumbles easily, it’s mature. Avoid pods that are still green or damp, as they won’t contain viable seeds.
Choose pods from the healthiest plants in your garden. Look for stems with strong, upright growth and no signs of disease or pest damage. I like to harvest pods from the second flush of blooms—these often produce the hardiest seedlings. Use clean, sharp scissors or pruners to snip the pods cleanly from the stem, leaving about ½ inch of stem attached. This prevents the pods from splitting open prematurely.
💧 Step 2: Dry and Store the Seed Pods Properly
Spread the harvested pods on a clean, dry paper towel in a single layer. Place them in a warm, dry, well-ventilated spot for 7-10 days. This allows the pods to fully dry out, which prevents mold and ensures seed viability. Avoid direct sunlight, as it can cause the pods to overheat and crack open too quickly.
Once the pods are completely dry, store them in a paper envelope or small breathable bag. Label each envelope with the variety name and the harvest date. I keep mine in a cool, dark place like a pantry or seed drawer. Dianthus seeds can remain viable for 2-3 years if stored properly, so there’s no rush to plant them right away.
✂️ Step 3: Extract and Plant the Seeds
When you’re ready to sow, gently rub the dry seed pods between your fingers or tap them lightly on a hard surface. The seeds will pop out easily—they’re tiny, dark, and slightly angular. For best results, sow them in early spring or late summer, just before the first frost. Use a light potting mix (no heavy garden soil) in small pots or seed trays.
Sprinkle the seeds on the surface of the soil—don’t bury them. Dianthus seeds need light to germinate, so pressing them lightly into the mix is enough. Mist the soil with a spray bottle until it’s evenly moist but not soggy. Place the trays in a warm spot (65-75°F) with bright, indirect light until germination, which typically takes 14-21 days. Avoid overwatering; let the soil dry out slightly between waterings to prevent damping-off.
☀️ Step 4: Care for Seedlings Until Transplanting
Once the seedlings emerge, move them to a sunny windowsill or under grow lights for 12-14 hours of light daily. Dianthus seedlings are delicate, so handle them gently to avoid damaging the tiny stems. Thin the seedlings to 2-3 inches apart when they develop their first true leaves—this prevents overcrowding and encourages stronger growth.
Harden off the seedlings by gradually exposing them to outdoor conditions over 7-10 days before transplanting. Start with 1-2 hours of shade on the first day, then increase their time outside each day. Plant them in the garden after the last frost when the soil is warm and well-draining. Space them 12-18 inches apart to allow for airflow and reduce disease risk. With proper care, your homegrown dianthus will bloom beautifully next season!
Tips & tricks for perfect dianthus seed harvesting
Avoid these common mistakes—and watch your dianthus plants thrive for seasons to come.
Pod Selection Matters: In Step 1, I can't stress enough how important it is to pick only the tan or brown pods that crumble easily. Green pods won't contain viable seeds, and damp ones will mold during drying. Pro tip: Harvest on a dry morning after any morning dew has evaporated—this gives you the best chance of working with completely dry pods right from the plant.
Drying Conditions Are Critical: The 7-10 day drying period in Step 2 can't be rushed. Place your pods in a spot with gentle airflow—like a pantry with a small fan blowing nearby—but avoid direct sunlight. I've seen pods crack open prematurely when left in hot, sunny windowsills, ruining the harvest. If you live in a humid climate, consider adding a small packet of silica gel to the drying container to absorb excess moisture.
Storage Wisdom: Once your pods are completely dry, store them in paper envelopes rather than plastic bags. Paper allows for better air circulation, preventing mold growth that can occur in sealed plastic. I also add a tiny pinch of food-grade diatomaceous earth to each envelope as a natural pest deterrent—it keeps those pesky seed-eating insects away without chemicals.
Light Requirements for Germination: When it comes time to plant your seeds in Step 3, remember that dianthus seeds need light to germinate. I like to use clear plastic seed trays so I can monitor moisture levels without disturbing the seeds. Place them under grow lights set to 12-14 hours daily—this mimics natural daylight and encourages strong, healthy seedlings. Avoid burying them; just press them lightly into the surface of your light potting mix.
Pro Tips for Harvest Dianthus Seeds
- Avoid these common mistakes—and watch your dianthus plants thrive for seasons to come.
- Pod Selection Matters: In Step 1, I can't stress enough how important it is to pick only the tan or brown pods that crumble easily.
- Drying Conditions Are Critical: The 7-10 day drying period in Step 2 can't be rushed.
Frequently asked questions
Got questions about harvesting dianthus seeds? You’re not alone! Whether you’re a first-time gardener or a seasoned pro, these common queries can help you avoid pitfalls and maximize your success. Here’s what you need to know:
When is the best time to harvest dianthus seeds?
Harvest seeds once the pink or white flower petals have fallen off, leaving behind a small, rounded seed pod. Aim for late summer to early fall (August–September in most climates) when pods are dry but haven’t split open. Pro tip: Check daily—seeds can scatter quickly!
How long does it take for dianthus seeds to mature?
From pollination to seed readiness, it typically takes 4–6 weeks. Warm, dry conditions speed this up, while cool or wet weather may delay maturity. If pods turn brown and papery, they’re ready—don’t wait too long, or they’ll burst open!
Can I harvest seeds from store-bought dianthus plants?
Yes, but with a caveat. Store-bought dianthus may be hybrids, meaning seeds won’t always grow true to type (color/shape). For consistent results, choose heirloom or open-pollinated varieties labeled for seed-saving. If unsure, ask your local nursery!
What do I do if my seed pods won’t open or dry out?
If pods stay green or leathery, they’re not ready yet. Try these fixes:
- Improve airflow: Space plants further apart or prune nearby foliage.
- Reduce humidity: Move pots to a drier spot or use a fan on low.
- Be patient: Some varieties need cooler nights to trigger drying.
How should I store harvested dianthus seeds?
Once dry, remove seeds from pods and store them in a cool, dark, dry place (like a sealed envelope or jar). Label with the variety and date. Seeds stay viable for 2–3 years if kept below 40°F (4°C) and humidity-free. Pro tip: Add a silica gel packet to prevent moisture buildup!
Bonus: What if I don’t want to save seeds—can I still enjoy dianthus?
Deadhead spent blooms to encourage more flowers (and fewer seeds). Simply pinch off faded flowers at the base. For year-round blooms, combine deadheading with regular fertilizing and watering. No seed-saving required!
Wrapping up and next steps
Harvesting dianthus seeds is a rewarding way to ensure vibrant blooms year after year with minimal effort! By mastering the timing, tools, and techniques—like deadheading and proper drying—you’ll unlock a garden full of fragrant, colorful flowers. Don’t let hesitation hold you back; your future blooms will thank you!
Ready to grow more dianthus? Grab your seeds, mark your calendar for next year’s harvest, and start planning your dream garden layout. Happy gardening! 🌸✨