
Picking
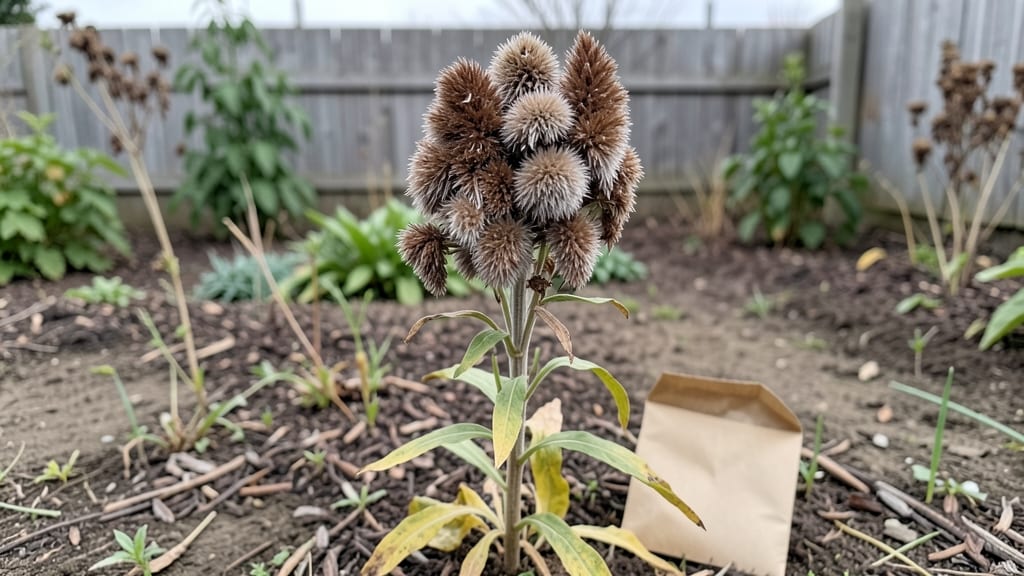
Harvesting celosia seeds saves you money and guarantees next year’s fiery blooms. ✨ I’ve collected seeds from my velvet-feathered celosia for years, and the key is timing—wait until the seed heads turn completely brown and crispy, then snip them before they scatter.
This simple step keeps your favorite varieties growing without buying new plants every spring.
The process is straightforward: you’ll need scissors, paper bags, and a dry spot indoors. Once you’ve collected the seed heads, let them dry for 2-3 weeks in a warm, airy place—this prevents mold and ensures good germination.
I hang mine upside down in a mesh bag to keep airflow steady, and the seeds stay fresh for years if stored properly.
By the time you’re ready to plant, you’ll have plump, dark seeds that sprout reliably. The first flush of celosia blooms will appear in 6-8 weeks, and you’ll get that same bold color and texture you love.
No more hunting for rare varieties—they’re right in your seed stash, ready to grow.
Works for both flame and plume celosia types, and the method scales from a few plants to a full garden. Here’s how to do it without losing a single seed to moisture or pests—guaranteed to save you time and frustration next planting season.
📚 In This Guide
- What you need
- Instructions
- Tips and common mistakes
- Wrapping up and next steps
What you need
- ● Mature celosia plants – Choose healthy, fully bloomed plants with dry, brown seed heads (avoid wilted or diseased ones).
- ● Pruning shears or sharp scissors – For cleanly snipping seed heads without damaging stems.
- ● Paper bags or breathable mesh sacks – 1-2 bags per plant (or a large tray lined with newspaper).
- ● Drying location – A warm, well-ventilated spot (indoors or outdoors, away from direct sunlight).
- ○ Air-tight containers – Small jars, envelopes, or resealable bags with silica gel packets (optional but recommended).
- ● Permanent marker or labels – To tag containers with the plant variety and harvest date.
- ● Desiccant packs – Extra silica gel or rice grains to absorb moisture during storage.
- ● Fine mesh sieve – For separating seeds from chaff if needed.
- ● Humidity monitor – To ensure your drying/storing space stays <20% humidity.
- ● Freezer bags – For long-term storage (seal tightly after drying).
Step-by-step guide to harvesting celosia seeds
Here's how to save seeds from your celosia plants for vibrant blooms next season.
🌿 Step 1: Identify and Select Mature Seed Heads
Wait until celosia flower heads turn a deep brown and begin to dry out completely. These mature heads are your seed source. I look for the ones that feel crispy to the touch and easily crumble when gently squeezed—this signals full maturity. Avoid any heads still showing color or moisture, as those seeds won't store properly.
Use clean, sharp garden shears to snip the dried flower heads from the stems. Cut about 1 inch below the base of the head to include the connecting stalk. Place the cut heads in a paper bag immediately to prevent seed loss. I always work on a dry, sunny day to ensure the heads stay completely dry before handling.
💧 Step 2: Dry the Seed Heads Thoroughly
Spread the collected seed heads out on a clean, dry surface in a well-ventilated area. I use a mesh screen or an old window screen covered with parchment paper to allow airflow on all sides. Keep them out of direct sunlight to prevent overheating, which can damage the seeds.
Let the heads dry for about 1-2 weeks, checking daily. You'll know they're fully dry when the flower heads crumble easily between your fingers and no moisture remains. If humidity is high, extend drying time to 3 weeks to prevent mold. I place a small fan nearby to circulate air and speed up the process.
✂️ Step 3: Extract Seeds from Dried Heads
Once completely dry, gently rub the flower heads between your hands or use a clean, dry cloth to separate the seeds. Celosia seeds are small and light, so they'll float away if you're too aggressive. I like to work over a large sheet of white paper to make the tiny seeds easier to spot.
Remove any remaining plant debris or chaff by sifting the seeds through a fine-mesh strainer. The good seeds will fall through while the larger debris stays behind. Store the extracted seeds in a clean, dry container—glass jars with tight-sealing lids work perfectly for long-term storage.
🪴 Step 4: Store Seeds Properly for Viability
Label your storage container with the celosia variety and the date of harvest. Place the sealed container in a cool, dark place, such as a pantry or refrigerator. Celosia seeds can remain viable for 2-3 years when stored properly in these conditions.
Check the seeds annually for moisture or signs of pests. If you notice any dampness or odd smells, transfer them to a new container immediately. I like to keep a small portion of seeds in the freezer for extra-long-term storage, though standard refrigerator storage works perfectly for most gardeners.
Tips & tricks for perfect celosia seed harvesting
A few simple tricks will help you maximize seed yield and ensure your celosia blooms return even more vibrant next season.
Timing is Everything: Harvesting at the right moment is crucial—wait until the flower heads turn completely deep brown and feel crispy when squeezed. I've learned the hard way that harvesting too early means immature seeds that won't store well, while waiting too long risks losing seeds to birds or wind. The crispy test is foolproof: if it crumbles easily, it's ready.
Drying Strategy: For the 1-2 week drying period in Step 2, I recommend using a mesh screen elevated on a frame to maximize airflow. This prevents mold while keeping seeds dry. If your climate is particularly humid, add a small dehumidifier nearby or extend drying to 3 weeks. A fan on low speed helps circulate air without damaging delicate seeds.
Seed Extraction Tip: When separating seeds in Step 3, work in small batches over white paper to spot any missed seeds. I've found that using a clean, dry cloth works better than hands for some varieties—it gives you more control and prevents accidental seed loss. The fine-mesh strainer is your best friend for removing chaff, but don't rush this step; take your time to ensure purity.
Storage Wisdom: For long-term viability, I double up on storage methods: keep most seeds in the refrigerator and reserve a small portion for the freezer. The refrigerator maintains viability for 2-3 years, while the freezer acts as a backup for seeds you want to save beyond that. Always use airtight containers—glass jars with rubber seals work perfectly and prevent moisture buildup.
Pro Tips for Harvest Celosia Seeds
- A few simple tricks will help you maximize seed yield and ensure your celosia blooms return even more vibrant next season.
- Timing is Everything: Harvesting at the right moment is crucial—wait until the flower heads turn completely deep brown and feel crispy when squeezed.
- Drying Strategy: For the 1-2 week drying period in Step 2, I recommend using a mesh screen elevated on a frame to maximize airflow.
Frequently asked questions
Got questions about harvesting, drying, or storing celosia seeds?
Here are some of the most common ones—plus quick, practical answers to keep your seed-saving game strong!
When is the best time to harvest celosia seeds?
Harvest celosia seeds when the flower heads turn completely brown and dry, usually 4–6 weeks after flowering. If you pick too early, seeds won’t mature; too late, and they may scatter or lose viability. Aim for late summer or early fall in most climates!
How long does it take for celosia seeds to dry indoors?
Celosia seeds need 1–2 weeks to fully dry indoors in a cool, dry, and well-ventilated spot (like a paper bag hung in a dark closet). Check daily—if the seeds rattle when shaken, they’re ready! Avoid heat sources (like radiators) to prevent mold.
Can I store celosia seeds in the fridge or freezer?
Yes! While room-temperature storage works, seeds last longer (up to 3–5 years) in the fridge (35–40°F) or freezer (-4°F). Use airtight containers with silica gel packets to absorb moisture. Label them with the harvest date for easy tracking!
What if my celosia seeds won’t germinate next year?
Check these fixes:
- Seeds may be too old (viability drops after 2–3 years).
- They need light to germinate—don’t bury them deep!
- Try soaking seeds overnight in warm water before planting.
- Test a few seeds on damp paper towels to confirm viability.
Are there alternative ways to save celosia seeds if I miss the harvest?
If you missed the dry-down window, cut the seed heads early and hang them upside-down in a mesh bag. Place the bag in a warm, dry spot (like a sunny windowsill) for 2–3 weeks. Shake occasionally to speed up drying—this mimics natural conditions!
Wrapping up and next steps
Harvesting and storing celosia seeds is a rewarding way to ensure vibrant blooms for seasons to come! With the right tools and techniques—like proper drying, airtight containers, and cool storage—you’re all set to grow your own celosia garden next year. Don’t let those seeds go to waste!
Now that you’re equipped with the know-how, take the next step: mark your calendar for seed collection time and keep an eye on your plants. Happy gardening, and may your future celosia blooms be as stunning as ever! 🌸