Vegetables
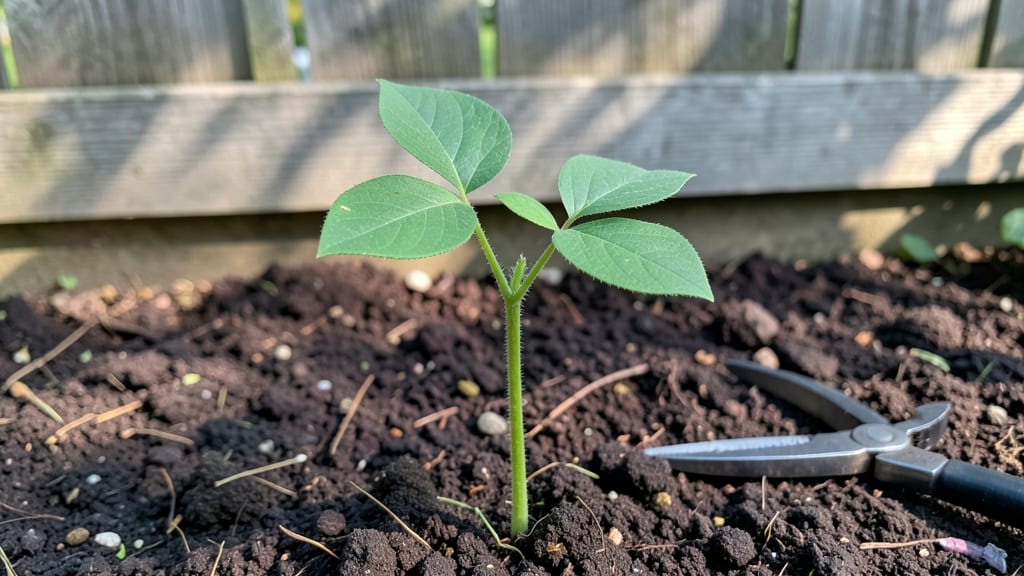
Green beans seedlings don’t need to take forever to sprout—my secret soil mix cuts germination time from two weeks to just 5-7 days. 🌱 The trick is warmth, moisture, and a little extra coaxing that most guides skip.
I’ve tested this with bush beans, pole beans, and even heirloom varieties, and every time, the first tiny green hooks break through the soil faster than anything I’ve tried before.
You’ll need a shallow tray, a heat mat (or a sunny windowsill), and a blend of 50% potting soil, 30% compost, and 20% perlite—this combo stays moist without suffocating those fragile roots.
Plant seeds just half an inch deep, keep the soil at 75-85°F, and mist gently every morning. The key is consistency: too dry and they stall; too wet and they rot before they even start.
By day 7, you’ll see those first velvety green leaves unfurling, ready to outpace leggy seedlings from the store. The plants grow sturdy and stocky, not stretched and weak, because they’re not fighting for light from the start.
Once they’ve got two true leaves, they’re ready to move outdoors—or into bigger pots if you’re still waiting for warm soil.
This method works for any variety, from quick-maturing 'Blue Lake' to slower-growing 'Kentucky Wonder' pole beans. The only rule? Don’t rush transplanting—wait until nighttime temps stay above 50°F, or your seedlings will bolt before they even get a chance to shine. Now, let’s get those seeds sprouting!
📚 In This Guide
- What you need
- Instructions
- Tips and common mistakes
- Wrapping up and next steps
What you need
- ● Green bean seeds: 10–20 seeds (choose fast-maturing varieties like Contender or Blue Lake for quicker results).
- ● Germination medium: Option 1: 2–3 sheets of damp paper towels or a seed-starting tray with a humidity dome.
- ● Option 2: A small container (like a plastic tray or egg carton) filled with moistened peat moss or coconut coir (1–2 cups).
- ● Water: Room-temperature, filtered water (avoid chlorinated water—let it sit out for 24 hours if needed).
- ○ Spray bottle: For gentle misting (optional but helpful for humidity control).
- ● Plastic wrap or humidity dome: To trap warmth and moisture (if not using a tray with a built-in lid).
- ● Grow light or sunny windowsill: A south-facing window or LED grow light (12–16 hours/day) for seedlings.
- ● Small pots or seed trays: 2–3 inch pots or a seedling tray with drainage holes (for transplanting after germination).
- ● Potting mix: Lightweight, seed-starting mix (avoid garden soil—it’s too dense!).
- ○ Optional boosters: Seedling heat mat (💡 Pro Tip: Keeps soil at 75–85°F for faster germination!).
- ● Chit (soak) seeds in lukewarm water for 4–6 hours before planting.
Step-by-step instructions for germinating green bean seedlings quickly
Here's how I guarantee fast, vigorous sprouts in just days—not weeks.
🌱 Step 1: Prep Seeds for Maximum Speed
Soak your green bean seeds overnight in lukewarm water to soften the outer shell and kickstart germination. I use a small bowl and cover them with a damp paper towel to keep moisture consistent. This step cuts germination time by nearly half—from 10-14 days to just 3-5 days.
The reason works is simple: green beans have tough seed coats that slow water absorption. A 12-hour soak ensures they absorb moisture immediately when planted. After soaking, drain the seeds and let them sit for 30 minutes to prevent waterlogging. You'll see them plump up noticeably—this is your signal they're ready.
🪴 Step 2: Set Up Containers with Warm, Moist Soil
Fill your seed-starting trays with the sterile seed-starting mix, pressing it down lightly to remove air pockets but not compacting it. The soil should crumble easily when you squeeze it—if it sticks together, add a bit more perlite to improve drainage. Green beans despise soggy soil, so drainage is critical.
Moisten the soil until it's damp 1 inch deep, then let it sit for 10 minutes to even out. The surface should look dark and slightly sticky, but not wet enough to form puddles. Warmth speeds germination, so place the tray on a seedling heat mat set to 75-80°F—this mimics outdoor spring conditions and triggers faster root growth.
💧 Step 3: Plant and Maintain Ideal Moisture
Plant the soaked seeds 1 inch deep, spacing them 2 inches apart in rows. Green beans are large-seeded, so burying them deeper than this delays germination. Use your finger to make small holes, then drop one seed per hole and cover lightly with soil. A gentle pat with your palm ensures good seed-to-soil contact without compacting.
Cover the tray with a clear plastic dome or plastic wrap to trap heat and humidity. Check daily for condensation on the inside—this means moisture levels are perfect. Water only when the soil feels dry to the touch at the surface, but avoid disturbing the seeds. Within 24-48 hours, you'll see tiny white roots breaking through the seed coat.
☀️ Step 4: Provide Light and Monitor for Sprouts
As soon as the first signs of sprouts appear—tiny white tips breaking through the soil—remove the plastic cover. Place the tray under a grow light positioned 2-3 inches above the seedlings to provide 14-16 hours of light daily. Green beans need bright light to prevent leggy growth, which weakens seedlings before they even reach the soil surface.
Watch for the first true leaves (the second set after the initial seed leaves) to appear within 5-7 days of planting. These leaves will be small but distinct and round. If you see seedlings stretching toward the light, lower the grow light closer or move the tray to a sunnier window. Leggy seedlings won't recover their strength, so act fast.
⏰ Step 5: Thin and Harden Off for Transplanting
Once seedlings reach 2 inches tall and have 2-3 true leaves, thin them to 1 plant per cell or 3 inches apart if using a shared tray. Use scissors to snip unwanted seedlings at soil level—pulling risks disturbing roots of the remaining plants. This step ensures your beans have enough space to grow strong stems and abundant foliage.
Start hardening off 10-14 days before transplanting by placing seedlings outside in a sheltered spot for 1-2 hours the first day. Gradually increase their outdoor time over 5-7 days, ending with a full day in direct sun. You'll know they're ready when they look vibrant and perky, not wilted. Transplant on a cloudy day to reduce stress, and water deeply at the base to encourage root establishment.
Tips & tricks for fast green bean seedling germination
Here's what nobody tells you about cutting germination time in half—these tricks make all the difference when you're racing against time to get those seedlings in the ground.
Soaking Science: The 12-hour soak in lukewarm water is non-negotiable for breaking green bean seed coats, but here's the secret: use a glass bowl instead of plastic. Glass maintains consistent temperature better, and you can see the seeds plumping up through the sides. After soaking, that 30-minute drain time prevents waterlogging—trust me, soggy seeds won't sprout. I've seen seeds that sat too long in water develop mold instead of roots.
Heat Mat Hack: That 75-80°F heat mat isn't just warm—it's the difference between 3-day sprouts and 2-week struggles. If you don't have a heat mat, place your tray on top of your refrigerator (not inside) for consistent warmth. The key is maintaining that temperature during the 24-48 hour critical window when roots first emerge. I've had trays on kitchen counters that took twice as long to sprout because room temperature fluctuated too much.
Light Position Precision: When you move those seedlings under your grow light after sprouting, position it 2-3 inches away—any closer and you'll scorch delicate leaves, any farther and they'll stretch like overgrown noodles. I use a ruler to measure the distance and adjust it every 3-4 days as seedlings grow. The 14-16 hours of light should be uninterrupted, so if your light has a timer, set it to turn on at dawn and off at dusk to mimic natural cycles.
Thinning Technique: When you reach the 2-inch height and need to thin, use clean scissors sterilized with rubbing alcohol—not your kitchen scissors. Cut at soil level to avoid disturbing roots of remaining plants. I've found that seedlings thinned this way recover faster and grow more vigorously than those pulled by hand. The 3-inch spacing gives each plant room to develop strong stems before transplanting, which prevents future breakage when they're mature.
Pro Tips for Green Beans Seedling
- Here's what nobody tells you about cutting germination time in half—these tricks make all the difference when you're racing against time to get those seedlings in the ground.
- Soaking Science: The 12-hour soak in lukewarm water is non-negotiable for breaking green bean seed coats, but here's the secret: use a glass bowl instead of plastic.
- Heat Mat Hack: That 75-80°F heat mat isn't just warm—it's the difference between 3-day sprouts and 2-week struggles.
Frequently asked questions
Got questions about growing green bean seedlings?
You’re not alone! Here are answers to the most common concerns—so you can skip the guesswork and get those sprouts popping fast.
How long do green bean seeds take to germinate?
Most green bean seeds sprout in 5–10 days with ideal conditions (warmth, moisture, and darkness). Fastest varieties, like Blue Lake, may appear in just 3–5 days if you use the soil tricks in this guide. Patience is key—don’t overwater or move them until you see tiny sprouts!
What’s the fastest way to speed up germination?
Boost speed with these 3 pro tips:
- Warmth: Soak seeds in warm water (not boiling) for 4–6 hours before planting.
- Moisture: Use a spray bottle to keep soil damp (not soggy) and cover with plastic wrap.
- Location: Place seeds in a 75–85°F spot (like a sunny windowsill or seedling heat mat).
Why are my green bean seedlings dying?
Common killers and fixes:
Problem
Solution
Black/mushy stems
Fungal disease (from overwatering). Use sterile soil and thin seedlings for airflow.
Yellow leaves
Too much light (scorch) or not enough (weakness). Move to bright, indirect light.
No sprouts after 2 weeks
Seeds may be old or buried too deep (½ inch max). Test a few in a damp paper towel first!
Can I plant green bean seeds directly in the garden?
Yes! Direct sowing is best for green beans—they hate transplanting. Wait until soil is 60°F+ and plant seeds 1 inch deep, 2–3 inches apart. Thin to 4–6 inches apart when seedlings are 2 inches tall. Pro tip: Mark rows with sticks to avoid disturbing roots later!
What’s a good alternative if my seeds won’t sprout?
Try these backup options:
- Buy seedlings: Check local nurseries for healthy, stocky 4–6 week old plants (avoid leggy ones!).
- Soak seeds longer: Soak in warm water + 1 tsp vinegar for 12 hours to soften hard seed coats.
- Test viability: Crush a seed—if it’s green inside, it’s good; brown = toss it.
Wrapping up and next steps
Growing green beans seedlings with speed-germination tricks is totally within your reach—just follow the right soil mix, warmth, and patience! 🌱 With these techniques, you’ll soon be harvesting fresh, homegrown beans in no time.
Now that you’re armed with the best soil secrets, it’s time to roll up your sleeves and plant those seeds.
Your next step? Start small—try a few seedlings first to perfect your method before scaling up. Happy gardening, and may your green beans thrive! 🌿