Pruning
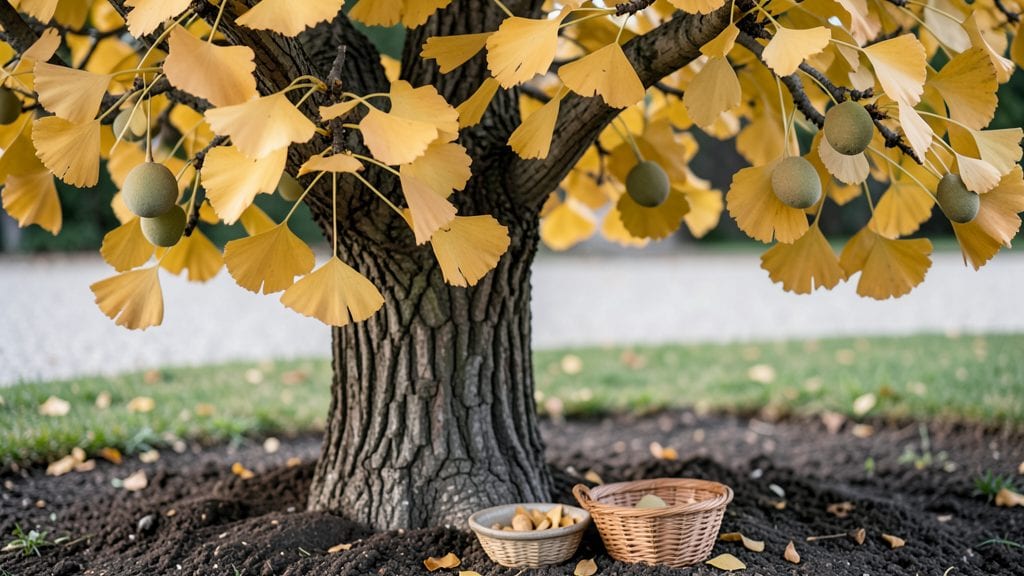
Growing ginkgo trees from these ginko tree seeds starts with cold-stratifying the nuts—this step mimics winter and tricks them into breaking dormancy. 🌱 I’ve tried every method, and the cold treatment is the only way I’ve seen reliable sprouts emerge after months of waiting.
The process is simple but requires patience; those nuts need a winter-like chill to wake up properly.
You’ll need fresh ginkgo nuts (the ones with the fleshy outer layer removed), a damp paper towel, a sealed plastic bag, and a fridge. The key is keeping them consistently moist and cool for about 90 days—no shortcuts here.
Once stratified, you’ll plant them in well-draining soil and wait, but the payoff is worth it: a tree that can live for centuries.
By spring, you’ll see tiny shoots pushing through the soil, and within a few years, a sturdy young tree will stand in your yard. The smell of fresh soil and the sight of new growth make every step feel like magic.
Just don’t rush—ginkgos grow slowly, but they’re worth the wait.
This method works best in zones 4-8, but with extra care (like extending cold treatment), you can try it almost anywhere. The real secret? Starting early and staying consistent—those seeds won’t sprout if you skip the cold step. Let’s get those nuts ready for planting!
📚 In This Guide
- What you need
- Instructions
- Tips and common mistakes
- Wrapping up and next steps
What you need
- ● Ginkgo tree seeds: 5–10 fresh, plump seeds (harvested in fall, ideally from a healthy tree). Pro tip: 🌡️ Store seeds in a cool, dry place (like the fridge) until stratification begins.
- ● Stratification medium: Option 1: 1–2 cups of moistened perlite or vermiculite (sterilized, not damp—think "wrung-out sponge" consistency).
- ● Option 2: 1 small paper towel + 1 ziplock bag (for a no-mess alternative).
- ● Containers: 1 small seed tray or plastic container (with drainage holes, if using perlite).
- ● OR 2–3 ziplock bags (for paper towel method).
- ● Spray bottle: For gentle moisture control (avoid soaking!).
- ● Labels & marker: To track seed varieties and stratification dates.
- ● Refrigerator: Must maintain 35–40°F (2–4°C) for 60–90 days.
- ● Humidity dome: Keeps the environment moist during stratification (great for perlite method).
- ● Thermometer: Monitor fridge temps if your appliance runs hot/cold.
- ● Growth journal: Note seed progress (sprouting timelines vary!).
- ● Fungicide (mild): 1 tsp hydrogen peroxide (3%) in water to dip seeds before stratification (prevents mold).
Step-by-step instructions for cold stratifying ginkgo tree seeds
Turn those hard-to-sprout ginkgo seeds into strong seedlings with this foolproof cold stratification method.
🌱 Step 1: Prepare the Seeds for Stratification
Ginkgo seeds need a 3-month cold period to break dormancy. Start by removing any fleshy outer layer—just the nut inside matters. I like to soak them in lukewarm water for 24 hours first to soften the shell slightly. This helps the seed absorb moisture before the cold treatment begins.
After soaking, place the seeds in a paper towel and fold it to create a damp (not soggy) bundle. The towel should feel like a wrung-out sponge—moist but not dripping. This mimics natural winter conditions while keeping them from rotting. Store the wrapped seeds in a resealable plastic bag with a few small holes poked in it for airflow.
⏰ Step 2: Stratify in the Fridge for 12 Weeks
Place the bagged seeds in the crispest part of your refrigerator (usually the top shelf). Ginkgo seeds need 32-40°F for proper stratification—colder than a standard fridge's bottom shelf. Check them every 2-3 weeks to ensure the paper towel stays damp but not wet.
You'll know stratification is working when the seed coat starts to crack slightly after about 8 weeks. This means the embryo is waking up, but don't rush it—keep them in the fridge until all 12 weeks are complete. Patience here is key; skipping this step results in seeds that either rot or never sprout.
☀️ Step 3: Plant Stratified Seeds in Growing Medium
After stratification, fill a 4-inch pot with a mix of 50% peat moss and 50% perlite—this ensures excellent drainage while retaining moisture. Ginkgo seedlings hate soggy roots, so avoid garden soil entirely. Plant each seed about 1 inch deep, pressing lightly to ensure good soil contact.
Water gently until moisture seeps from the bottom of the pot, then place it in a warm, bright location (like a sunny windowsill). Keep the soil consistently moist but never waterlogged. Germination can take 4-12 weeks, depending on seed vigor—don't give up if nothing happens in the first month. I've seen some take nearly 3 months, but they're worth the wait.
🌿 Step 4: Provide Ideal Growing Conditions
Once sprouts emerge, move the seedlings to a south-facing window or under a grow light for 12-14 hours daily. Ginkgo seedlings grow slowly at first, so don't be alarmed if they're tiny after a month. They need 60-70°F daytime temperatures and 50-60°F at night to thrive.
When the first true leaves appear (they'll look fan-shaped and delicate), it's time to fertilize lightly with a balanced 10-10-10 formula diluted to half strength. Over-fertilizing now can burn the tender roots. You'll see steady growth after the first set of true leaves—this is when they start storing energy for their first winter.
Tips & tricks for perfect ginkgo tree seed stratification
Ginkgo seeds are famously stubborn, but these little tricks will help you break through dormancy like a pro.
Soaking Secret: That 24-hour lukewarm water soak in Step 1 is your first chance to jumpstart germination. Use water that's warm enough to feel comfortable in your hands—not scalding, not ice cold. I've found that adding a drop of dish soap to the water helps break down the seed coat more effectively without damaging the seed. Just rinse thoroughly before wrapping in the paper towel. The goal is to soften the shell enough to let moisture penetrate, but not so much that you compromise the seed's integrity.
Temperature Matters: The 32-40°F range in Step 2 is non-negotiable for ginkgo seeds—this mimics their natural winter dormancy period. If your fridge runs cooler than 40°F, consider using a refrigerator thermometer to monitor the temperature. I place mine on the top shelf where it's consistently around 38°F. Pro tip: Never use the freezer compartment or bottom shelf—these extremes can damage the seed or cause uneven stratification.
Visual Cues for Success: In Step 2, watch for that first sign of life—the seed coat will develop tiny cracks around week 8. This is your reward for patience! If you're not seeing cracks by week 10, gently check the moisture level of your paper towel—it might need a light misting. Remember, the towel should feel like a wrung-out sponge, not a damp washcloth. Over-moisture is the #1 cause of seed rot during stratification.
Planting Precision: When you reach Step 3, the 1-inch planting depth is crucial. Press the seed lightly but firmly into the peat moss-perlite mix to ensure good soil contact. I like to use a small spoon to create a hole just slightly deeper than the seed, then place it in and cover with a thin layer of additional mix. This prevents the seed from floating to the surface when you water. The mix should stay consistently moist but never soggy—think of it like a well-wrung sponge.
Pro Tips for Ginko Tree Seeds
- Ginkgo seeds are famously stubborn, but these little tricks will help you break through dormancy like a pro.
- Soaking Secret: That 24-hour lukewarm water soak in Step 1 is your first chance to jumpstart germination.
- Temperature Matters: The 32-40°F range in Step 2 is non-negotiable for ginkgo seeds—this mimics their natural winter dormancy period.
Frequently asked questions
about ginkgo tree seeds and cold stratification—here’s what you need to know!What is cold stratification, and why do ginkgo seeds need it?
Cold stratification mimics winter conditions to break seed dormancy. Ginkgo seeds require this process (typically 60–90 days at 33–41°F) because their hard outer shell prevents natural germination. Without it, seeds may stay dormant for years—or never sprout at all!
How long should I stratify ginkgo seeds before planting?
Stratify ginkgo seeds for 60–90 days in a moist, refrigerated environment (like a sealed container with damp peat moss). Check moisture weekly—seeds should feel damp but not soggy. After stratification, plant them in well-draining soil, and germination usually takes 2–4 weeks in warm conditions. Patience is key!
Can I skip cold stratification and plant ginkgo seeds directly?
While some seeds may germinate without stratification, most won’t. Skipping this step risks poor or delayed sprouting. If you’re in a hurry, try soaking seeds in warm water for 24 hours before stratification—this can speed up the process slightly. But for best results, follow the full cold treatment!
What’s the best soil mix for planting stratified ginkgo seeds?
Use a light, well-draining mix like:
- 50% potting soil
- 30% perlite or coarse sand
- 20% compost
My stratified seeds aren’t sprouting—what went wrong?
Common issues and fixes:
- Dry seeds: Re-moisten the stratification medium and check moisture weekly.
- Improper timing: Ensure stratification lasted at least 60 days.
- Poor soil: Ginkgo seeds need warmth (70–75°F) and light to germinate.
- Old seeds: Fresh seeds (1–2 years old) germinate best.
Wrapping up and next steps
Ginkgo tree seeds may seem tricky to sprout, but with patience and cold stratification, you’ll unlock their full potential! 🌱 By mimicking nature’s winter cycle, you’re giving these ancient seeds the best chance to thrive.
Whether you’re a seasoned gardener or a curious beginner, this process is totally doable—just follow the steps, and soon you’ll be rewarded with vibrant new ginkgo trees.
Ready to take the next step? Start your seeds today and watch your green thumb grow! For extra inspiration, explore ginkgo tree care tips or share your progress with fellow plant enthusiasts. Happy gardening! 🌿