
Tools
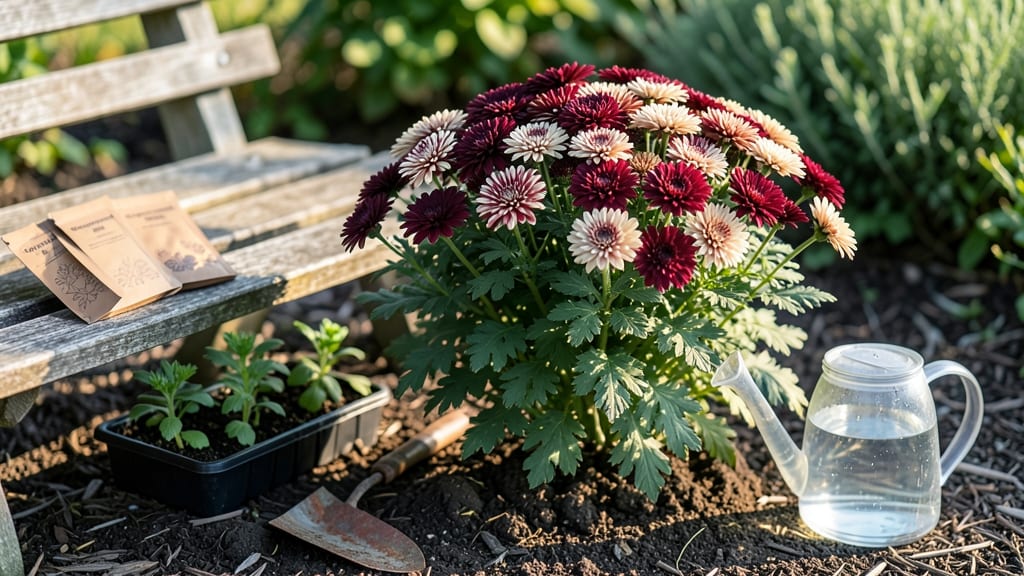
Transform your garden with garden chrysanthemum seeds, but only if you cold-stratify them first—skipping this step delays blooms by months, and my first batch proved it. 🌱 12 weeks to bloom because I planted straight from the packet.
The secret lies in mimicking winter's chill, which breaks the seed's dormancy and jumpstarts growth.
You'll need a flat tray, damp paper towels, a plastic bag, and a fridge for the stratification process. Choose hardy varieties like 'Bonanza' or 'Mammoth' for best results, as they handle the cold treatment better than fussy hybrids.
Once stratified, seeds sprout in 7-10 days when moved to warm, bright conditions—no fancy equipment required, just a sunny windowsill or grow light.
By the time summer rolls around, you'll be pinching back young plants to encourage bushier growth and watching buds form that rival nursery-grown chrysanthemums. The first flush of blooms arrives in 8-10 weeks from planting, and with proper care, they'll keep flowering until frost.
The key is consistent moisture and deadheading spent blooms to prolong the show.
This method works equally well for garden beds, containers, or even hanging baskets—just adjust spacing based on your final plant size. Beginners often struggle with uneven germination or leggy seedlings, but I'll walk you through exactly how to avoid those pitfalls. Let's get those seeds sprouting!
📚 In This Guide
- What you need
- Instructions
- Tips and common mistakes
- Wrapping up and next steps
What you need
- ● Garden chrysanthemum seeds: Choose a variety suited to your climate (e.g., Chrysanthemum × grandiflorum for cut flowers or C. morifolium for garden displays). Start with 5–10 seeds for a small patch or 20+ seeds for a full border.
- ● Seed-starting mix: A sterile, well-draining potting soil (e.g., Pro-Mix or Miracle-Gro Seed Starting Potting Mix). You’ll need about 1–2 gallons depending on your container size.
- ● Seed trays or small pots: Use biodegradable peat pots (3–4 inches deep) or cell trays (72–200 cells) for easy transplanting. Aim for 1 seed per pot to avoid overcrowding.
- ● Plastic wrap or humidity dome: Keeps moisture in during stratification. A clear plastic bag or humidity lid works perfectly.
- ● Refrigerator (for cold stratification): A standard fridge set to 34–40°F (1–4°C). Store seeds in a sealed container with damp paper towels.
- ● Spray bottle: For gentle watering to keep soil moist without disturbing seeds.
- ● Grow lights or sunny windowsill: Chrysanthemums need 12–16 hours of light daily. A full-spectrum LED grow light (e.g., Spectrum Grow Light) is ideal if natural light is limited.
- ○ Fertilizer (optional but helpful): A balanced, water-soluble fertilizer (e.g., 10-10-10 or 20-20-20) diluted to half-strength for young seedlings.
- ● Heating mat: Speeds up germination after stratification (set to 65–75°F (18–24°C)).
- ● pH test kit: Ensure soil pH is between 6.0–7.0—chrysanthemums thrive in slightly acidic to neutral soil.
- ● Labeling tags: Mark pots with seed variety and date planted to track growth.
- ● Transplanting tools: A small hand trowel and twine for supporting tall varieties later.
- ● Mulch: Straw or shredded leaves to retain moisture and suppress weeds once seedlings are outdoors.
Step-by-step instructions for cold-stratifying garden chrysanthemum seeds
Here's the foolproof method I use to break dormancy and get vibrant blooms in record time.
🌱 Step 1: Prepare the Seeds for Stratification
Chrysanthemum seeds need 90 days of cold treatment to simulate winter conditions and trigger germination. Start by placing the seeds in a paper towel or moistened coffee filter—these materials allow airflow while maintaining moisture. Fold the edges to create a small packet and place it inside a ziplock bag.
Add 2 tablespoons of water to the bag, seal it, and gently squeeze to distribute moisture evenly. You'll see condensation form on the inside—this ensures consistent moisture without drowning the seeds. Label the bag with the variety and date, then store it in your refrigerator's crispers drawer, where temperatures stay between 35-40°F.
💧 Step 2: Monitor Moisture and Check for Sprouting
Check the bag every 7-10 days to ensure the paper towel or coffee filter remains damp but not soggy. If you notice dry spots, add 1 teaspoon of water and reseal. Chrysanthemum seeds typically germinate in 3-4 weeks of cold treatment, but some varieties may take up to 6 weeks.
Here's the thing—you'll know germination is about to happen when you see tiny white roots emerging from the seeds. Once you spot these, remove the seeds immediately from cold storage. Pro tip: Place the bag in a bright, indirect light location (like a north-facing windowsill) for 24 hours before planting to prevent shock.
☀️ Step 3: Plant Stratified Seeds in Prepared Containers
Fill 4-inch diameter pots with a lightweight seed-starting mix—I prefer a blend that includes 20% perlite for drainage. Moisten the mix until it feels like a wrung-out sponge: damp but not dripping. Plant the stratified seeds ¼ inch deep, spacing them 1 inch apart in each pot.
Gently press the soil around the seeds to ensure good contact without compacting. Place the pots in a humidity dome or clear plastic bag to retain moisture and warmth. Keep them in a location with 60-65°F temperatures and bright, indirect light until germination occurs, which should happen within 7-14 days.
🌿 Step 4: Transplant Seedlings and Harden Off
Once seedlings develop 2-3 sets of true leaves (the second set appears after the initial cotyledons), they're ready for individual pots. Transplant each seedling into a 4-inch pot filled with well-draining potting mix, burying the stem up to the first set of leaves. This encourages root growth along the buried stem.
Harden off the seedlings by placing them outdoors in a sheltered, shaded spot for 1-2 hours the first day. Gradually increase their outdoor time over 7-10 days, eventually moving them to full sun for 4-6 hours daily. Watch for deep green leaves and sturdy stems—these are signs your seedlings are thriving and ready for the garden.
⏰ Step 5: Time Planting for Season-Long Blooms
Plant hardened-off seedlings outdoors 4-6 weeks before your first frost date, spacing them 12-18 inches apart in well-draining soil with full sun exposure. Chrysanthemums bloom best when planted early in the season, so timing is everything. After transplanting, water deeply to settle the soil and reduce transplant shock.
Here's where it gets fun—pinch back the tips of each stem when they reach 6 inches tall. This encourages bushier growth and more abundant blooms. You'll see new side shoots emerge within 2-3 weeks, setting the stage for a spectacular display of color.
Tips & tricks for perfect cold-stratified chrysanthemum blooms
These game-changing strategies will help you break dormancy and grow showstopping chrysanthemums with minimal fuss.
Temperature Precision: The 35-40°F range in your refrigerator's crispers drawer is ideal, but not all fridges are created equal. If your fridge runs cooler, consider using a seed stratification fridge or a garage refrigerator. I've found that 38°F consistently produces the best germination rates. Too warm, and you risk premature sprouting—too cold, and you delay the process. The key is consistency, so check your fridge's temperature with a thermometer if you're unsure.
The 90-Day Commitment: Don't be tempted to cut the 90 days short—chrysanthemum seeds need this full cold treatment to break their natural dormancy. That said, if you're in a hurry, you can extend the cold period to 120 days for particularly stubborn varieties. Just be patient—rushing this step often leads to weak, leggy seedlings that struggle to thrive. Think of it as nature's way of ensuring you get strong, healthy blooms.
Moisture Management: When checking your seeds every 7-10 days, focus on the paper towel's texture—it should feel like a wrung-out sponge, not a dripping washcloth. Overwatering can lead to mold, while too little moisture halts germination. I like to use a spray bottle for this check to avoid over-saturating the seeds. If you notice condensation on the bag's interior, that's a good sign—it means the moisture balance is just right.
Light Transition: That 24-hour bright, indirect light period before planting is crucial for preventing transplant shock. Place your bag near a north-facing window or under a grow light. Avoid direct sunlight, which can cause the seeds to overheat. I've seen seedlings that skipped this step struggle with yellowing leaves and stunted growth—don't skip this gentle wake-up call for your seeds!
Pro Tips for Garden Chrysanthemum Seeds
- These game-changing strategies will help you break dormancy and grow showstopping chrysanthemums with minimal fuss.
- Temperature Precision: The 35-40°F range in your refrigerator's crispers drawer is ideal, but not all fridges are created equal.
- The 90-Day Commitment: Don't be tempted to cut the 90 days short—chrysanthemum seeds need this full cold treatment to break their natural dormancy.
Frequently asked questions
Got questions about growing garden chrysanthemums from seeds? You’re not alone! Here are some of the most common queries—plus quick, practical answers to help you grow stunning blooms with ease.
How long does it take for chrysanthemum seeds to germinate?
With cold stratification (the key trick in this guide!), most garden chrysanthemum seeds sprout in 7–14 days. Keep soil consistently moist (not soggy) and warm (70–75°F) for best results. Patience pays off—delayed germination up to 3 weeks is normal for some varieties!
Do I really need to cold-stratify chrysanthemum seeds?
Yes! Chrysanthemums have a hard seed coat that blocks germination without cold treatment. Skip stratification, and you’ll likely see little to no sprouting. The 3-week cold period mimics winter, breaking dormancy naturally. Pro tip: Use a fridge (not a freezer) for consistent 34–40°F temps.
Can I grow chrysanthemums from seeds indoors, or should I start outside?
Start indoors for faster, controlled growth, especially in cooler climates. Use seed trays with drainage, and transplant seedlings outdoors after the last frost when soil is at least 60°F. Harden off seedlings (acclimate to outdoor conditions) for 1–2 weeks before moving them to avoid shock.
Why aren’t my chrysanthemum seedlings growing? Troubleshooting tips.
Common issues and fixes:
- Leggy seedlings: Too little light! Move trays to a sunny windowsill or use grow lights 12–14 hours/day.
- Damping off (black stems): Overwatering or poor airflow. Reduce moisture and space seedlings 2 inches apart.
- Slow growth: Check soil temps—keep above 60°F. Fertilize lightly with a balanced 10-10-10 mix when true leaves appear.
Still struggling? Test seed viability by soaking a few in water—if they sink, they’re likely good!
What’s the best chrysanthemum variety for beginners?
Start with ‘Bonanza’ or ‘Dwarf Yellow’—they’re hardy, disease-resistant, and thrive in containers or garden beds. For bold colors, try ‘Merton Beauty’ (pink/purple) or ‘Seaside’ (salmon). Avoid hybrid varieties labeled F1—they often don’t reproduce true from seed.
Wrapping up and next steps
Growing garden chrysanthemum seeds with cold stratification is a rewarding way to bring vibrant blooms to your garden in just three weeks! 🌸 With the right preparation—from selecting high-quality seeds to mastering the perfect chilling process—you’ll unlock a burst of color and texture that’s sure to impress.
Whether you’re a seasoned gardener or a curious beginner, these steps make it simple and fun.
Ready to dive in? Start by ordering your seeds today and mark your calendar for that first cold-stratification date. Your future garden will thank you—and so will your neighbors! 🌱