Propagation
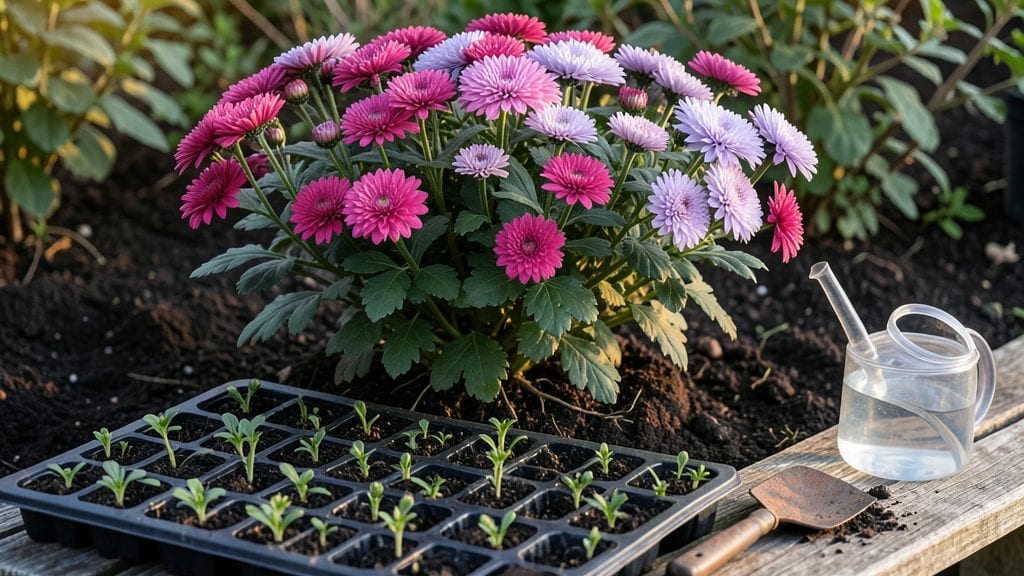
Growing chrysanthemum perennials from seeds starts with a little winter magic—cold stratification that mimics nature’s timing. ✨ I’ve grown these hardy bloomers from seed for years, and the key to success lies in that 3-week cold treatment before planting.
Most gardeners overlook this step, but it’s what turns flimsy seedlings into sturdy, vibrant plants ready for fall color.
The process is simpler than it sounds: gather your seeds, mix them with damp sand or peat moss, then refrigerate them for 21 days. You’ll need basic supplies—a seed-starting tray, well-draining soil, and patience—but the payoff is worth it.
Unlike cuttings, seeds give you a wider variety of colors and forms, from classic yellows to deep purples, all while saving money.
By late spring, you’ll have bushy, healthy transplants bursting with potential. These perennials thrive in full sun and well-drained soil, rewarding you with months of blooms from late summer through frost.
The secret? Consistent watering and a light fertilizer touch—nothing too heavy, or you’ll end up with lush foliage but few flowers.
Perfect for gardeners who love planning ahead or want to experiment with heirloom varieties. Once you master this method, you’ll never buy chrysanthemum plants again—just save seeds from your best blooms for next year’s garden. Let’s get those seeds stratified!
📚 In This Guide
- What you need
- Instructions
- Tips and common mistakes
- Wrapping up and next steps
What you need
- ● Chrysanthemum seeds: Choose heirloom or perennial varieties (e.g., 'Ruby Mound,' 'Painted Lady'). Aim for 10-20 seeds to maximize success.
- ● Seed-starting mix: A sterile, well-draining blend (e.g., 50% peat moss, 30% perlite, 20% vermiculite). You’ll need 2-3 cups.
- ● Seed trays or small pots: 2-4 inch deep with drainage holes. 4-6 trays/pots (1 seed per cell or 3 seeds per pot).
- ● Plastic wrap or humidity dome: To retain moisture during germination.
- ● Spray bottle: For gentle watering (16 oz with a fine mist nozzle).
- ● Refrigerator (for cold stratification): A cool, dark space (34–40°F / 1–4°C). Use a ziplock bag or sealed container.
- ● Grow lights or sunny windowsill: 6-8 hours of light/day after stratification (LED grow lights work best).
- ○ Heating mat: (Optional) Speeds germination if your space is chilly (70–75°F / 21–24°C).
- ● pH test kit: Ensures your soil is 6.0–6.5 (chrysanthemums thrive in slightly acidic soil).
- ● Fertilizer (low-dose): A balanced 10-10-10 or fish emulsion (diluted to half-strength) for post-stratification growth.
- ● Labeling tags: To track seed varieties and planting dates.
- ● Tweezers: For delicate seed placement (especially tiny varieties).
Step-by-step instructions for cold-stratifying chrysanthemum perennial seeds
Here's my foolproof method for breaking dormancy and ensuring strong, vibrant chrysanthemums from seed.
🌱 Step 1: Prepare the Seeds for Stratification
Chrysanthemum seeds need a cold stratification period to mimic winter conditions and break dormancy. Start by placing the seeds in a resealable plastic bag with a moistened paper towel—just enough moisture so the towel feels damp but not dripping. Seal the bag and label it with the date and variety. This creates a controlled environment that prevents drying while allowing oxygen flow.
Real talk: Don't skip the moisture check. If the towel feels dry after 24 hours, add a few drops of water. Overly wet towels invite mold, which will kill your seeds before they even start. Store the bag in your refrigerator's crisper drawer where temperatures hover around 35-40°F. This cool, humid environment is exactly what chrysanthemum seeds need to trigger germination.
⏰ Step 2: Stratify for 3 Weeks
Leave the seeds in the refrigerator for exactly 3 weeks. This is non-negotiable—the cold period must be consistent to break dormancy properly. Check the bag weekly to ensure the paper towel remains moist. If it dries out, mist it lightly with water and reseal immediately. You'll see no visible changes during this time, but internally, the seeds are undergoing critical biochemical changes that prepare them for growth.
I know it seems counterintuitive to wait this long without seeing progress, but patience here pays off. Skipping or shortening this step results in weak seedlings that struggle to establish roots. After 3 weeks, remove the bag from the fridge and let it sit at room temperature for 24 hours to acclimate. This gradual temperature shift prevents shock to the seeds.
🌿 Step 3: Sow the Stratified Seeds
Fill 4-inch diameter pots with sterile seed-starting mix—this lightweight medium ensures proper drainage and prevents waterlogged roots. Plant the seeds ¼ inch deep, spacing them 1 inch apart in each pot. Chrysanthemum seeds are tiny, so I use a toothpick to create small holes for precision planting. Cover the seeds lightly with additional mix, just enough to obscure them from view.
Water gently using a spray bottle until the soil surface looks uniformly moist but not soggy. Overwatering now can cause the seeds to rot before they germinate. Place the pots in a warm, bright location where temperatures stay between 65-75°F. A seedling heat mat set to 70°F accelerates germination, but a sunny windowsill works too if you're patient. Germination typically occurs within 10-14 days, though some varieties may take up to 3 weeks.
☀️ Step 4: Provide Optimal Light and Care
Once seedlings emerge, move them to a location with bright, indirect light for the first week to prevent legginess. After that, provide 6-8 hours of direct sunlight daily. If natural light is insufficient, supplement with a grow light positioned 2-3 inches above the seedlings. You'll notice strong seedlings have thick stems and deep green leaves, while weak ones appear pale and stretched.
Water the seedlings when the top inch of soil feels dry to the touch. Use a small watering can or spray bottle to avoid disturbing the delicate roots. Fertilize lightly with a balanced liquid fertilizer (10-10-10) diluted to half strength after the second set of true leaves appears. This encourages steady growth without overwhelming the young plants. Thin to the strongest seedling per pot if multiple sprouts appear.
🪴 Step 5: Harden Off and Transplant
When seedlings reach 3-4 inches tall and have 5-6 true leaves, they're ready for hardening off. Begin by placing them outside in a sheltered, shaded spot for 1-2 hours the first day. Gradually increase their outdoor time over 7-10 days, exposing them to morning sun first and bringing them indoors before afternoon heat. This slow acclimation prevents transplant shock.
Transplant the hardened-off seedlings into the garden after the last frost date in your area. Choose a location with full sun and well-draining soil amended with compost. Space the plants 12-18 inches apart to allow for mature growth. Water deeply at the base after transplanting to encourage root establishment. Mulch with 2-3 inches of organic mulch to retain moisture and regulate soil temperature.
Tips & tricks for perfect chrysanthemum seed stratification
These game-changing tips will help you transform tiny chrysanthemum seeds into robust, thriving plants with minimal fuss.
Moisture Precision: The 24-hour moisture check is where many gardeners go wrong. Use a clean paper towel and wring it out until it's damp but not saturated—think of it like wringing out a sponge. Too much moisture creates anaerobic conditions that breed mold, while too little prevents proper hydration. I like to place the sealed bag on a paper towel in the fridge to catch any condensation that might form during the 3 weeks. This keeps the environment stable without risking over-moisture.
Temperature Consistency: While the instructions specify 35-40°F in your refrigerator's crisper drawer, I've found that some fridges have temperature fluctuations—especially if you open the door frequently. Place a small thermometer inside the bag to monitor conditions. If your fridge runs cooler (below 35°F), consider using a seedling heat mat set to low (around 35°F) instead. The goal is consistency—the seeds need stable cold to break dormancy properly.
Acclimation Strategy: That 24-hour room temperature acclimation after the 3-week cold period is often overlooked, but it's crucial. I recommend placing the bag in a warm spot (around 70°F) for this period to create a gradual temperature shift. This mimics natural spring conditions and prevents thermal shock that could damage the seeds. You'll know it's working when you see the first signs of swelling in the seed coats after about 12 hours.
Lighting Hack: When your seedlings emerge and you're providing 6-8 hours of direct sunlight, don't underestimate the importance of light quality. If using grow lights, position them just 2-3 inches above the seedlings and use full-spectrum bulbs. I've seen seedlings develop legginess because they were too far from the light source—even with sufficient hours. A good rule of thumb is to adjust the light height so the seedlings almost touch it without actually brushing against it.
Pro Tips for Chrysanthemum Perennial Seeds
- These game-changing tips will help you transform tiny chrysanthemum seeds into robust, thriving plants with minimal fuss.
- Moisture Precision: The 24-hour moisture check is where many gardeners go wrong.
- Temperature Consistency: While the instructions specify 35-40°F in your refrigerator's crisper drawer, I've found that some fridges have temperature fluctuations—especially if you open the door frequently.
Frequently asked questions
Got questions about growing chrysanthemums from perennial seeds?
Here are the most common ones—and their quick answers to help you succeed!
When is the best time to plant chrysanthemum seeds for cold stratification?
Plant your seeds outdoors in late fall (8–12 weeks before your first frost) or indoors in early spring for cold stratification. If starting early, refrigerate moist seed-starting mix with seeds for 3–4 weeks before transferring to pots. Timing ensures natural dormancy breaks for healthier seedlings!
How do I know if my seeds are properly cold-stratified?
Cold stratification is complete when seeds sprout in 1–3 weeks after moving to warm conditions (65–75°F). If nothing grows after 4 weeks, check for moisture (soil should stay damp, not soggy) or try a second round of stratification. Patience is key—some varieties need extra time!
Can I grow chrysanthemums from seeds bought at a grocery store?
Most grocery-store chrysanthemums are hybrids or cuttings, not true seeds, so they won’t reproduce reliably. For perennial seeds, buy from reputable seed companies or specialty nurseries. Look for labels specifying "perennial" or "hardy" varieties like ‘Mammoth’ or ‘Ruby Mound’ for guaranteed success.
Why aren’t my chrysanthemum seeds germinating?
Common culprits: too-warm soil (keep below 65°F), dry seeds (soak overnight before planting), or old seeds (viability drops after 1–2 years). Try scratching seed coats lightly with sandpaper to mimic natural wear. If pests (like fungus gnats) are present, use a neem oil spray for seedlings.
How long until chrysanthemum seeds bloom after planting?
From seed to flower takes 3–5 months, depending on variety and growing conditions. First-year plants may focus on root growth, so pinch back tips in early summer to encourage bushier blooms. With proper care, you’ll see vibrant flowers by late summer or fall!
Wrapping up and next steps
Growing chrysanthemum perennials from cold-stratified seeds is a rewarding journey that unlocks vibrant blooms year after year! 🌸 With just a few weeks of patience and the right techniques, you’ll transform tiny seeds into hardy plants ready to thrive in your garden.
Whether you’re a seasoned gardener or just starting out, this method makes it easier than ever to expand your floral collection.
Now that you’re armed with the knowledge, take the next step—gather your supplies and start stratifying those seeds! Soon, you’ll be enjoying a burst of color that’ll make your garden the envy of the neighborhood. Happy planting! 🌱