
Planting
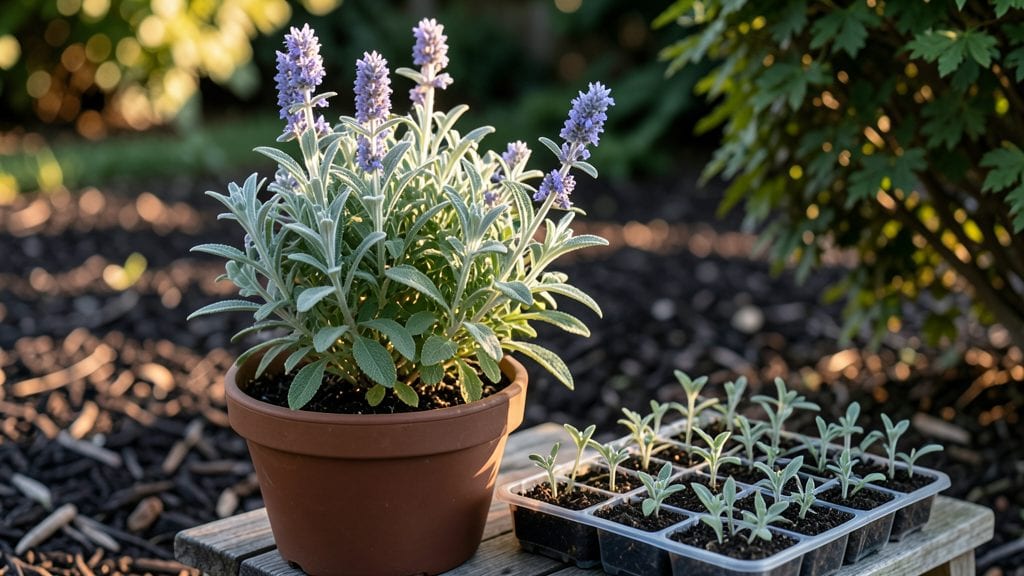
Catmint plant seeds are your ticket to a buzzing, purple-hued garden in just two months. 🌿 I remember the first time I scattered these tiny seeds—within weeks, my yard transformed into a hummingbird highway, with bees and butterflies swarming the air.
The key is patience and a few simple tricks that make germination effortless.
You’ll need a sunny spot, well-draining soil, and a light touch when sowing. Catmint thrives in poor soil, so don’t overthink the mix—just ensure it drains well. Start indoors 8-10 weeks before your last frost or sow directly outside after soil warms to 50°F.
The secret to strong seedlings? Keep them consistently moist but never soggy, and they’ll pop up in 7-14 days.
By day 60, you’ll be pinching back leggy stems to encourage bushier growth and watching as the first lavender-blue blooms appear. These hardy plants reward low maintenance with months of color, attracting pollinators long after other annuals fade.
The best part? Catmint spreads easily, so you’ll have more plants than you started with.
Perfect for borders, containers, or wildflower meadows—this plant handles heat, drought, and even light shade once established. Here’s how to turn those tiny seeds into a pollinator paradise without the fuss.
📚 In This Guide
- What you need
- Instructions
- Tips and common mistakes
- Wrapping up and next steps
What you need
- ● Catmint seeds: 1 packet (100–500 seeds, depending on variety; check seed count per packet). Opt for Nepeta spp. like ‘Walker’s Low’ or ‘Six Hills Giant’ for reliable blooms.
- ● Well-draining potting mix: 1–2 gallons (sterilized, peat-based or coconut coir blend for moisture control). Avoid heavy clay mixes.
- ● Containers or garden bed: For containers: 5–6" deep pots with drainage holes (1–2 plants per 6" pot). Use 3–4 containers for a small pollinator patch.
- ● For in-ground planting: Full-sun spot (6+ hours/day) with loose, rocky soil (catmint hates soggy roots!). Space seeds 12–18" apart.
- ● Watering can or spray bottle: Fine-mist nozzle for gentle hydration (overhead watering can cause fungal issues).
- ○ Garden gloves (optional but recommended): Protects hands from prickly stems and soil-borne irritants.
- ● Seed starter tray: With clear domes or humidity lid to speed up germination (if sowing indoors).
- ● Soil thermometer: Catmint seeds germinate best in 60–70°F (15–21°C) soil. Ideal for late spring/early summer planting.
- ● Organic fertilizer (low-nitrogen): 5-10-5 or compost tea (mix 1 tbsp per gallon of water) to boost early growth.
- ● Mulch (gravel or straw): Preserves moisture and deters weeds. Skip if planting in containers.
- ● Plant labels: Mark varieties if growing multiple types (e.g., ‘Catnip’ vs. ‘Giant Catmint’).
- ● Pruning shears: For deadheading spent blooms (encourages non-stop flowers all season!).
- ● USDA Hardiness Zones: 3–8 (catmint thrives in cool to warm climates; avoid tropical zones).
- ● Best planting time: Direct sow outdoors: 4–6 weeks before last frost (or late summer for fall blooms).
- ● Indoor starter: 8–10 weeks before transplanting (use grow lights if natural light is <6 hours/day).
- ● Avoid frost: Catmint is frost-tender; wait until soil warms to 50°F (10°C) before planting.
Step-by-step instructions for growing catmint from seeds
Here's how to coax these hardy pollinator magnets from tiny seeds into blooming powerhouses.
🌱 Step 1: Prepare Containers and Seed Starting Mix
Fill clean 2-3 inch deep seed trays with a sterile seed-starting mix—never garden soil, which can harbor fungal spores that catmint seedlings resist poorly. I press the mix down lightly with my fingers until it's firm but not compacted, creating a fine, even surface for seeds to settle into. Moisten the mix thoroughly with warm water until it feels like a wrung-out sponge: damp but not dripping.
Use a toothpick to make small ¼-inch deep dimples in the soil surface, spacing them about ½ inch apart. This prevents seeds from washing away during watering and gives each seedling room to establish. Place 1-2 seeds per dimple—catmint seeds germinate reliably, but overcrowding leads to weak, leggy stems later.
💧 Step 2: Sow and Create Ideal Germination Conditions
Gently press each seed into its dimple just enough to cover it with soil—no need to bury deeply. Catmint seeds need light to germinate, so I never cover them completely. Mist the surface lightly with a spray bottle until the soil looks evenly moist but not glistening. Place the tray in a warm location (70-75°F), ideally on a seedling heat mat.
Cover the tray with a clear humidity dome or plastic wrap to trap warmth and moisture. Check daily for condensation—if you see droplets forming on the dome, remove it for 30 minutes to prevent fungal growth. Germination typically occurs in 10-21 days, but don't disturb the soil until you see tiny green sprouts breaking through.
☀️ Step 3: Provide Light and Thin Seedlings
As soon as seedlings emerge, remove the humidity dome immediately—catmint hates damp conditions once established. Place them under grow lights (14-16 hours daily) positioned 2-3 inches above the plants. You'll know the light is right when seedlings grow compact and dark green rather than stretching pale and leggy toward the light source.
When seedlings have 2-3 sets of true leaves (not the initial seed leaves), thin them to 1 plant per dimple using clean scissors. Snip at soil level to avoid disturbing roots of remaining seedlings. Transplant thinned seedlings into 3-inch pots filled with the same seed-starting mix, burying them to the same depth they grew in the tray.
🪴 Step 4: Harden Off and Transplant Outdoors
Two weeks before your last frost date, begin hardening off seedlings by placing them outside in a sheltered, shaded spot for 1-2 hours daily. Gradually increase exposure over 7-10 days, ending with full sun. Catmint thrives in full sun to partial shade, but sudden exposure can scorch tender new leaves.
Transplant seedlings outdoors after all danger of frost has passed, spacing them 18-24 inches apart in well-draining soil. Water deeply at planting to settle the soil around roots, then reduce watering to 1 inch per week once established. You'll see first blooms in 60 days—just in time for pollinators to arrive!
Tips & tricks for growing catmint from seeds
To ensure your catmint seeds thrive and transform into vibrant pollinator magnets, here are the essential techniques that make all the difference.
Seed Starting Mix Matters: The sterile seed-starting mix is non-negotiable—garden soil contains fungal spores that catmint seedlings can't handle. I always sift mine to remove any clumps, which creates a fine, even surface for those delicate seeds. For extra insurance, you can sterilize your mix by baking it at 200°F for 30 minutes before use. This step prevents mold issues later in the process.
Precision in Planting: Those ¼-inch deep dimples are critical—they keep seeds from washing away during watering while still allowing light to reach them. I use a toothpick to create them because it gives me better control than my fingers. Pro tip: If you don't have a toothpick, a clean chopstick works perfectly. The spacing between dimples ensures each seedling gets enough room to grow without competing for nutrients.
Germination Environment: The 70-75°F range is ideal, but most homes don't maintain this consistently. If your space runs cooler, place a seedling heat mat underneath the tray and monitor with a small thermometer. During the 10-21 day germination window, I check the humidity dome daily—if condensation forms, that 30-minute venting prevents fungal growth. Real talk: I've lost batches from ignoring this step, so don't make my mistake.
Lighting Strategy: The 14-16 hours of grow light daily is non-negotiable for compact growth. I position my lights 2-3 inches above the seedlings and adjust as they grow. Watch for that telltale sign: if they're stretching pale and leggy, they need more light or less time under it. A simple trick is to move the lights closer rather than increasing hours—this prevents that weak, spindly growth that's so hard to recover from.
Pro Tips for Catmint Plant Seeds
- To ensure your catmint seeds thrive and transform into vibrant pollinator magnets, here are the essential techniques that make all the difference.
- Seed Starting Mix Matters: The sterile seed-starting mix is non-negotiable—garden soil contains fungal spores that catmint seedlings can't handle.
- Precision in Planting: Those ¼-inch deep dimples are critical—they keep seeds from washing away during watering while still allowing light to reach them.
Frequently asked questions
Got questions about growing catmint from seeds? You’re not alone! Here are answers to the most common queries to help you cultivate a thriving pollinator haven with ease.
How long does it take for catmint seeds to germinate?
Catmint seeds typically germinate in 14–30 days after planting, depending on soil temperature and moisture. Keep the soil consistently damp (not soggy) and place the tray in bright, indirect light (like a sunny windowsill). Patience is key—some seeds may take longer, especially in cooler conditions.
Can I grow catmint from seeds indoors or should I start outside?
Starting catmint seeds indoors 8–10 weeks before your last frost gives them a head start. Use seed-starting mix in small pots under grow lights. Once seedlings have 2–3 sets of true leaves and nighttime temps stay above 50°F (10°C), transplant them outdoors. Direct sowing is also possible in spring after frost, but expect slower growth.
Why aren’t my catmint plants blooming?
Catmint may skip blooms if it’s too young, over-fertilized, or stressed. Ensure it gets full sun (6+ hours daily) and well-draining soil. Deadhead spent flowers to encourage more blooms, and avoid heavy nitrogen fertilizer (it promotes foliage over flowers). Most catmint varieties bloom in 60–90 days from seed.
Is catmint deer-resistant? Will it spread aggressively?
Catmint is deer-resistant due to its minty oils, but not deer-proof—young plants may still be nibbled. As for spreading, catmint is perennial and self-seeding but not invasive like mint. To control it, trim back flowers before they go to seed or divide clumps every 2–3 years to keep it tidy.
What can I plant with catmint to attract more pollinators?
Pair catmint with pollinator favorites like lavender, bee balm, coneflowers, or Russian sage for a buzzing garden. These plants share similar growing conditions (sun, dry soil) and create a continuous nectar buffet from spring to fall. Avoid planting with aggressive spreaders like creeping thyme to prevent competition.
Wrapping up and next steps
Growing catmint plant seeds is a rewarding way to attract pollinators like bees and butterflies to your garden in just 60 days! 🐝 With minimal effort, you’ll enjoy fragrant blooms that thrive in sunny spots and require little maintenance.
Whether you’re a beginner or a seasoned gardener, these hardy plants are a fantastic addition to any outdoor space.
Ready to get started? Grab your seeds, pick a sunny spot, and let nature do the rest. Plant your catmint today and watch your garden transform into a buzzing, beautiful haven! 🌱