Pests and Diseases
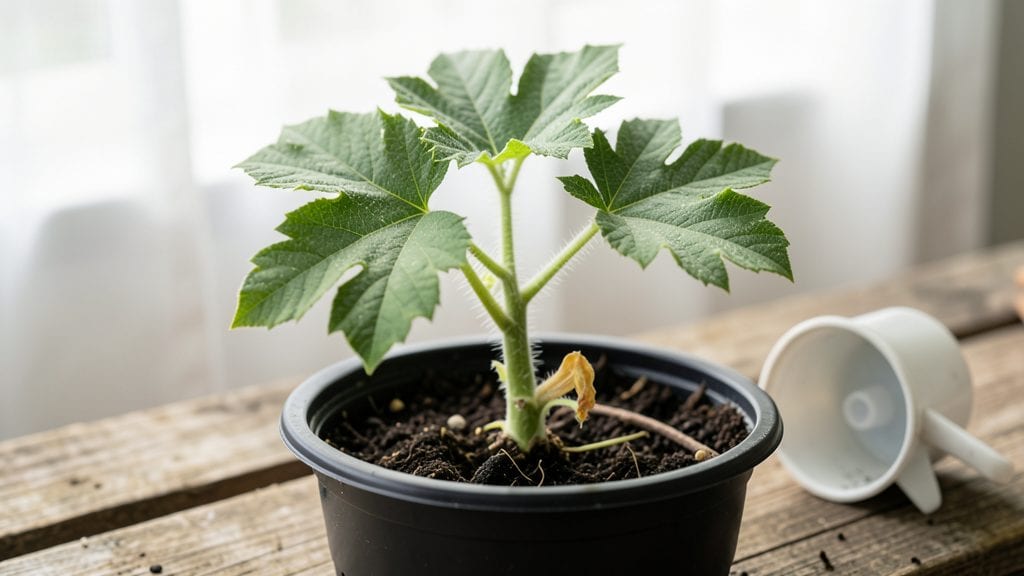
Cantaloupe seedling leaves turning yellow or curling can mean the difference between a thriving vine and a lost harvest. 🌱 I’ve watched seedlings go from crisp green to sad and limp—usually because of pests hiding in plain sight or simple watering mistakes.
The key is catching problems early, when you can still fix them without harming the plant.
Start by inspecting the undersides of leaves for tiny webs, chewed edges, or sticky residue—those are dead giveaways. Overwatering or nutrient deficiencies can also mimic pest damage, so check the soil moisture and color.
Once you identify the issue, you’ll know whether to treat with neem oil, adjust your watering, or simply snip off the worst-affected leaves to save the rest.
📚 In This Guide
- What you need
- Instructions
- Tips and common mistakes
- Wrapping up and next steps
What you need
- ● Cantaloupe seeds – Fresh, high-quality seeds (e.g., heirloom or hybrid varieties like Hale’s Best or Athena).
- ● Seed-starting mix – Lightweight, sterile potting mix (e.g., Pro-Mix or Fox Farm Seedling Mix), 1-2 gallons per seedling tray.
- ● Seedling trays or pots – Biodegradable or plastic trays with drainage holes (e.g., 72-cell trays or 4-inch pots).
- ● Grow lights or sunny windowsill – LED grow lights (e.g., Samsung LM300) or a south-facing window for 12-16 hours of light/day.
- ● Spray bottle – For gentle watering (e.g., 16-ounce misting bottle).
- ● Pruning shears or small scissors – Sharp, sterilized tools (e.g., Fiskars bypass pruners) for removing damaged leaves.
- ○ Fungicide (optional) – Copper-based or neem oil spray (e.g., Bonide Copper Fungicide) for fungal prevention.
- ○ Insecticidal soap (optional) – For pest control (e.g., Safer Brand Insect Killing Soap).
- ● Hand lens or magnifying glass – To inspect leaves for pests/diseases (e.g., 10x magnification).
- ● pH test kit – To check soil acidity (ideal range: 6.0-6.8).
- ○ Moisture meter (optional) – To monitor soil hydration (e.g., Grower’s Solution).
How to prune cantaloupe seedlings for stronger growth
Here's how to identify and remove weak leaves without harming your young vines.
🌱 Step 1: Identify Healthy vs. Weak Leaves
Start by examining each leaf on your cantaloupe seedlings. Healthy leaves are bright green, firm to the touch, and positioned upright. Look for first true leaves—these are the first set of leaves that appear after the initial seedling leaves (cotyledons). These are critical for photosynthesis and shouldn't be removed.
Weak or damaged leaves, on the other hand, appear yellow, brown, or wilted. These are often the lower leaves closest to the soil, which can get diseased or shaded out by the plant's own growth. You'll also spot small, underdeveloped leaves that aren't contributing much to the plant's energy. These are the ones you’ll focus on removing.
✂️ Step 2: Use the Right Tools and Technique
Grab a pair of clean, sharp scissors or pruning shears—never your fingers or dull tools. Dull blades can crush stems and invite disease. Sterilize your tools with rubbing alcohol before and after use to prevent spreading any pathogens. Hold the tool at a 45-degree angle just above a leaf node (the small bump where leaves attach to the stem).
Cut cleanly through the stem without tearing. Avoid leaving stubs, as these can rot and attract pests. If you're unsure where to cut, look for the small bump or node where the leaf meets the stem—this is your target. For very small seedlings, you can pinch the leaf off by hand, but always use clean fingers or tools.
🌿 Step 3: Remove Only the Weak Leaves
Focus on removing leaves that are yellow, brown, or significantly smaller than the others. These leaves drain energy from the plant without contributing much in return. Start with the lowest leaves, as these are often the first to weaken and can harbor moisture, leading to disease. Leave the upper, healthy leaves intact—they’re the plant’s powerhouses for photosynthesis.
If a leaf is only partially damaged, you can trim away the affected portion but leave the rest. This avoids shocking the plant with unnecessary stress. Watch for new growth between nodes—this is a sign your plant is healthy and recovering well from the pruning.
💧 Step 4: Monitor and Support the Plant After Pruning
After pruning, give your seedlings a light watering to help them recover. Avoid overwatering, as this can stress the plant further. Place the seedlings in a spot with full sun (6-8 hours daily) and ensure the soil stays moist but not soggy. You’ll notice new growth emerging within 3-5 days if the plant is healthy.
Keep an eye out for signs of stress, like wilting or further yellowing. If you see these, reduce watering slightly and check the soil moisture with your finger—it should feel damp 1 inch below the surface. Pruning is all about encouraging stronger growth, so your goal is to see the plant focus its energy on producing healthier, larger leaves and eventually, those sweet cantaloupe fruits.
Tips & tricks for pruning cantaloupe seedlings
Here's what I've learned after pruning dozens of cantaloupe seedlings—these tricks make all the difference in plant recovery and fruit production.
Timing Secret: Prune your seedlings in the early morning when the plants are well-hydrated and the air is cool. This reduces stress on the plant and gives it time to recover before the heat of the day. I always do mine between 6-8 AM, and you'll notice the seedlings bounce back faster than if you prune in the afternoon.
Here's What I Learned: When you're using scissors or pruning shears in Step 2, make sure to cut just above the leaf node at that 45-degree angle. This encourages new growth from that exact spot. I've found that leaving even a tiny stub can trap moisture and lead to rot, so clean cuts are absolutely critical.
Common Mistake Fix: Don't remove more than 20-25% of the plant's foliage in one session. This threshold keeps the plant healthy while still removing enough weak leaves. I learned this the hard way when I over-pruned a batch and ended up with stressed seedlings that took weeks to recover. Focus on just the most damaged leaves during your first session.
Recovery Strategy: After pruning, I give my seedlings a light misting with water (not a full watering) to help them recover. This keeps the soil moist without overwatering. Place a small fan on low setting nearby for the first 24 hours to improve airflow and prevent fungal issues. You should see new growth emerging within 3-5 days if everything is done correctly.
Pro Tips for Cantaloupe Seedling Leaves
- Here's what I've learned after pruning dozens of cantaloupe seedlings—these tricks make all the difference in plant recovery and fruit production.
- Timing Secret: Prune your seedlings in the early morning when the plants are well-hydrated and the air is cool.
- Here's What I Learned: When you're using scissors or pruning shears in Step 2, make sure to cut just above the leaf node at that 45-degree angle.
Frequently asked questions
Got questions about cantaloupe seedling leaves? You’re not alone! Here are some of the most common concerns—and their solutions—to keep your seedlings thriving.
Why are my cantaloupe seedling leaves turning yellow or brown?
Yellowing or brown leaves are often a sign of overwatering, underwatering, or nutrient deficiencies. Check the soil moisture—it should be damp but not soggy. If leaves feel crispy, water lightly; if they’re mushy, reduce watering. Yellowing between veins may indicate nitrogen deficiency—try a balanced fertilizer.
How soon can I remove damaged leaves from cantaloupe seedlings?
Remove damaged leaves immediately to prevent disease or pest spread. Use clean, sharp scissors or pruners to cut leaves at the base, avoiding healthy tissue. Early intervention helps seedlings focus energy on growth. Pro tip: Sterilize tools with rubbing alcohol between cuts!
Are holes in cantaloupe seedling leaves a sign of pests?
Yes! Holes or chewed edges usually mean aphids, cucumber beetles, or spider mites. Inspect undersides of leaves and stems. Spray seedlings with soapy water (1 tsp mild soap per quart of water) or use neem oil for organic control. Act fast—pests spread quickly to mature plants!
Can I replant cantaloupe seedlings if I prune too many leaves?
Seedlings can recover if you remove no more than 20-30% of leaves. Avoid cutting large leaves entirely—trim only the damaged parts. If seedlings look stressed, provide shade and monitor watering. With proper care, they’ll bounce back!
What’s a good alternative if my seedlings keep getting leaf damage?
Try row covers (lightweight fabric) to block pests early. Alternatively, grow cantaloupe in containers for better control over soil and pests. Varieties like ‘Hale’s Best’ or ‘Athena’ are also more disease-resistant. Start seedlings indoors for a head start!
Wrapping up and next steps
Caring for cantaloupe seedlings starts with vigilance and gentle action—identifying issues early and removing damaged leaves keeps your plants thriving! 🌱 Whether dealing with pests, disease, or environmental stress, the right tools and techniques make all the difference.
With patience and practice, you’ll master the art of nurturing healthy seedlings.
Ready to take the next step? Monitor your seedlings daily and act at the first sign of trouble. Happy gardening—your future cantaloupe harvest is waiting! 🍉