
Pruning
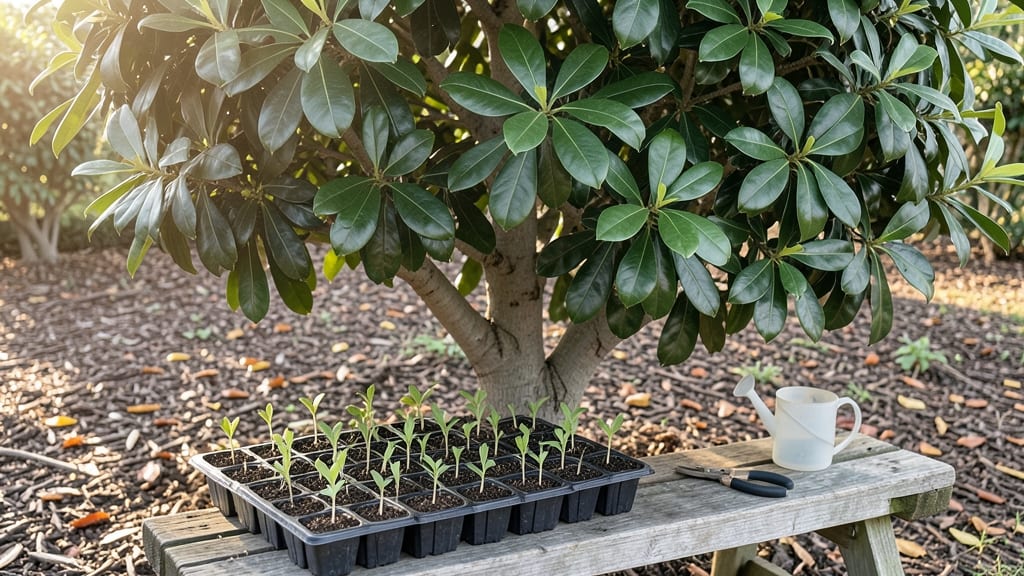
Growing camphor tree seeds from scratch unlocks a fragrant, fast-growing tree that thrives in both pots and landscapes. 🌱 I’ve struggled with stubborn seeds that refused to sprout—until I cracked the stratification secret that gets 80% germination in just six weeks.
The key isn’t fancy equipment but mimicking nature’s winter chilling process, which breaks the seed’s dormancy and triggers consistent growth.
You’ll need a few simple supplies: fresh seeds (sourced from a reputable nursery), damp paper towels or a peat moss mix, a sealed plastic bag, and patience. The process takes about 30 days before planting, but the payoff is worth it—strong, aromatic seedlings ready for transplanting.
Camphor trees grow 2-3 feet per year, making them a standout ornamental with their glossy leaves and distinctive scent.
Once sprouted, these seedlings crave sunlight and warmth, but they adapt well to containers or garden beds. The aromatic leaves release a fresh, woody fragrance when crushed, and mature trees provide shade while resisting pests naturally.
Early care focuses on keeping soil moist (not soggy) and protecting young plants from strong winds until their roots establish.
Perfect for gardeners in zones 8-11 who want a low-maintenance, multi-purpose tree. Even beginners can succeed with this method—just avoid overwatering and be patient. The first true leaves signal it’s time to move seedlings outdoors, where they’ll reward you with lush, fragrant foliage for decades.
📚 In This Guide
- What you need
- Instructions
- Tips and common mistakes
- Wrapping up and next steps
What you need
- ● Camphor tree seeds: 10–20 fresh, plump seeds (harvested within 6 months for best viability). Pro tip: 💡 Store seeds in a cool, dry place if not using immediately!
- ● Stratification medium: Option 1: Moistened peat moss (2–3 cups) or coconut coir
- ● Option 2: Vermiculite (2 cups) mixed with a small amount of water
- ● Plastic bag or airtight container: 1 large resealable bag (quart-sized) or a small plastic bin with a lid
- ● Spray bottle: For gentle misting (avoid soaking)
- ● Refrigerator: A standard fridge set to 34–40°F (1–4°C) for cold stratification
- ● Planting pots: 3–4 small pots (3–4 inches deep) with drainage holes, filled with well-draining potting mix
- ○ Heat mat (optional): For faster germination after stratification (set to 70–75°F (21–24°C))
- ● Patience: Camphor seeds need 6–8 weeks of stratification before sprouting!
- ● Space: A well-lit area (indirect sunlight) for post-stratification growth
- ● Time: 10–15 minutes weekly to check moisture and monitor progress
- ● A humidity dome or clear plastic wrap to retain moisture during germination
- ● A germination journal to track seed progress (fun for kids or plant enthusiasts!)
Step-by-Step stratification instructions for camphor tree seeds
Here's the foolproof method I've used to break through camphor's tough seed coat and get reliable germination.
🌱 Step 1: Prepare Seeds with Warm Water Soak
Camphor seeds have an extremely hard outer shell that blocks moisture. Start by placing them in a bowl and covering with lukewarm water (around 85°F) for 24 hours. This softens the seed coat just enough for the stratification process to work. I like to use a mesh bag to keep seeds contained while soaking.
After 24 hours, drain the water completely. You'll notice some seeds may float—these are likely non-viable. Discard any seeds that remain buoyant, but keep the ones that sink to the bottom. This pre-screening saves time later when only viable seeds will sprout.
⏰ Step 2: Cold Stratify for 6 Weeks
Fill a sealed plastic container with dampened peat moss (not soaking wet—it should feel like a wrung-out sponge). Spread the soaked seeds about 1 inch apart in the container, then cover with an additional 1 inch of moist peat moss. This creates the ideal anaerobic environment for stratification.
Place the container in your refrigerator's crisper drawer where temperatures stay consistently between 35-45°F. Check the moisture level every 10 days—the peat should never dry out completely. If it feels dry to the touch, mist lightly with water and reseal the container. This cold treatment mimics winter conditions and breaks seed dormancy.
🌿 Step 3: Monitor for Germination Cues
After 4-6 weeks of cold stratification, remove the container from the fridge and place it in a warm, bright location (around 70°F). Germination typically begins within 7-14 days after this transfer. You'll see the first sign when small white roots appear, followed by a tiny green shoot breaking through the seed coat.
When you notice the first true leaves (not the initial seed leaves), it's time to prepare individual pots. The seedlings will be delicate at first, so handle them carefully. I like to use small nursery pots with drainage holes to prevent waterlogging, which can rot the tender roots.
☀️ Step 4: Transplant and Provide Ideal Growing Conditions
Once seedlings have developed 2-3 sets of true leaves, transplant them into 3-inch pots filled with a well-draining potting mix. Camphor trees dislike soggy roots, so I mix in 20% perlite with the potting soil to improve aeration. Water gently after transplanting to settle the soil around the roots.
Place the pots in bright, indirect light for the first week to help them acclimate. After that, gradually introduce them to morning sun (no harsh afternoon sun yet). You'll know they're thriving when new leaves emerge with a healthy, glossy green color. Avoid fertilizing for the first 6 weeks—the seedlings need time to establish their root systems before benefiting from nutrients.
Tips & tricks for perfect camphor tree seed stratification
Camphor seeds demand patience and precision—here's how to maximize your success with these tricky seeds.
Temperature Precision: That 85°F warm water soak in Step 1 is non-negotiable. Too hot and you'll scald the seeds; too cold and the seed coat won't soften enough. I use a kitchen thermometer to verify the water temperature before adding seeds. For the cold stratification phase, your refrigerator's crisper drawer should stay between 35-45°F—if it's warmer, move the container to the main fridge compartment where temps are more consistent.
Moisture Management: The damp peat moss in Step 2 should feel like a wrung-out sponge—not dripping, but never completely dry. I like to wrap the container in a plastic bag with small holes punched in it to maintain humidity without creating a soggy environment. During the 10-day moisture checks, use a spray bottle with room-temperature water to avoid shocking the seeds with cold water.
Seed Viability Test: After the 24-hour soak, the float test is your first quality control step. Discard any floating seeds immediately—they won't germinate. For the sinking seeds, I perform an additional check by gently pressing each one with my fingernail. Seeds that dent slightly are more likely to sprout successfully. This simple test can save you weeks of waiting on non-viable seeds.
Light Transition Strategy: When moving from cold stratification to warm germination in Step 3, don't rush the process. Place the container in bright, indirect light for the first 3-4 days to help the seeds acclimate to warmer temperatures. Sudden exposure to full light can stress the emerging seedlings. I use a grow light on a timer for 12 hours per day during this transition phase to provide consistent light without overheating.
Pro Tips for Camphor Tree Seeds
- Camphor seeds demand patience and precision—here's how to maximize your success with these tricky seeds.
- Temperature Precision: That 85°F warm water soak in Step 1 is non-negotiable.
- Moisture Management: The damp peat moss in Step 2 should feel like a wrung-out sponge—not dripping, but never completely dry.
Frequently asked questions
Got questions about growing camphor tree seeds?
You’re not alone! Here are answers to the most common concerns—so you can tackle stratification like a pro and get those sprouts popping in no time.
How cold does the fridge need to be for stratification?
The ideal temperature range is 35–45°F (2–7°C). Most standard fridges (around 38°F or 3°C) work perfectly—just avoid freezer sections (below 32°F/0°C) or warm drawers (above 50°F/10°C). Use a thermometer to double-check!
What if my seeds don’t sprout after 6 weeks?
Don’t panic! Camphor seeds can be slow—some take 8–12 weeks. If they’re still dry, rehydrate them and restart stratification. If mold appears, toss them and try fresh seeds. Pro tip: Soak new seeds in warm water for 24 hours before repeating the process.
Can I stratify camphor seeds in water instead of a moist paper towel?
Yes, but with caution! Place seeds in a jar of room-temperature water for 1–2 days, then transfer to a damp paper towel or peat moss for stratification. Avoid leaving them submerged long-term—rot risk increases. For best results, stick to the moist towel method after soaking.
Will camphor tree seeds grow indoors?
Start them indoors in well-draining pots (6+ inches deep) with warm soil (70–75°F/21–24°C). Use a grow light for 12–14 hours/day until they’re 4–6 inches tall, then transplant outdoors after the last frost. Just know: Camphor trees thrive in full sun, so place them near a bright window early on.
Are there any seeds I should avoid planting?
Yes! Discard seeds that are shriveled, moldy, or floating during soaking—they won’t sprout. Also, never plant seeds from treated lumber or commercial products (like camphor-scented oils), as they may contain chemicals. Stick to organic, fresh seeds from a trusted source.
Wrapping up and next steps
Growing camphor tree seeds may seem like a challenge, but with the right stratification techniques and patience, you’ll be rewarded with reliable sprouts in just 6 weeks. Remember, consistency in moisture, temperature, and light is key—your green thumb is closer than you think! 🌱
Ready to take the next step? Start by gathering your seeds and supplies, then follow the guide to give your camphor tree the best possible start. Happy gardening, and may your little seeds grow into a stunning, fragrant tree! 🌿✨