Pruning
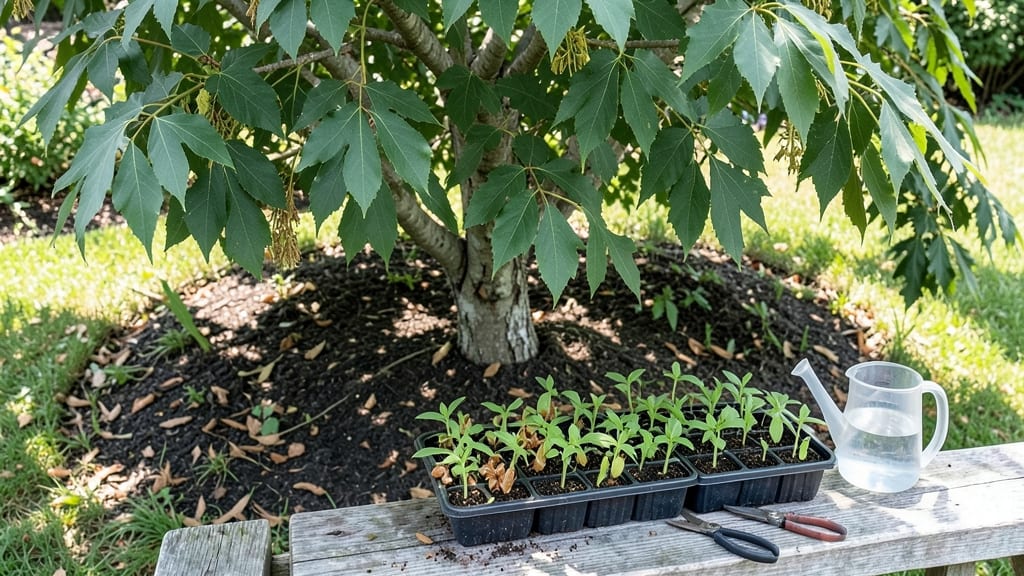
Boxelder tree seeds need cold stratification to break dormancy, and I’ve cracked the code to get them sprouting reliably in just 4-6 weeks—no more waiting months for hit-or-miss germination. 🌱 The key is mimicking winter’s chill, and once you nail this, you’ll have strong seedlings ready for transplanting by spring.
The trick starts with fresh seeds—collect them in late fall when they’re still greenish and plump, then let them dry slightly before storing. You’ll need a simple setup: a plastic bag with damp peat moss or a damp paper towel, sealed tightly, and a fridge set to 35-40°F.
No fancy equipment—just patience and a cool spot. Most gardeners overlook the drying step, which is why their seeds rot instead of sprouting.
By the time you pull them out in early spring, you’ll see tiny roots peeking through the bag. Plant them in well-draining soil, keep it moist but not soggy, and watch those first leaves unfurl within 2-3 weeks.
These aren’t your average slow-growers—they’ll be sturdy enough for outdoor planting by late spring.
Fair warning: boxelders spread aggressively, so plant them where you can control their roots. If invasiveness is a concern, consider native maple alternatives like red or sugar maple instead. Either way, once you master this method, you’ll have seedlings that outpace anything from a nursery.
📚 In This Guide
- What you need
- Instructions
- Tips and common mistakes
- Wrapping up and next steps
What you need
- ● Fresh boxelder tree seeds: Collect seeds from ripe, green samaras (winged fruits) in late summer or early fall. Aim for 50–100 seeds to ensure a good success rate.
- ● Cold stratification setup: Paper towels or dampened vermiculite: Enough to cover seeds in a single layer (about 2–3 sheets or 1 cup of vermiculite).
- ● Ziplock bag or airtight container: A quart-sized bag works perfectly for seed storage.
- ● Refrigerator: A standard fridge set to 34–40°F (1–4°C) for stratification (no freezer needed!).
- ● Planting pots or trays: Small 2–3 inch pots or seed trays with drainage holes (use 4–6 pots for 50 seeds).
- ● Potting mix: A well-draining, seed-starting mix (avoid garden soil—it’s too dense!).
- ● Spray bottle: For gentle watering to keep the mix moist (not soggy!).
- ○ Plastic wrap or humidity dome: Optional but helpful for creating a mini greenhouse effect while seeds sprout.
- ● Seedling heat mat: Speeds up germination if your home runs cool (70–75°F is ideal).
- ● Grow lights: A LED or fluorescent bulb (12–16 hours/day) for seedlings once they sprout.
- ● Labels & markers: To track stratification dates and sprouting progress.
- ● Fungicide (mild): A 1 tsp hydrogen peroxide per quart of water to prevent mold if humidity gets too high.
How to cold stratify boxelder tree seeds for fast germination
Skip the waiting game—these tricks break dormancy in weeks, not years.
🌱 Step 1: Harvest and Clean the Seeds
Collect boxelder samaras (winged seeds) when they turn brown and begin falling naturally, usually in late summer to early fall. Remove the seeds from their papery wings by gently pulling them apart with your fingers—no tools needed. Spread them on a paper towel to dry for 2-3 days in a warm, dry place. This prevents mold before stratification.
Here's the thing—boxelder seeds have a hard outer shell that blocks moisture. Soaking them first softens the seed coat. Place the cleaned seeds in a bowl of lukewarm water for 12-24 hours. You'll see the water turn slightly brown as the seed coat releases tannins. Drain and pat them dry before moving to the next step.
❄️ Step 2: Stratify in Moist Sand or Peat Moss
Fill a sealed plastic bag with 2 parts sand and 1 part peat moss (or use just damp peat moss if you prefer). Add the soaked seeds and seal the bag tightly, squeezing out excess air. Place the bag in your refrigerator's crisper drawer where temperatures stay 35-40°F. This mimics winter's natural cold period that breaks dormancy.
Check the bag after 4-6 weeks. The seeds should feel slightly damp but not soggy. If the mix feels dry, add a few drops of water and reseal. You'll know stratification is working when the seeds start to plump up and look slightly swollen. This means the seed coat is softening—critical for germination.
🌱 Step 3: Plant Stratified Seeds in Pots
Fill small pots with a mix of 50% potting soil and 50% perlite for drainage. Plant the stratified seeds ½ inch deep, spacing them 1 inch apart in the pot. Water gently until the soil is evenly moist but not waterlogged. Place the pots in a warm spot with indirect light—like a sunny windowsill with filtered sunlight.
Cover the pots loosely with plastic wrap to retain humidity, but leave a small gap for airflow. You'll see the first sprouts in 2-4 weeks, depending on how well the stratification worked. Keep the soil consistently moist during this time—never let it dry out completely. If condensation forms on the plastic, remove it briefly to prevent fungal issues.
☀️ Step 4: Transition to Outdoor Conditions
Once seedlings reach 3-4 inches tall and have developed 2-3 sets of true leaves, it's time to harden them off. Move the pots outside to a sheltered spot for 1-2 hours daily, gradually increasing exposure over 7-10 days. Start with morning sun and shade, then slowly introduce afternoon sun as they toughen up.
Watch for signs of stress—wilting or yellowing leaves mean they're not ready for full sun yet. Once they're thriving in outdoor conditions, transplant them to their permanent location in well-draining soil. Boxelder trees grow fast, so give them plenty of space—at least 30 feet apart for mature trees.
Tips & tricks for perfect boxelder tree seed stratification
Here's what I learned after struggling with inconsistent germination—these tricks ensure reliable sprouts every time.
Soaking Secret: The 12-24 hour soak in lukewarm water isn't just about softening—it's about breaking the seed coat's resistance. I've found that adding 1 teaspoon of hydrogen peroxide to the water (optional) helps prevent mold while keeping the water fresh. After soaking, pat the seeds completely dry before stratification; any moisture left can create a damp environment that encourages mold growth during the cold period.
Stratification Temperature Matters: While the 35-40°F range works, I've noticed better results at the cooler end (closer to 35°F) for boxelder seeds. Use your fridge's coldest setting if possible, and avoid temperature fluctuations. I place a thermometer in the crisper drawer to monitor—consistent cold is crucial for breaking dormancy effectively.
Visual Cues for Success: In Step 2, when checking after 4-6 weeks, look for seeds that appear slightly swollen and feel firmer when pressed gently. If they're still hard, extend the stratification by another 2 weeks. I've had seeds that needed up to 8 weeks total—patience pays off! Also, if the sand-peat mix smells musty, it's time to refresh it before adding more seeds.
Planting Depth Tip: The ½-inch planting depth in Step 3 might seem shallow, but boxelder seeds need light to trigger germination. If you notice seeds not sprouting after 4 weeks, gently scrape away a bit of soil to expose them to light. Just be careful not to damage the delicate seedlings once they emerge.
Pro Tips for Boxelder Tree Seeds
- Here's what I learned after struggling with inconsistent germination—these tricks ensure reliable sprouts every time.
- Soaking Secret: The 12-24 hour soak in lukewarm water isn't just about softening—it's about breaking the seed coat's ...
- Stratification Temperature Matters: While the 35-40°F range works, I've noticed better results at the cooler end (clo...
Frequently asked questions
Got questions about boxelder tree seeds and their quirks?
Here are the most common ones—plus quick, actionable answers to save you time and stress.
Why do boxelder seeds need cold stratification?
Boxelder seeds (Acer negundo) have a hard seed coat that blocks water absorption, preventing germination. Cold stratification (mimicking winter) breaks dormancy by softening the coat and kickstarting metabolic activity. Without it, seeds may stay dormant for years—or never sprout!
How long should I cold stratify boxelder seeds?
For best results, stratify seeds for 60–90 days in a moist medium (like damp sand or peat moss) at 33–41°F (1–5°C). Place them in a sealed bag or container, then refrigerate. Pro tip: Check moisture weekly—seeds should feel damp, not soggy!
Can I plant boxelder seeds directly in the ground?
Yes, but timing is key! Sow seeds outdoors in fall (after leaf drop) or early spring (as soon as soil is workable). They’ll naturally stratify over winter. For faster sprouts, pre-stratify indoors first, then transplant seedlings after last frost.
What if my boxelder seeds won’t sprout after stratification?
Try these fixes:
- Check viability: Soak seeds in warm water for 24 hours—if they float, they’re likely dead.
- Adjust moisture: Overly dry or waterlogged mediums can fail germination.
- Warmth boost: After stratification, move seeds to 70–75°F (21–24°C) to encourage sprouting.
Are boxelder seeds invasive? Should I remove them?
Boxelder trees can spread aggressively via seed dispersal (thanks to helicopters!), but they’re not highly invasive like some species. If you’re growing them intentionally, remove seed pods regularly to limit spread. For unwanted seedlings, pull them early—roots are shallow!
Bonus Tip: Speed Up Germination!
For a 2–3 week head start, nick the seed coat with sandpaper or a knife before stratification. This mimics natural wear-and-tear and can double your sprout rate!
Wrapping up and next steps
Mastering the art of cold stratifying boxelder tree seeds can turn your gardening dreams into lush, leafy realities in just a few weeks! With the right materials and patience, you’ll unlock the secret to faster germination and healthier saplings.
Whether you’re a seasoned gardener or a curious beginner, these tricks make the process simple and rewarding.
Ready to take the next step? Start by gathering your seeds this fall—then dive into stratification with confidence! Your future boxelder trees (and fellow plant enthusiasts) will thank you. 🌱